
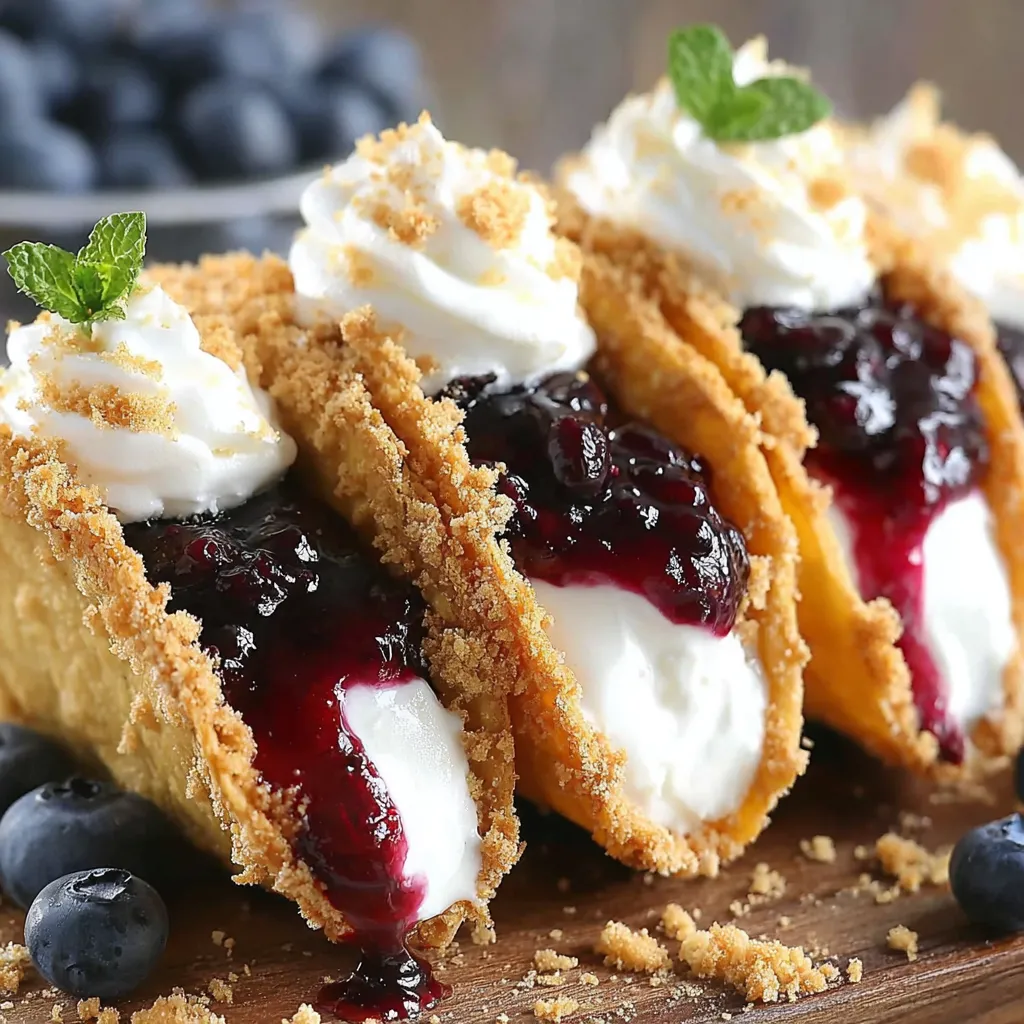
Blueberry Cheesecake Tacos

Crispy tortilla shells filled with a light cream cheese filling and topped with fresh blueberry sauce for an easy, crowd-pleasing dessert taco.
This dessert first captured my heart on a warm spring afternoon when I was looking for something playful to bring to a family picnic. I wanted a handheld sweet that felt festive and a little nostalgic, and turning tortilla shells into crisp taco cups filled with a tangy-sweet cheesecake filling and bright blueberry sauce did exactly that. The contrast between the golden, slightly crunchy shell and the silky cream cheese center is irresistible. I discovered the combination while experimenting with pantry staples and blueberries from a farmer's market haul. The result became an instant hit with both adults and children, and it now shows up at potlucks and weekday celebrations in my house.
What makes this version special is its simplicity and balance. The crust-like graham coating on the tortilla adds the familiar flavor of a classic crust without the fuss of pressing and baking a pie. The filling is stabilized with a touch of powdered sugar and a brief chill so it pipes neatly into the shells. The homemade blueberry sauce is vivid, slightly jammy, and can be made with frozen berries when fresh are not available. These are fun to assemble, are visually charming, and they travel well when stored correctly.
Why You'll Love This Recipe
- Handheld dessert that looks like a party treat yet comes together quickly using pantry basics and common refrigerated items.
- Ready in about 45 minutes total with a 30 minute chilling step, making it fast enough for weeknight celebrations but special enough for guests.
- Uses simple techniques: cutting tortillas, coating them in butter and graham crumbs, and a no-bake cheesecake-style filling that stabilizes when chilled.
- Flexible blueberry topping that works with fresh or frozen berries and can be swapped for canned pie filling for an ultra-quick option.
- Make-ahead friendly the blueberry sauce and filling can be prepared a day ahead, saving assembly for the last minute and reducing day-of stress.
- Kid-friendly to assemble: a great activity for older kids to pipe filling and spoon on berries, while adults handle the oven steps.
My family always smiles when these come out of the oven and the shells are golden. I remember the first time my niece declared them the best dessert she had ever eaten, which was high praise from a six year old who prefers cupcakes. Over several gatherings I learned tiny adjustments, like scraping a little lemon zest into the filling and adding a touch of cinnamon to the graham crumbs, that made a big difference.
Ingredients
- Tortillas: Six 8-inch flour tortillas will yield about 24 to 30 small rounds when cut. Use fresh tortillas that are pliable so they mold easily into cups. If you prefer gluten-free, use certified gluten-free tortillas and note texture differences.
- Graham cracker crumbs: One cup of crumbs combines with 1/2 teaspoon cinnamon for a buttery coating. I like Nabisco Honey Maid for a consistent sweet flavor, but plain graham crumbs will work.
- Butter: 1/4 cup melted butter helps the crumbs adhere and crisps the shells. Use unsalted so you can control seasoning; salted is fine if you prefer a slightly savory contrast.
- Cream filling: 1 cup heavy cream and 1 cup cream cheese, softened, are the base. Add 1/4 cup powdered sugar, 1 teaspoon vanilla, and 1 teaspoon lemon zest for brightness. Full fat cream cheese and heavy cream create the best mouthfeel and stability.
- Blueberry sauce: For the homemade sauce you will need 1/2 cup granulated sugar, 2 cups fresh or frozen blueberries (about 8 ounces), 5 tablespoons warm water, 1 tablespoon lemon juice, and 3 tablespoons cornstarch. Alternatively one 21 ounce can of blueberry pie filling can be used for a time-saving option.
Instructions
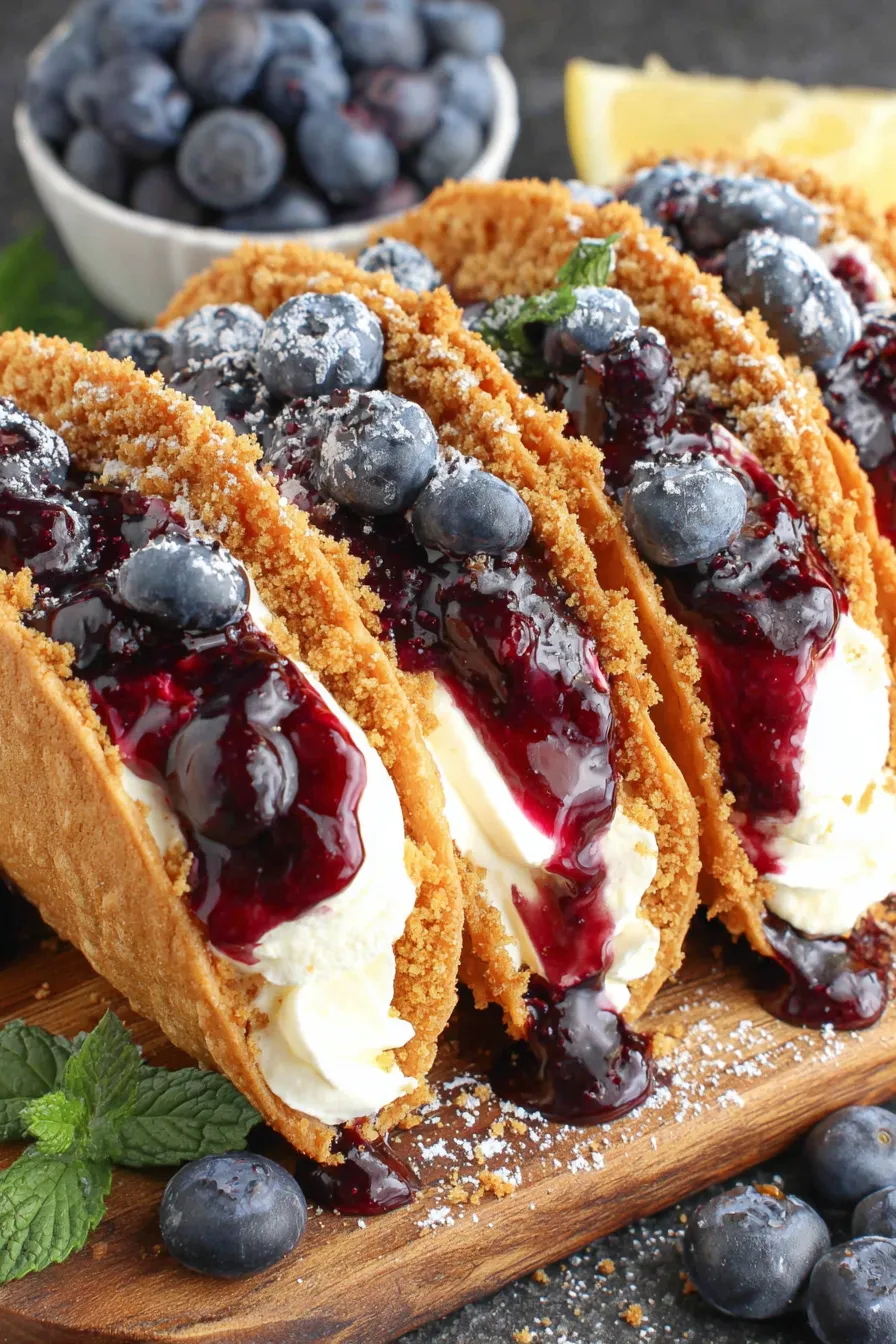
Preheat and prep: Preheat the oven to 400 F. Combine 1 cup graham cracker crumbs and 1/2 teaspoon cinnamon in a medium bowl and set aside. Measure and soften the cream cheese by letting it sit at room temperature for about 20 minutes so it blends smoothly. Cut and coat shells: Using a 3 1/2 to 4 inch cookie cutter or round glass, cut 4 to 5 rounds from each 8-inch tortilla. You should get approximately 24 to 30 rounds total. Lightly brush or dip each round into 1/4 cup melted butter, then press both sides into the graham crumb mixture to coat. Shake off excess crumbs for even baking. Mold and bake: Flip a standard muffin tin upside down on a sheet pan so the rounded cups create shallow holders. Place each coated tortilla round between two inverted muffin wells to form a cup shape. Bake at 400 F for about 10 minutes, or until the edges are just golden and crisp. Watch closely near the end to avoid overbrowning. Let the shells cool completely in the pan to hold their shape. Make the blueberry sauce (homemade): Whisk 5 tablespoons warm water and 3 tablespoons cornstarch in a small bowl until smooth. In a small saucepan combine 2 cups blueberries and 1/2 cup granulated sugar over medium-low heat. Stir gently for 4 to 5 minutes until the berries start to release juices and slightly break down. Stir in the cornstarch slurry and 1 tablespoon lemon juice, then simmer gently for about 3 minutes until the mixture thickens to a jammy consistency. Remove from heat and cool to room temperature. Prepare the cream filling: In a stand mixer or with an electric hand mixer beat 1 cup cream cheese, 1 cup heavy cream, 1/4 cup powdered sugar, 1 teaspoon vanilla, and 1 teaspoon lemon zest on medium speed for about 2 minutes. The mixture should thicken and hold soft peaks but remain pipeable. Chill in the refrigerator for 30 minutes to firm up slightly, then transfer to a piping bag fitted with a round tip. Assemble: Pipe the chilled cream filling into each cooled tortilla cup, filling to just below the rim. Top each with about 1/2 teaspoon of the homemade blueberry sauce or canned blueberry pie filling if using the shortcut. Sprinkle a few additional graham crumbs over the top if desired. Serve immediately or refrigerate until serving.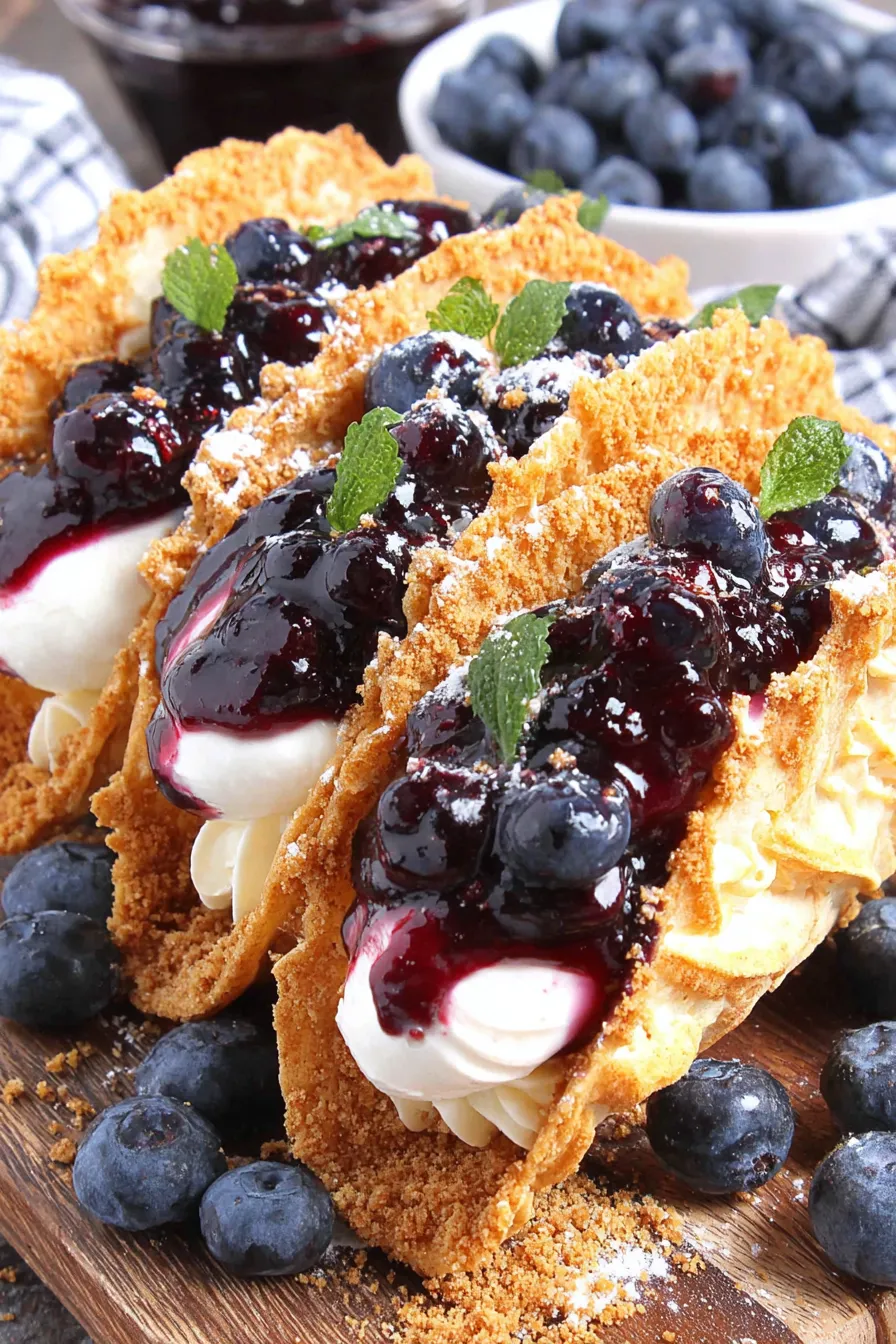
You Must Know
- These hold best when assembled within a few hours of serving; the shells will soften over time from moisture in the filling and berries.
- Blueberry sauce keeps refrigerated for up to 5 days and freezes well for up to 3 months in an airtight container.
- Filling can be made a day ahead and kept chilled in the refrigerator; bring back to piping consistency by briefly rewhipping if it loses body.
- Substitute frozen berries without thawing for the sauce if fresh are not available; expect extra liquid which the cornstarch will help manage.
I love how portable these are for gatherings. One time I brought a tray to a backyard barbecue and watched people take pictures before anyone could sample them. The crunch to creamy bite is my favorite part, and adding a tiny sprinkle of lemon zest on top gives a pop that keeps the flavor bright. They also make a charming brunch treat when paired with coffee and mint leaves for garnish.
Storage Tips
For short term storage, keep assembled tacos covered in a single layer in the refrigerator for up to 6 hours to retain the shell crunch. If you need to store longer, keep the filling and blueberry sauce separate and assemble within a few hours of serving. Shells should be cooled completely and stored in an airtight container at room temperature for up to 2 days. To re-crisp shells that have softened slightly, bake them on a sheet tray at 350 F for 3 to 5 minutes, then let cool before filling.
Ingredient Substitutions
Want to adjust for dietary needs or what you have on hand? Use gluten-free tortillas and gluten-free graham crumbs to make these gluten-free. For a lighter filling, substitute half the cream cheese with ricotta and reduce heavy cream to 1/2 cup, keeping powdered sugar the same; texture will be slightly less dense. Replace granulated sugar in the sauce with honey for a different floral note, though color and thickness will vary slightly. For a dairy-free version use a firm vegan cream cheese and coconut cream whipped to soft peaks.
Serving Suggestions
Serve these on a long platter garnished with fresh mint sprigs and a dusting of powdered sugar for a pretty presentation. They pair beautifully with iced coffee for brunch or a light sparkling wine for an evening dessert. Consider arranging a small toppings station with lemon zest, extra graham crumbs, whipped cream, and chopped toasted almonds for guests to customize their tacos.
Cultural Background
The idea of turning a tortilla into a vessel for desserts is a playful twist on handheld foods across many cuisines. While not traditional, these borrow flavor elements from American cheesecake and pie traditions, combining graham cracker crust flavors with the beloved summer fruit topping. It is a modern, fusion style treat born from innovation in home cooking rather than an established cultural recipe.
Seasonal Adaptations
In summer use ripe fresh blueberries for the brightest flavor. In fall swap the blueberry sauce for an apple-cinnamon compote with a touch of maple syrup and chopped toasted pecans. For winter holidays consider cranberry-orange sauce with a pinch of ground clove and orange zest. The base technique adapts well to seasonal fruit and spice combinations.
Meal Prep Tips
Make the blueberry sauce up to 3 days ahead and refrigerate in a sealed container. Prepare and chill the filling the day before, then re-whip briefly to bring back volume before piping. Store shells at room temperature in an airtight container and assemble the day of. For events, pre-fill half the shells and transport the rest separately to finish assembly on site so they stay crisp.
Enjoy making these for gatherings or a simple evening treat. They are easy to scale up, visually delightful, and adaptable. Take time to taste the sauce before spooning so you can adjust sweetness or lemon brightness to match your fruit. Most of all, have fun with the process and make them your own.
Pro Tips
Soften cream cheese at room temperature for smoother filling and quicker whipping.
Chill the filling for 30 minutes before piping to ensure it holds shape in the shells.
Press tortilla rounds into graham crumbs while still slightly warm from the butter for better adhesion.
Use a piping bag for clean assembly and consistent portions.
This nourishing blueberry cheesecake tacos recipe is sure to be a staple in your kitchen. Enjoy every moist, high protein slice — it is perfect for breakfast or as a wholesome snack any time.
FAQs about Recipes
Can I make the blueberry sauce ahead of time?
Yes. Make the blueberry sauce up to 5 days ahead and refrigerate in an airtight container. Reheat briefly before using or use cold for a thicker topping.
How many rounds will six 8-inch tortillas make?
Yes. Use a 3 1/2 to 4 inch round cutter to get about 24 to 30 rounds from six 8-inch tortillas.
Can I use canned blueberry pie filling instead of making sauce?
If you prefer a quicker option, use one 21 ounce can of blueberry pie filling. Spoon directly onto the filled shells.
Tags
Blueberry Cheesecake Tacos
This Blueberry Cheesecake Tacos recipe makes perfectly juicy, tender, and flavorful steak every time! Serve with potatoes and a side salad for an unforgettable dinner in under 30 minutes.
Ingredients
Shells
Graham coating
Cheesecake filling
Homemade blueberry sauce
Canned filling option
Instructions
Preheat and combine crumbs
Preheat the oven to 400 F. In a bowl mix 1 cup graham cracker crumbs and 1/2 teaspoon cinnamon. Set aside for coating.
Cut tortillas
Cut 4 to 5 rounds from each 8-inch tortilla using a 3 1/2 to 4 inch cutter to yield about 24 to 30 rounds total.
Coat shells
Dip each round into 1/4 cup melted butter then press into the graham mixture until evenly coated. Shake off excess crumbs.
Mold and bake
Flip a muffin tin upside down and place coated tortilla rounds between the inverted cups. Bake for 10 minutes until just golden. Cool in the pan.
Make blueberry sauce
Whisk 5 tablespoons warm water and 3 tablespoons cornstarch. Combine 2 cups blueberries and 1/2 cup sugar in a saucepan over medium-low heat for 4 to 5 minutes. Add the cornstarch slurry and 1 tablespoon lemon juice and simmer 3 minutes until thickened. Cool to room temperature.
Prepare filling
Beat 1 cup cream cheese, 1 cup heavy cream, 1/4 cup powdered sugar, 1 teaspoon vanilla, and 1 teaspoon lemon zest on medium speed until thickened, about 2 minutes. Chill 30 minutes then transfer to a piping bag.
Assemble tacos
Pipe the chilled filling into each cooled shell and top with about 1/2 teaspoon blueberry sauce or canned pie filling. Sprinkle extra graham crumbs if desired and serve.
Last Step: Please leave a rating and comment letting us know how you liked this recipe! This helps our business to thrive and continue providing free, high-quality recipes for you.
Nutrition
Did You Make This?
Leave a comment & rating below or tag
@whiskia on social media!
Categories:
You might also like...

Savory Baked Meatballs
Tender, herb-laced meatballs baked to juicy perfection with Parmesan and garlic. Perfect over spaghetti, tucked into subs, or served with favorite dips.

Classic Bacon Carbonara Pasta
Creamy, silky carbonara with smoky bacon, peppery bite, and perfectly coated spaghetti. Ready in 25 minutes for a comforting, crowd-pleasing dinner.

One Pot Creamy Garlic Pasta
A rich, silky garlic pasta made in one pan with milk and Parmesan for a fast, comforting dinner that is ready in about 20 minutes.
Did You Make This?
Leave a comment & rating below or tag @whiskia on social media!
Rate This Recipe
Share This Recipe
Enjoyed this recipe? Share it with friends and family, and don't forget to leave a review!
Comments (1)
This recipe looks amazing! Can't wait to try it.
Comments are stored locally in your browser. Server comments are displayed alongside your local comments.

Hi, I'm Victoria!
What's Popular

30-Minute Meals!
Join to receive our email series which contains a round-up of some of our quick and easy family favorite recipes.