
>>

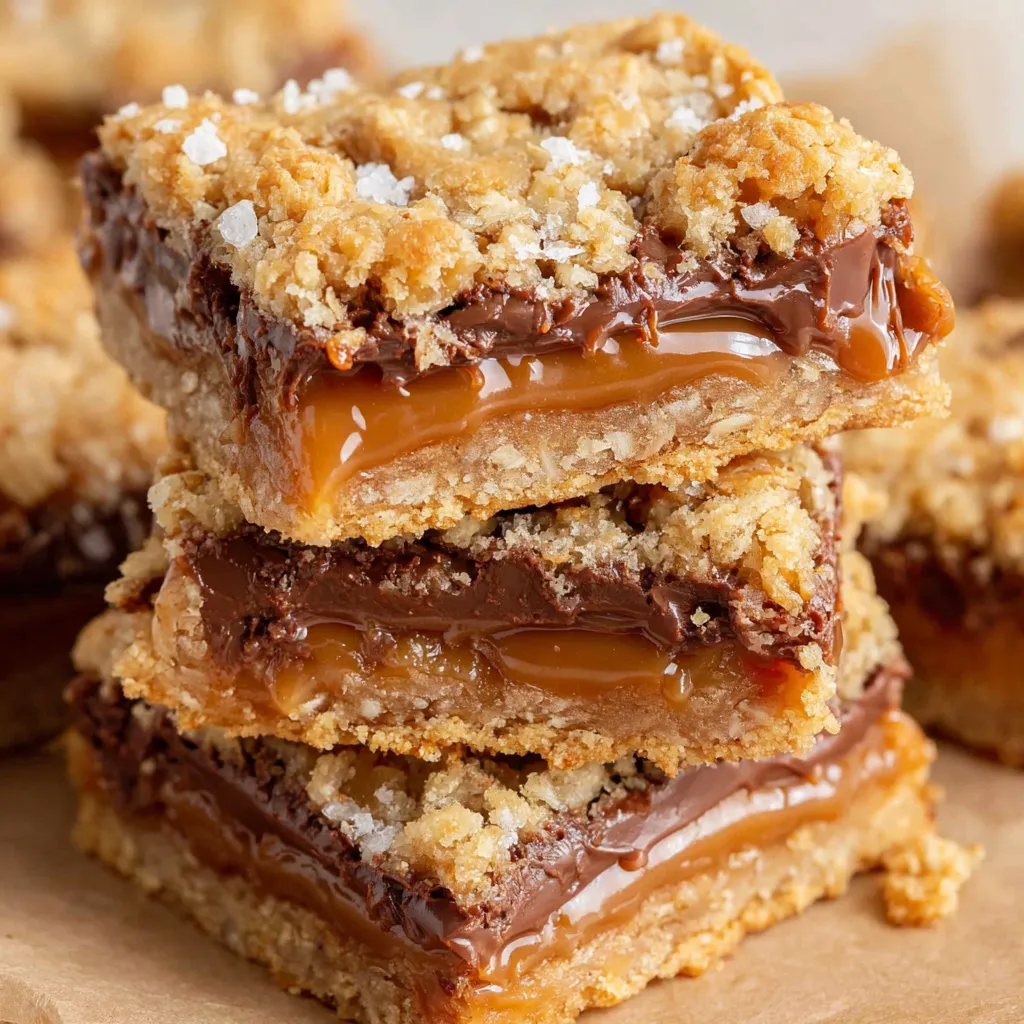
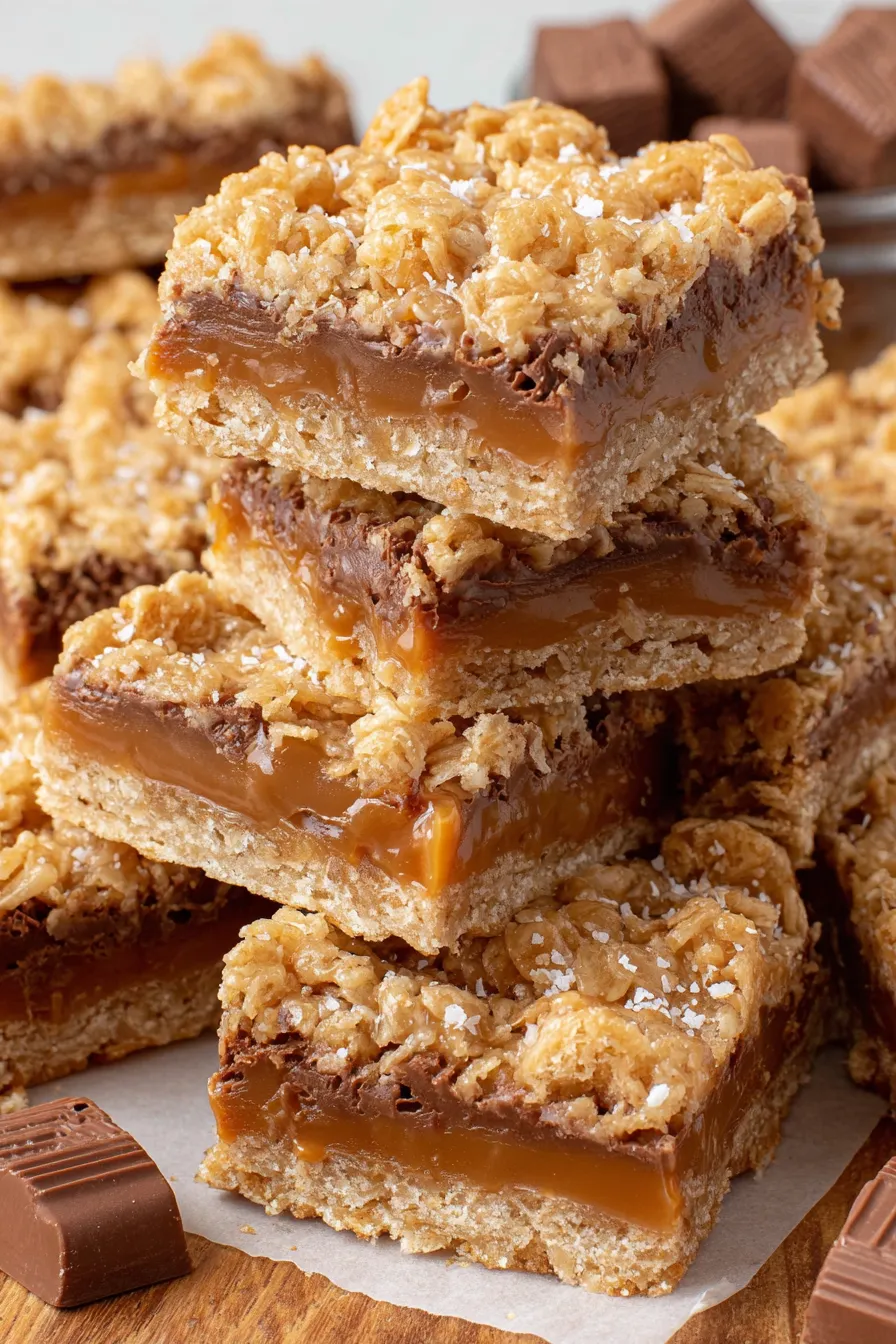
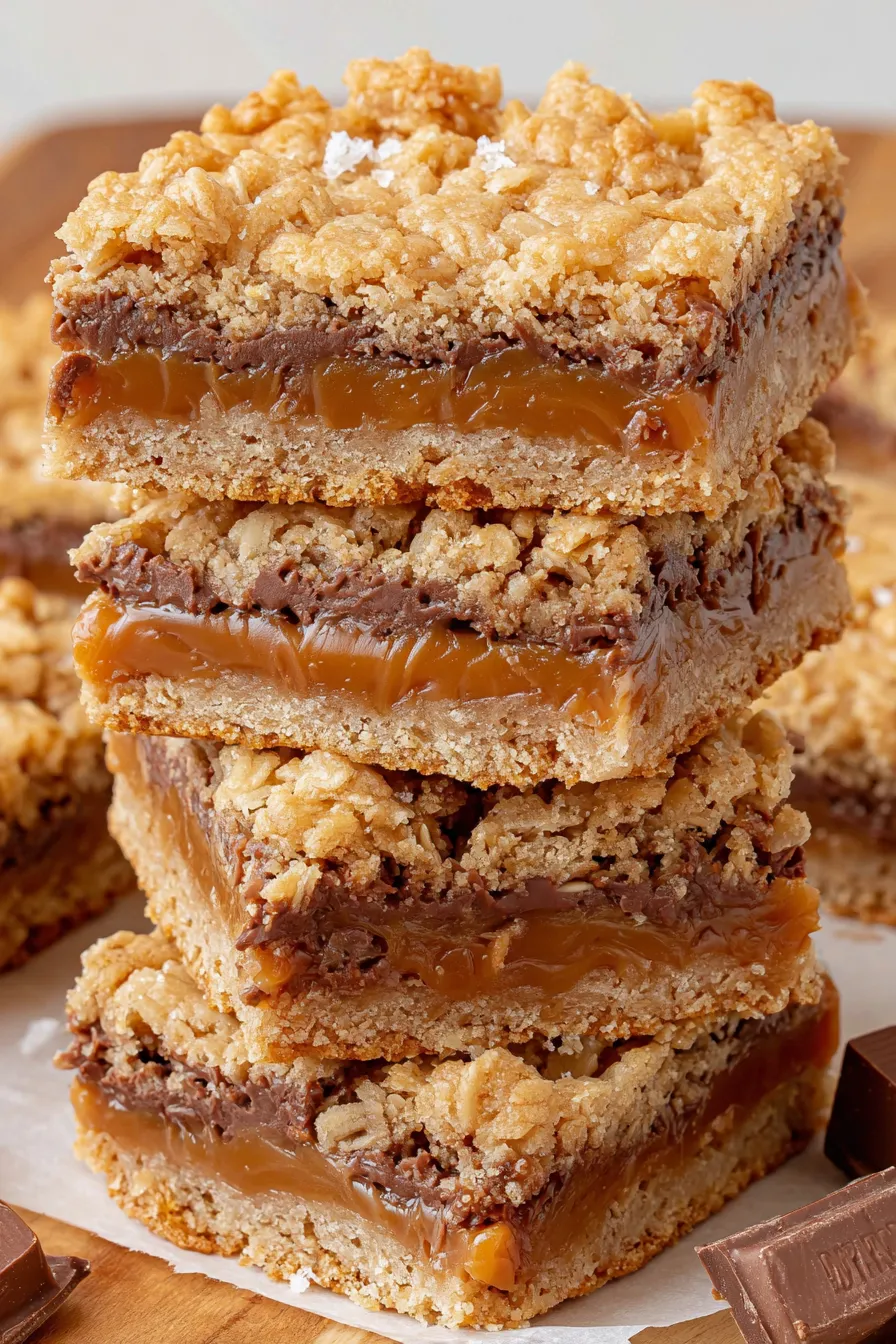
Buttery oat shortbread topped with melted chocolate and gooey caramel—classic Carmelitas that slice clean and travel well for gatherings.
I remember taking these to a neighborhood potluck where a neighbor declared them the best caramel bars she had ever eaten and asked for the recipe. Seeing familiar faces light up after one bite is why I keep this one in heavy rotation. They travel well and pair beautifully with a strong cup of coffee.
My favorite part of making these is the mid-bake peek when the base has set and you can press chocolate into a molten bed of caramel—there’s a small thrill in that glossy finish. Family members have a habit of snagging the corner pieces first because they crisp up in the oven and offer the best crunch-to-chew ratio.
Store tightly covered in the refrigerator for up to five days; place parchment between layers to prevent sticking. For longer storage, wrap the uncut slab in plastic wrap and then foil before freezing. Thaw overnight in the refrigerator before slicing for best texture. Room temperature storage is fine for a day if you prefer a softer caramel, but refrigeration makes slicing cleaner and the caramel firmer.
If you prefer a less sweet profile, use bittersweet or semisweet chocolate in place of milk chocolate. Vegan or dairy-free substitutions are possible by using dairy-free chocolate chips, dairy-free caramel alternatives, and a plant-based butter, though texture may vary. For a nutty note, fold 1/2 cup chopped pecans into the base or sprinkle on top before baking. To reduce sugar slightly, try 1/2 cup brown sugar in combination with 1/4 cup coconut sugar; expect a minor textural shift.
Serve slices on a small dessert platter, garnished with flaky sea salt for contrast or a light dusting of powdered sugar for presentation. These pair wonderfully with espresso, late-harvest wine, or a scoop of vanilla ice cream. For a festive touch, warm individual squares briefly and drizzle with extra caramel for a gooier presentation.
The concept of an oat shortbread layered with caramel and chocolate is common in North American baking and often appears in home-baked traditions at holiday time. Carmelitas are a variation on popular caramel slice bars and reflect the region’s love of portable, shareable sweets. They echo the classic British shortbread slice but incorporate American pantry staples like individually wrapped caramels and chocolate chips that became widely available in the mid-20th century.
In fall, add 1 teaspoon ground cinnamon and a pinch of nutmeg to the base for a warm spice profile. For the holidays, fold 1/2 cup dried cranberries into the top of the caramel layer before adding the final crust. In summer, serve slightly chilled with whipped cream or a citrusy curd to cut through the richness.
Make the base and store it in the pan, wrapped, for up to 24 hours before baking to spread out work. Caramel sauce can be made ahead and stored in the refrigerator; rewarm gently before pouring. For grab-and-go portions, cut into bars and individually wrap in parchment; they travel well and stay fresh for school lunches or snack boxes.
These bars are a joyful blend of simple techniques and comforting flavors—an easy recipe to memorize and make for anyone who loves a buttery, caramel-forward treat. I hope they become a favorite in your home as they have in mine.
Press the bottom layer firmly and evenly to create a stable base that holds the caramel without sinking.
Chill thoroughly before slicing; a warm slab will smear and stick, making clean cuts difficult.
If using unsalted butter, add an extra 1/4 teaspoon kosher salt to the dough to balance sweetness.
Warm the caramel gently and stir constantly to prevent scorching; microwave in short bursts if preferred.
This nourishing carmelitas recipe is sure to be a staple in your kitchen. Enjoy every moist, high protein slice — it is perfect for breakfast or as a wholesome snack any time.
This Carmelitas recipe makes perfectly juicy, tender, and flavorful steak every time! Serve with potatoes and a side salad for an unforgettable dinner in under 30 minutes.
Preheat oven to 350°F. Line a 9x9 inch pan with parchment paper leaving an overhang and lightly grease the paper with nonstick spray to ensure easy removal after chilling.
In a medium bowl mix flour, oats, brown sugar, baking soda and salt. Add melted butter and vanilla, stirring until just combined into a crumbly but cohesive mixture.
Press half of the mixture firmly into the prepared pan using the bottom of a measuring cup for an even surface. Bake for 10 minutes until set and lightly golden to prevent a soggy bottom layer.
Unwrap caramels and combine with heavy cream in a small heavy-bottomed saucepan over medium heat, stirring constantly until completely smooth and glossy. Alternatively microwave in 30 to 45 second bursts, stirring between intervals.
Immediately after the base comes out of the oven, sprinkle chocolate chips evenly over the hot crust, then pour the warm caramel over the chips. The heat will soften the chips and help them meld with the caramel.
Scatter the remaining cookie mixture over the caramel layer, leaving small gaps—these will close up while baking. Bake for 20 minutes or until the top is golden brown and firm to the touch.
Cool at room temperature for 10 to 15 minutes, then chill in the refrigerator for 1 1/2 to 2 hours until set. Use the parchment overhang to lift the slab from the pan and slice into 16 equal bars using a sharp knife.
Last Step: Please leave a rating and comment letting us know how you liked this recipe! This helps our business to thrive and continue providing free, high-quality recipes for you.
Leave a comment & rating below or tag
@whiskia on social media!

Tender, herb-laced meatballs baked to juicy perfection with Parmesan and garlic. Perfect over spaghetti, tucked into subs, or served with favorite dips.

Creamy, silky carbonara with smoky bacon, peppery bite, and perfectly coated spaghetti. Ready in 25 minutes for a comforting, crowd-pleasing dinner.

A rich, silky garlic pasta made in one pan with milk and Parmesan for a fast, comforting dinner that is ready in about 20 minutes.
Leave a comment & rating below or tag @whiskia on social media!
Enjoyed this recipe? Share it with friends and family, and don't forget to leave a review!
This recipe looks amazing! Can't wait to try it.
Comments are stored locally in your browser. Server comments are displayed alongside your local comments.

Join to receive our email series which contains a round-up of some of our quick and easy family favorite recipes.
