
>>

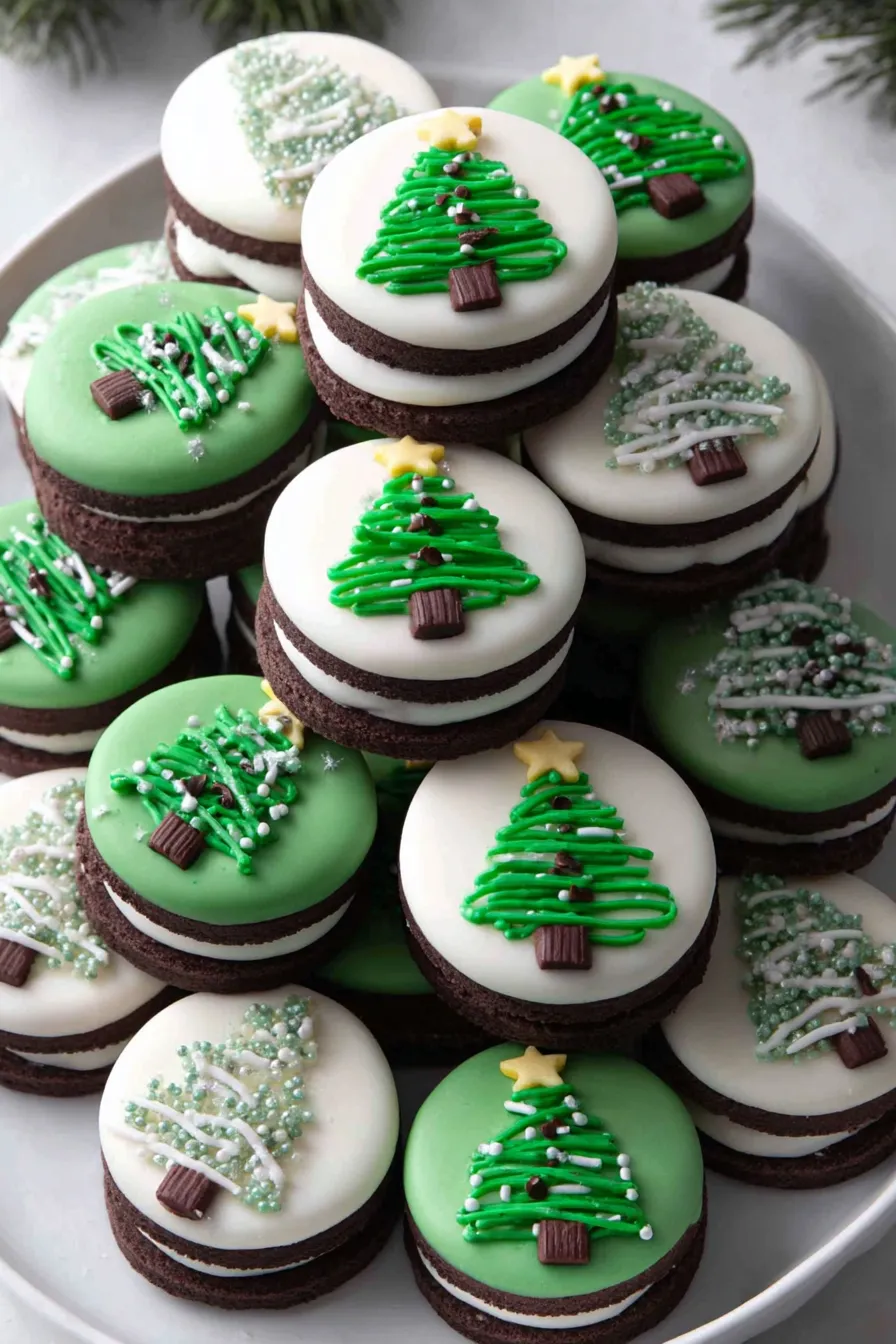
Festive Oreo cookies decorated like miniature Christmas trees — a quick, family-friendly holiday treat that's as fun to make as it is to eat.
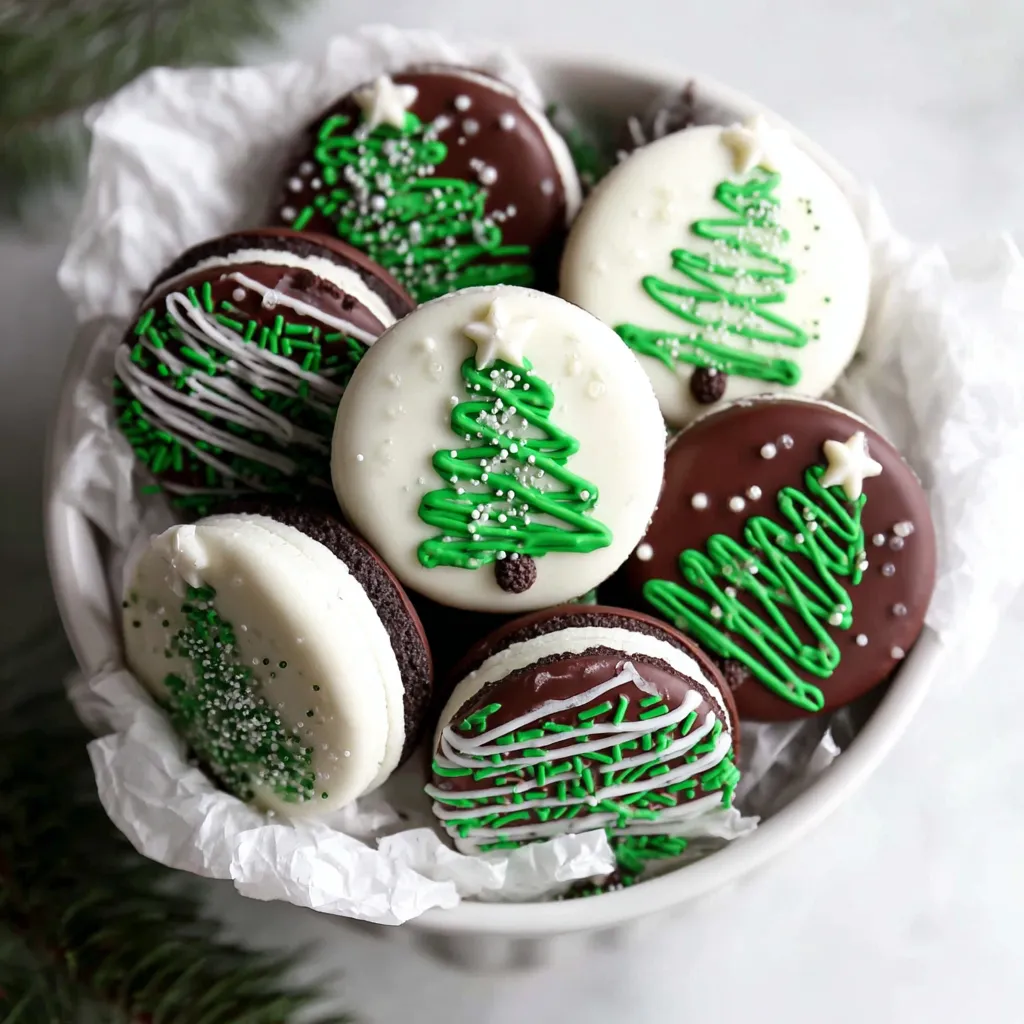
This Christmas Oreo Tree Cookies idea became a holiday must in my kitchen the first year my niece wanted to help decorate cookies but wasn’t ready for rolling dough and oven heat. I tucked into the pantry, pulled together a few simple supplies, and turned plain sandwich cookies into tiny edible trees. The whole project took under an hour, and the smiles around the table — sticky fingers and all — convinced me this is one of those repeatable, joyful traditions. The contrast between the smooth white chocolate base and the bright green tree piping gives each cookie a crisp, festive look that feels homemade yet polished.
What makes this particular version special is the balance between speed and presentation. Using melting chips keeps the process forgiving: chocolate that remelts smoothly and sets with a glossy finish. The green wafers pipe clean tree shapes with just a small squeeze, and a simple candy star creates an instant topper that looks professional. These are perfect for classroom parties, cookie exchanges, or anytime you want a quick seasonal treat without extensive baking. When guests see a platter of these little trees, they always ask for the recipe, and kids love choosing their own decorations.
From my first batch made with my niece to the platter I assembled for our neighborhood cookie swap, these cookies have been a hit. The green piping always brings out laughter — some trees look like perfect firs; others look like joyful scribbles. Either way, guests love them, and the recipe’s flexibility has inspired new toppings each year.

My favorite thing about these cookies is how they bring people together — a simple platter of decorated Oreos turns into a small party. At our annual holiday open house, neighbors ask for a plate to take home, and it’s become a cheerful little emblem of the season for my family.
Store finished cookies in a single layer in an airtight container to prevent the decorations from rubbing together. If you need to stack, place parchment between layers. At room temperature they stay crisp and glossy for about 2 to 3 days; refrigeration will firm the decorations faster but can create slight condensation when brought to room temperature, which may dull the shine. For longer keeping, freeze in a single layer until solid, then transfer to a freezer bag; thaw at room temperature for 30 minutes before serving.
If white melting chips are unavailable, use high-quality white chocolate bars chopped finely and tempered carefully, or choose almond bark as an alternative. For a dairy-free version, select vegan white melts and a certified gluten-free sandwich cookie. Swap green wafers for tinted royal icing piped through a small round tip; expect a slightly different texture and a longer drying time. Chocolate jimmies can be replaced by a small dot of piped dark chocolate for a tidier trunk.
Arrange cookies on a platter in the shape of a large tree for a playful centerpiece, or present them in small holiday boxes as party favors. Pair with hot cocoa, mulled cider, or a winter-spiced latte for a comforting combination. Garnish the serving tray with fresh pine sprigs or edible glitter for special occasions. Individual cookies also work well tucked into cellophane bags tied with ribbon for gifting.
Decorating cookies into festive shapes is a long-standing holiday tradition across Western cultures, with star and tree motifs commonly associated with Christmas. This adaptation — using store-bought cookies as a base — is part of a modern, convenience-driven twist on holiday confectionery that lets families celebrate ornate decoration without extensive baking. The visual symbol of the tree, borrowed from centuries-old traditions of decorated evergreen trees, remains the centerpiece and carries a sense of continuity in seasonal celebrations.
In winter, stick with classic evergreen green and gold stars. For a spring or summer party, switch the wafer color to pastel shades and use flower-shaped candy toppers instead of stars. For a New Year’s presentation, use metallic gold or silver dust atop the green or change the green to deep navy with silver stars to match a gala theme. Holiday color swaps are an easy way to repurpose this method year-round.
To prep ahead, dip all cookies in white chocolate one day, allow them to set, then store in an airtight container. Pipe the trees and add toppers on the day you plan to serve for the freshest appearance. If you’re hosting a decorating activity, pre-melt the melts and keep them warm in small thermal containers; refill piping bags as needed so each participant can decorate multiple cookies quickly without waiting for new melts to be prepared.
These decorated cookies are a reminder that holidays are as much about the process as the result. Whether you’re making a quick batch with kids or assembling trays for a party, the approachable technique and cheerful result make these a reliable festive favorite. Try them once, and you’ll find yourself inventing new toppers and colorways each season.
Microwave melts in short bursts and stir frequently to avoid overheating and seizing.
If green melts thicken while piping, reheat briefly and stir to restore flow.
Work in small batches to keep the melts at a usable temperature and avoid lumps.
This nourishing christmas oreo tree cookies recipe is sure to be a staple in your kitchen. Enjoy every moist, high protein slice — it is perfect for breakfast or as a wholesome snack any time.
Yes — store in a single layer in an airtight container at room temperature for up to 3 days. You can also freeze for up to 3 months in a freezer-safe bag.
Use vegan melting wafers and certified gluten-free sandwich cookies. Regular Oreos and common melting chips contain wheat, milk or soy.
This Christmas Oreo Tree Cookies recipe makes perfectly juicy, tender, and flavorful steak every time! Serve with potatoes and a side salad for an unforgettable dinner in under 30 minutes.
Line a baking sheet with parchment paper and arrange 15 Oreo cookies nearby so dipped cookies can be placed immediately.
Place 6 ounces of white melting chips in a microwave-safe bowl and heat in 30-second intervals, stirring between each, until smooth and glossy.
Hold each Oreo by the edges and dip halfway into the melted white chocolate. Let excess drip off and set on the parchment.
Melt 3 ounces of green wafers in a separate bowl using short microwave bursts, stirring until completely smooth. Add 1/4 teaspoon neutral oil if necessary to thin for piping.
Transfer green melts to a piping bag with a tiny tip. Pipe back-and-forth triangular tree shapes onto the white-coated portion of each cookie, starting wide and tapering to the top.
Place a candy star at the top of each tree while the green is still soft and use chocolate jimmies to form a trunk below the tree.
Allow cookies to set at room temperature for 20 to 30 minutes or chill briefly to speed setting. Serve once fully firm.
Last Step: Please leave a rating and comment letting us know how you liked this recipe! This helps our business to thrive and continue providing free, high-quality recipes for you.
Leave a comment & rating below or tag
@whiskia on social media!

Tender, herb-laced meatballs baked to juicy perfection with Parmesan and garlic. Perfect over spaghetti, tucked into subs, or served with favorite dips.

Creamy, silky carbonara with smoky bacon, peppery bite, and perfectly coated spaghetti. Ready in 25 minutes for a comforting, crowd-pleasing dinner.

A rich, silky garlic pasta made in one pan with milk and Parmesan for a fast, comforting dinner that is ready in about 20 minutes.
Leave a comment & rating below or tag @whiskia on social media!
Enjoyed this recipe? Share it with friends and family, and don't forget to leave a review!
This recipe looks amazing! Can't wait to try it.
Comments are stored locally in your browser. Server comments are displayed alongside your local comments.

Join to receive our email series which contains a round-up of some of our quick and easy family favorite recipes.
