
>>

A festive, crowd-pleasing poke cake layered with creamy cheesecake pudding, green-tinted whipped topping, and colorful holiday candies — perfect for Christmas gatherings.
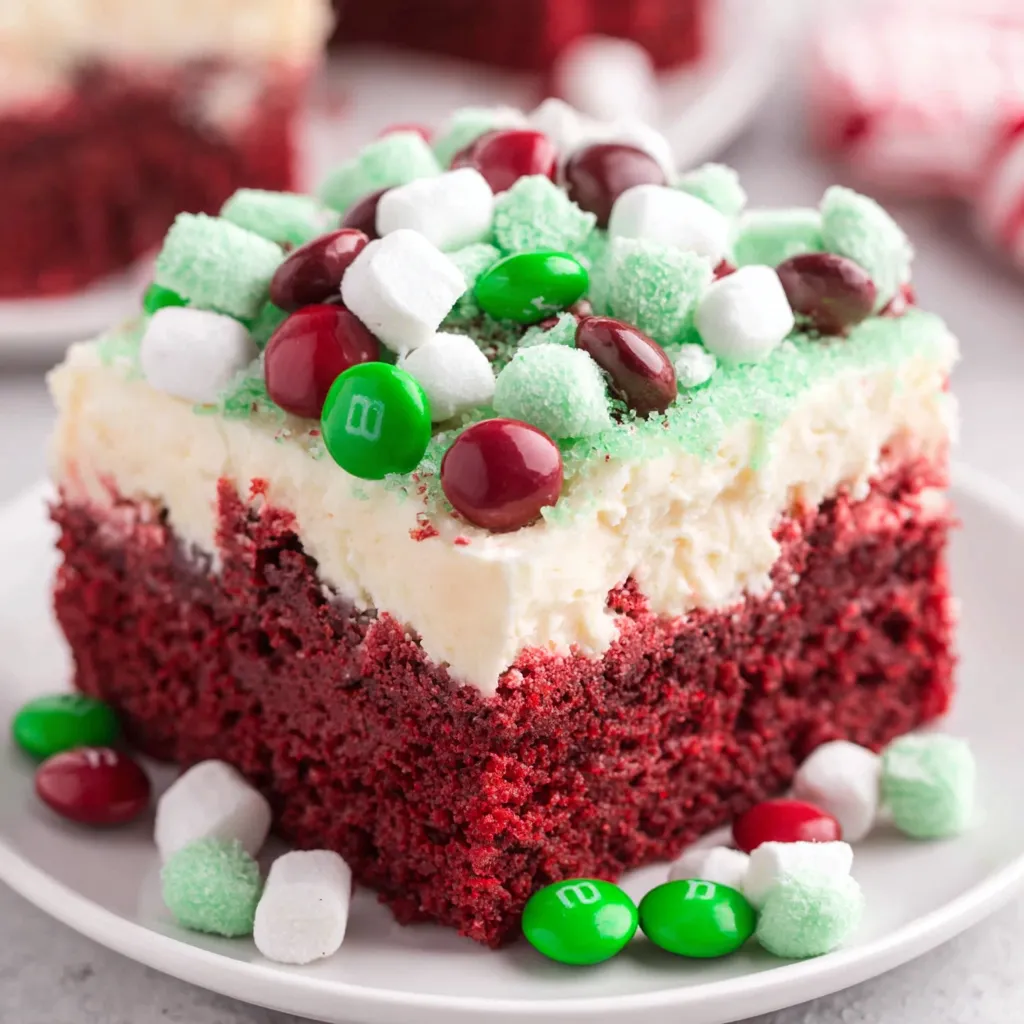
This Christmas red velvet poke cake has been a staple at our holiday table for years and immediately became my go-to when I need a bright, celebratory dessert that feeds a crowd. I first discovered this combination while riffing on a boxed mix and an impulse buy of cheesecake-flavored instant pudding one December evening. The deep red crumb, the cool creamy filling that sinks into the cake, and the minty-green whipped topping studded with marshmallows and candies create a playful contrast in color and texture that everyone remembers.
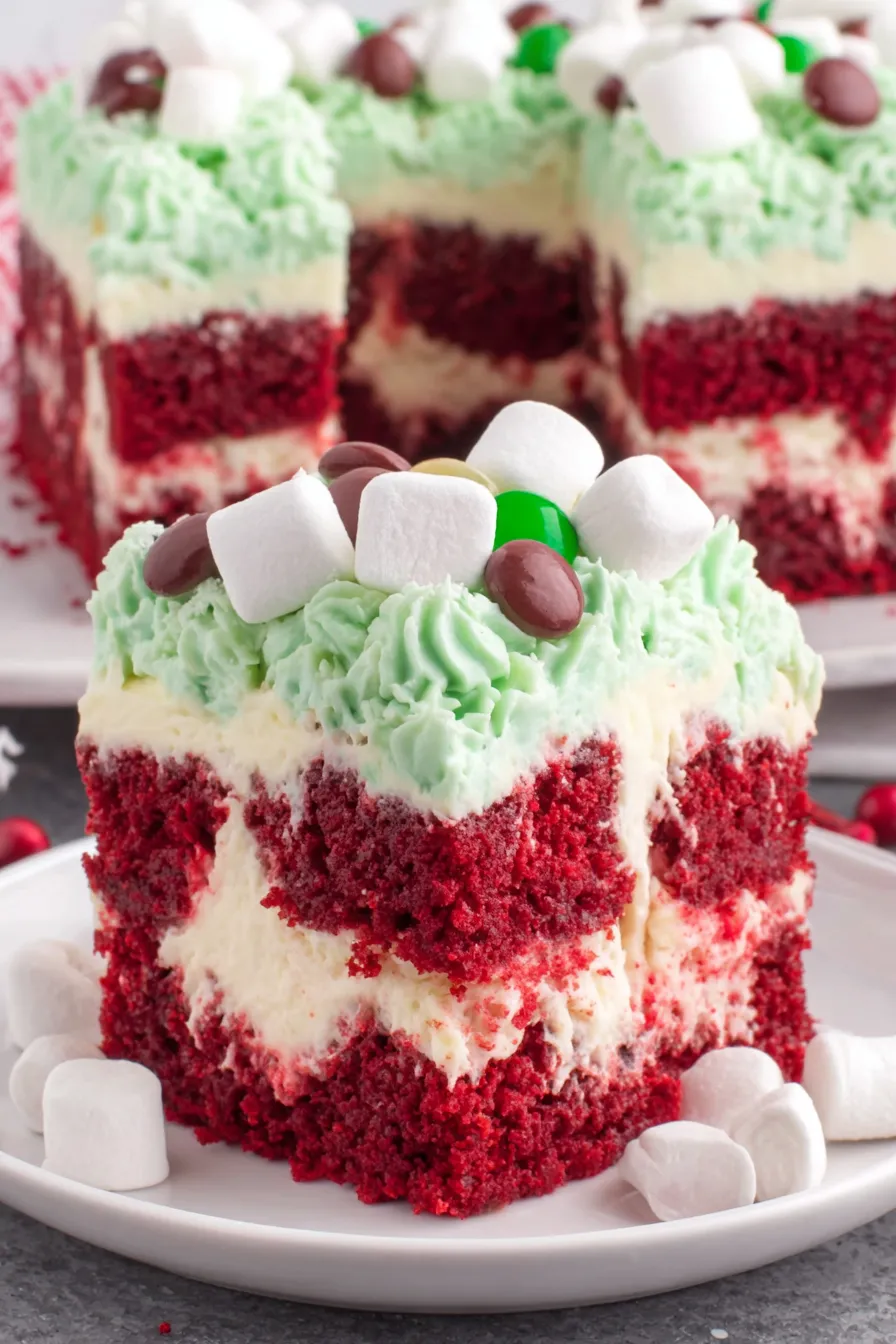
What makes this dish special is how effortless it is to transform pantry staples into something that looks and tastes like it took hours. The cake bakes quickly, you poke it so the pudding pools into each bite, and the chilled layers meld into a slice that is moist, slightly tangy from the cheesecake pudding, and finished with a cool whipped topping. Family members from toddlers to grandparents always ask for seconds. I often prepare this the day before a party, which saves time on the busy holiday morning and improves the flavor as the layers settle.
I tested this several times, tweaking how densely I poke the cake so the pudding sinks consistently without making the cake soggy. The first time I served it to my in-laws, they thought it was store-bought. It travels well to parties and the kids love helping to press the marshmallows and M&M's into the top.

My favorite thing about this cake is how it transforms with time. After an overnight chill the pudding and cake become one cohesive bite: the red crumb moist but still structured and the cheesecake filling cool and slightly tangy. During one holiday potluck, a neighbor asked for the recipe and brought it to their church bake sale — it sold out in an hour.
Store the cake tightly covered in the refrigerator for up to 4 days. Use an airtight cake carrier or press a sheet of plastic wrap directly on top of the whipped layer to avoid drying and to keep decorations intact. For longer storage, freeze individual slices wrapped in plastic and then in foil; they keep well for up to three months. Thaw in the refrigerator overnight and allow the slice to come to cool room temperature before serving for best texture. If decorations lose brightness after thawing, add a few fresh candies before serving.
To make the dessert lighter, substitute low-fat milk in the pudding, though expect a slightly less creamy texture. For a homemade alternative, prepare a basic vanilla or cream cheese pudding using cornstarch, sugar, cream cheese, and milk; increase chilling time to ensure set. Swap whipped topping for stabilized whipped cream (whip heavy cream with a tablespoon of powdered sugar and 1 teaspoon of unflavored gelatin dissolved in warm water) for a fresher taste. For a nut-free candy option, replace M&M's with colored chocolate chips or candied cranberries for a tart contrast.
Serve chilled with a small dusting of confectioners sugar or a single mint leaf on each square for a refined presentation. Pair with strong coffee or spiced hot cocoa to cut through richness. For a plated dessert at dinner, accompany a small scoop of vanilla bean ice cream and a drizzle of warm chocolate sauce. This dessert also shines on a buffet next to other holiday cookies, providing a chilled, creamy contrast to baked goods.
Red velvet originates from the early 20th century in American baking traditions, prized for its tender crumb and subtle cocoa note. The vibrant red hue became particularly popular during the 1940s and 1950s when food coloring allowed for more vivid baking palettes. The poke-method in chilled desserts evolved as a simple way to add a custard or pudding element without baking a layered custard. Combining red velvet and cheesecake flavors has become a modern American favorite for holidays where color and celebratory flavors matter.
For a winter twist, fold a teaspoon of peppermint extract into the whipped topping and garnish with crushed peppermint candy instead of M&M's. For a spring or summer celebration, reduce food coloring and decorate with fresh berries instead of marshmallows. Swap the red sprinkles for gold or silver for New Year's or adjust colors to match any holiday palette. Using seasonal candies and garnishes keeps the basic method fresh year-round.
Make the cake layer a day ahead, poke it, and keep it covered. Prepare the pudding the same day you plan to assemble to ensure it is fresh and still slightly pourable. After chilling and topping, portion into individual containers for grab-and-go holiday lunches. Label containers with the date and store in the coldest part of the refrigerator for up to four days. If transporting, pack slices in a shallow cooler with ice packs to keep the whipped layer firm.
This Christmas red velvet poke cake brings color, flavor, and effortless entertaining to your table. Whether you make it for a cookie exchange, family dinner, or potluck, it’s the kind of dessert that invites smiles and second helpings. Make it your own with different candies or extracts and enjoy the festive results.
Poke holes while the cake is warm but not hot to help the pudding sink in evenly without tearing the crumb.
Chill the assembled dessert for at least four hours or overnight to let the filling set and flavors meld.
Use whole milk for the pudding for the creamiest texture and best mouthfeel.
Tint whipped topping with gel food coloring for brighter color without adding extra liquid.
If slicing clean portions, chill the cake thoroughly and use a hot, dry knife wiped between cuts.
This nourishing christmas red velvet poke cake recipe is sure to be a staple in your kitchen. Enjoy every moist, high protein slice — it is perfect for breakfast or as a wholesome snack any time.
This Christmas Red Velvet Poke Cake recipe makes perfectly juicy, tender, and flavorful steak every time! Serve with potatoes and a side salad for an unforgettable dinner in under 30 minutes.
Preheat oven to 350°F. Lightly spray a 9x13-inch pan with nonstick baking spray. This ensures the cake releases cleanly and corners do not stick.
In a medium bowl, combine cake mix, 1 1/4 cups water, 1/2 cup oil, and 3 large eggs. Beat with a handheld mixer on medium until smooth, about 1 to 2 minutes. Scrape sides to fully incorporate.
Pour batter into prepared pan and smooth. Bake at 350°F for 25 minutes or until a toothpick inserted in center comes out with a few moist crumbs. Allow to cool 10 minutes before poking.
Using the rounded handle of a wooden spoon, poke holes about 1/2 inch apart across the warm cake surface. These channels let the pudding sink for even filling distribution.
Whisk pudding mix and 3 3/4 cups cold whole milk for 1 to 1 1/2 minutes until it begins to thicken. Pour evenly over the poked cake and smooth with a spatula.
Cover tightly and refrigerate at least 4 hours or overnight to allow the filling to set and flavors to meld.
Stir 10 to 12 drops green food coloring into 16 ounces thawed whipped topping until even. Spread over chilled pudding, then top with 3 cups mini marshmallows, 1/4 cup red M&M's, 1/4 cup green M&M's, and red sprinkles.
Cut into twelve 3-inch by 3-inch squares and serve chilled. For neat slices, use a hot, dry knife and wipe between cuts.
Last Step: Please leave a rating and comment letting us know how you liked this recipe! This helps our business to thrive and continue providing free, high-quality recipes for you.
Leave a comment & rating below or tag
@whiskia on social media!

Tender, herb-laced meatballs baked to juicy perfection with Parmesan and garlic. Perfect over spaghetti, tucked into subs, or served with favorite dips.

Creamy, silky carbonara with smoky bacon, peppery bite, and perfectly coated spaghetti. Ready in 25 minutes for a comforting, crowd-pleasing dinner.

A rich, silky garlic pasta made in one pan with milk and Parmesan for a fast, comforting dinner that is ready in about 20 minutes.
Leave a comment & rating below or tag @whiskia on social media!
Enjoyed this recipe? Share it with friends and family, and don't forget to leave a review!
This recipe looks amazing! Can't wait to try it.
Comments are stored locally in your browser. Server comments are displayed alongside your local comments.

Join to receive our email series which contains a round-up of some of our quick and easy family favorite recipes.
