
>>

Creamy peanut butter truffles dipped in white chocolate and decorated with festive sprinkles—perfect for holiday gifting and parties.
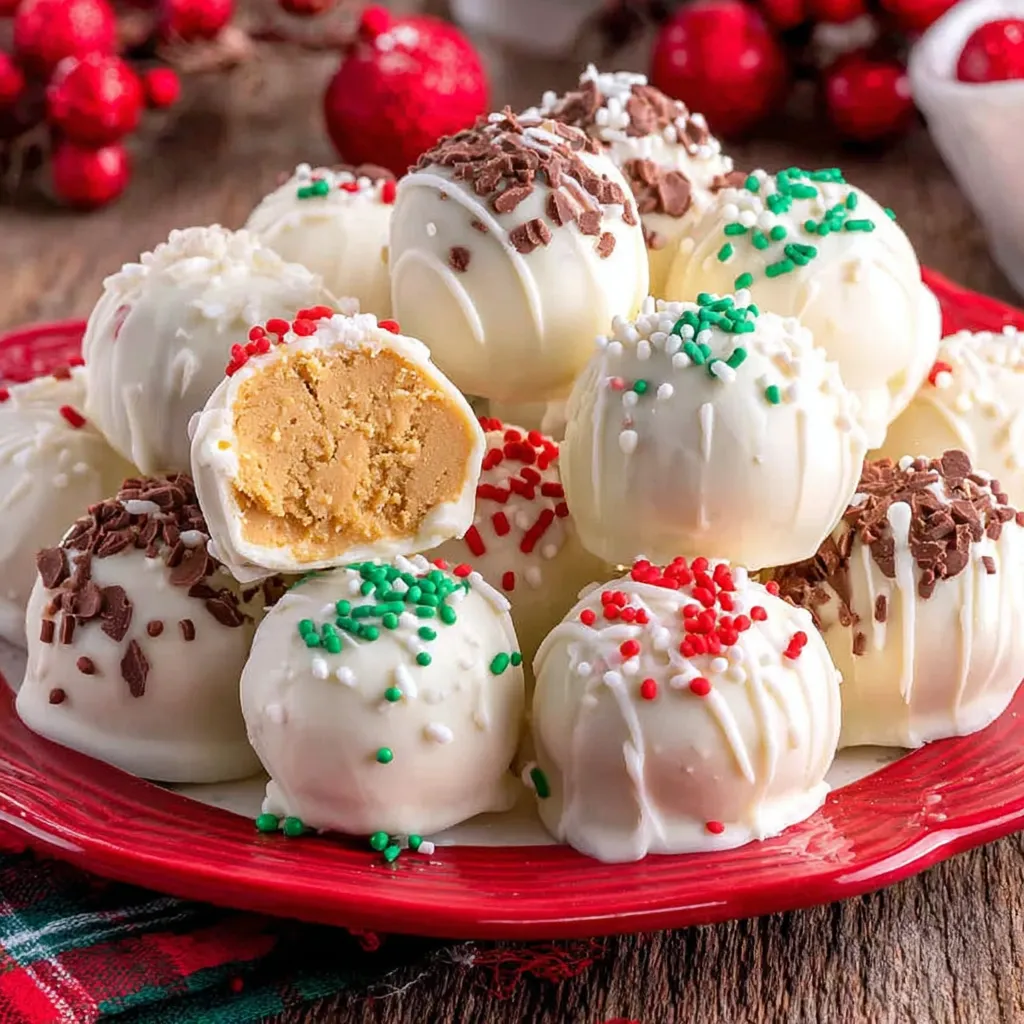
This batch of Christmas truffles started as a simple experiment one quiet December afternoon and quickly became our family’s favorite holiday treat. I first made them the year Clara got her first snowman cookie cutter; with a jar of peanut butter open and a bag of white melting chocolate on the shelf I wanted something festive but fuss-free. The combination of sweet powdered sugar, rich peanut butter and buttery mouthfeel rolled into bite-sized rounds then cloaked in gleaming white coating is irresistible. Each bite is smooth and slightly crumbly inside with a crisp, sweet shell that snaps pleasantly. They are sweet but balanced, and the texture contrast is what keeps everyone coming back for another.
What makes these especially memorable is how quick they are to pull together and how many ways you can make them your own. I love leaving a little variety in the tin when I bring them to holiday parties: some with classic red and green nonpareils, others with crushed peppermint for that wintery burst, and a few drizzled back with melted dark chocolate for visual contrast. Kids love rolling the dough, and my partner insists on adding an extra pinch of sea salt to a few just to keep things interesting. These truffles are the kind of treat that evoke the holidays—simple ingredients, easy steps, and lots of joy at the table.
From my experience, they are a crowd-pleaser: neighbors always ask for a tin, and I once brought them to an office swap where they disappeared in under an hour. The recipe’s simplicity makes it great for involving kids or for last-minute additions to a cookie plate.
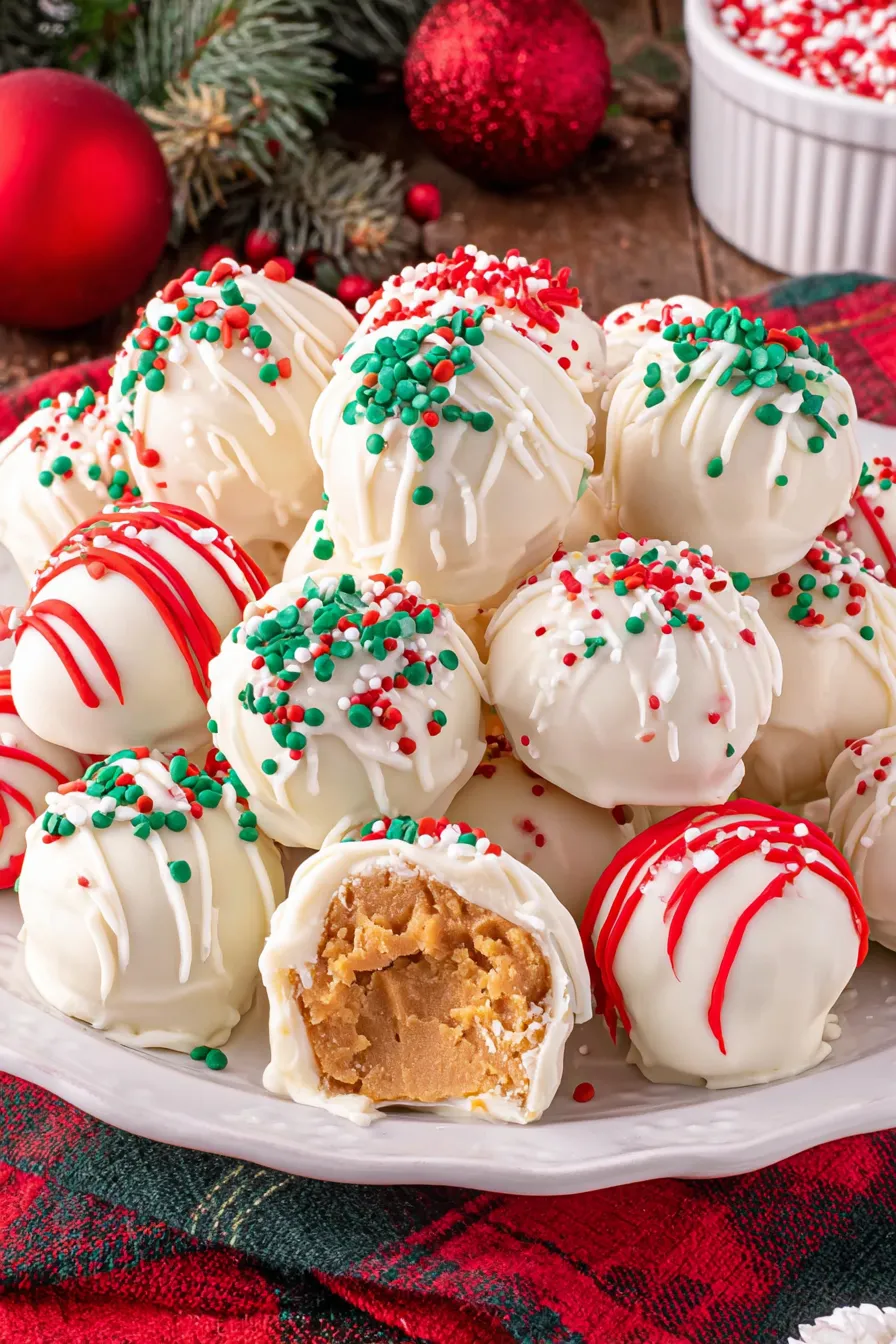
My favorite aspect is the immediate visual transformation: plain dough becomes holiday-ready with colorful sprinkles and a neat glossy shell. I remember making a batch on a stormy afternoon; the simple act of dipping and decorating became a small family ritual that turned a gray day into something bright and memorable.
Store truffles in a single layer or with parchment between layers in an airtight container. At room temperature they will keep a couple of days in a cool kitchen; refrigeration extends shelf life to about two weeks. For longer storage, freeze in a rigid container for up to three months. When freezing, wrap the truffles individually in waxed paper or parchment and arrange in a single layer to prevent sticking. Thaw overnight in the refrigerator and bring to room temperature before serving to avoid condensation on the coating.
If you need to avoid peanuts, substitute almond butter or sunflower seed butter using a 1:1 ratio; note that sunflower seed butter can darken slightly when mixed with sugar. To make dairy-free, swap butter for a plant-based margarine and use dairy-free melting wafers. For a less sweet version, reduce powdered sugar by 2 tablespoons and add a pinch of flaky sea salt to brighten flavors. Remember these swaps change texture slightly: oilier nut butters may require a touch more powdered sugar to achieve the right consistency.
Present them on a tiered serving tray for holiday parties or packed in small decorative tins for neighbors. Pair with strong coffee or a glass of dessert wine. Garnish with a small edible gold leaf for an upscale finish, or arrange truffles on a bed of shredded paper in gift boxes. For a contrasting mouthfeel, serve with crisp biscotti or lightly salted crackers.
While these truffles are not a traditional candy with a single-country origin, they draw on a long tradition of small no-bake confections found in many holiday cultures: quick, sweet bites assembled from pantry items. Similar peanut butter balls are common in American holiday baking, often made with chocolate coatings and called buckeyes or peanut butter balls. The festive decorations connect them to the winter holiday ritual of dressing simple sweets in seasonal colors.
Winter: Add crushed peppermint or cinnamon sugar on top for a warming holiday profile. Spring: swap sprinkles for pastel nonpareils and use a light lemon zest in the dough for brightness. Summer: omit heavy chocolate coating and roll in shredded toasted coconut for a lighter finish. For Valentine’s Day, pipe small chocolate hearts and use pink sanding sugar.
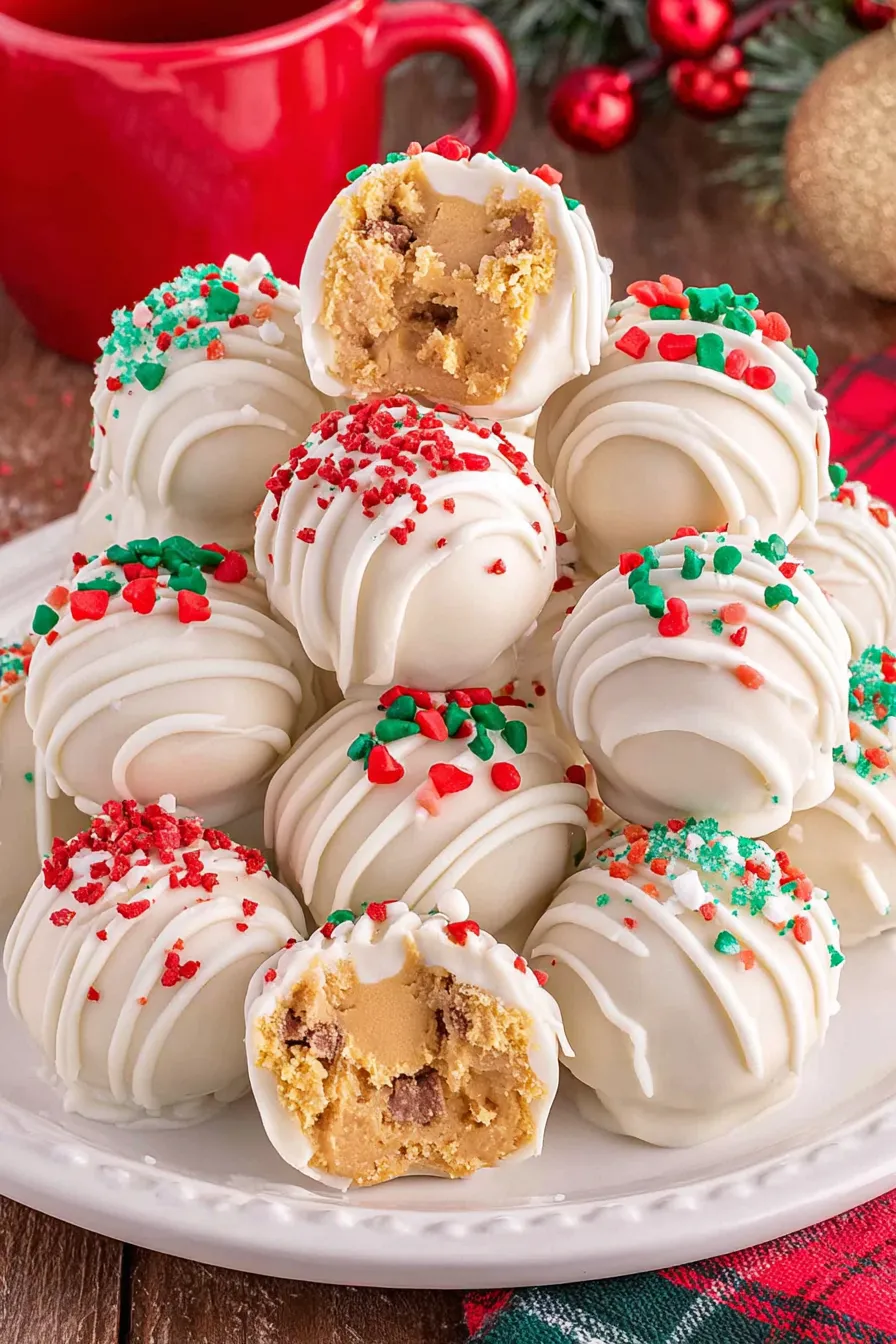
One memorable batch was a late-night assembly line with neighbors where we made three flavors at once. The simple format allows simultaneous variation: one tray with dark chocolate and sea salt, another with white coating and peppermint, and one dipped in milk chocolate with chopped hazelnuts. Folks at a local church bake sale asked for the recipe the next week—these truffles are reliably crowd-pleasing.
Portion the dough into balls and freeze them raw on a sheet pan. Once frozen, transfer to a container and coat from frozen when you are ready to serve; this helps the coating set quicker and reduces handling time. Make multiple flavors at once by preparing bases and storing them separately. Label containers with date and topping so you know which tin to grab for gifting.
These truffles are one of those uncomplicated holiday wins: accessible ingredients, minimal technique, and maximum joy. Make a double batch and freeze half so you always have a festive bite on hand. Happy dipping and decorating—the best part is sharing them with people you love.
Chill the formed balls before dipping; this prevents them from falling apart and results in a cleaner coating.
Warm the melted chocolate gently and stir frequently; if too thick, add 1/2 to 1 teaspoon neutral oil to thin.
Work in small batches when dipping so the chocolate stays fluid and toppings adhere properly.
If using true white chocolate, melt slowly over a double boiler to avoid scorching.
This nourishing christmas truffles recipe is sure to be a staple in your kitchen. Enjoy every moist, high protein slice — it is perfect for breakfast or as a wholesome snack any time.
Yes. Store in an airtight container in the refrigerator for up to two weeks or freeze for up to three months. Thaw in the fridge overnight before serving.
If your white melting chocolate seizes or becomes grainy, gently add 1 teaspoon of neutral oil and stir until smooth. Melt slowly and avoid water contact.
Yes. Use almond butter or sunflower seed butter 1:1. For dairy-free, swap butter for a plant-based stick margarine and choose dairy-free wafers.
This Christmas Truffles recipe makes perfectly juicy, tender, and flavorful steak every time! Serve with potatoes and a side salad for an unforgettable dinner in under 30 minutes.
In a medium bowl, mix 1 cup powdered sugar, 1/2 cup peanut butter and 3 tablespoons room-temperature butter until a uniform dough forms. Use a spatula or low-speed mixer and adjust powdered sugar if necessary for texture.
Scoop or roll the dough into 1-inch balls and place on a parchment-lined tray. Refrigerate for 15 to 30 minutes so the balls firm up and are easier to dip.
Melt 16 ounces white melting chocolate in a microwave-safe bowl in 30-second intervals, stirring between bursts until smooth. Add 1 teaspoon neutral oil if needed to thin.
Dip chilled balls into melted chocolate, tap off excess, place on parchment and immediately add sprinkles or toppings. Work quickly while the coating is wet.
Let the coating harden at room temperature briefly, then transfer to the refrigerator for 10 to 15 minutes to fully set. Store in an airtight container.
Last Step: Please leave a rating and comment letting us know how you liked this recipe! This helps our business to thrive and continue providing free, high-quality recipes for you.
Leave a comment & rating below or tag
@whiskia on social media!

Tender, herb-laced meatballs baked to juicy perfection with Parmesan and garlic. Perfect over spaghetti, tucked into subs, or served with favorite dips.

Creamy, silky carbonara with smoky bacon, peppery bite, and perfectly coated spaghetti. Ready in 25 minutes for a comforting, crowd-pleasing dinner.

A rich, silky garlic pasta made in one pan with milk and Parmesan for a fast, comforting dinner that is ready in about 20 minutes.
Leave a comment & rating below or tag @whiskia on social media!
Enjoyed this recipe? Share it with friends and family, and don't forget to leave a review!
This recipe looks amazing! Can't wait to try it.
Comments are stored locally in your browser. Server comments are displayed alongside your local comments.

Join to receive our email series which contains a round-up of some of our quick and easy family favorite recipes.
