
>>

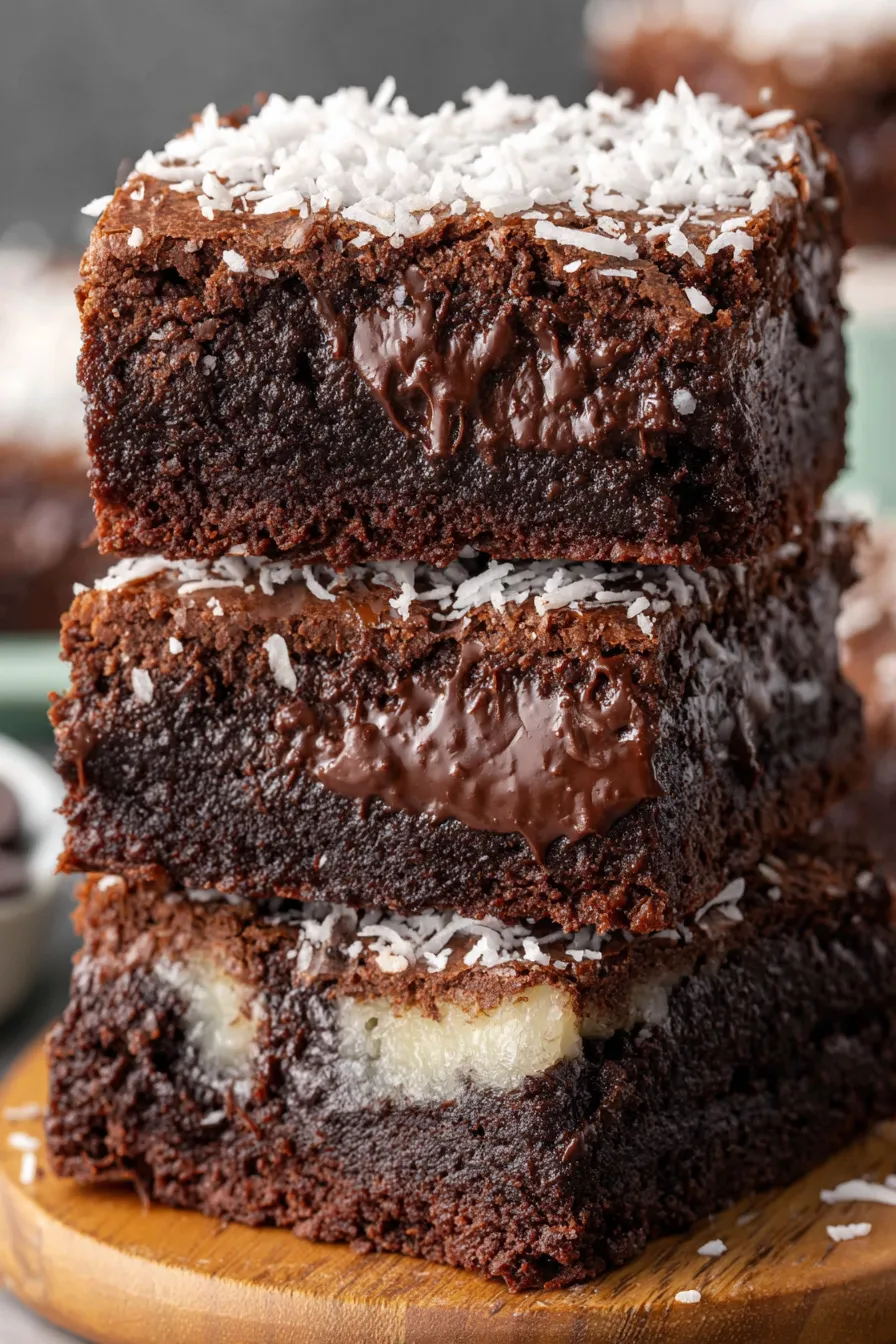
Fudgy chocolate squares layered with a sweet, gooey coconut filling — a nostalgic bake that blends two beloved flavors into one unforgettable treat.
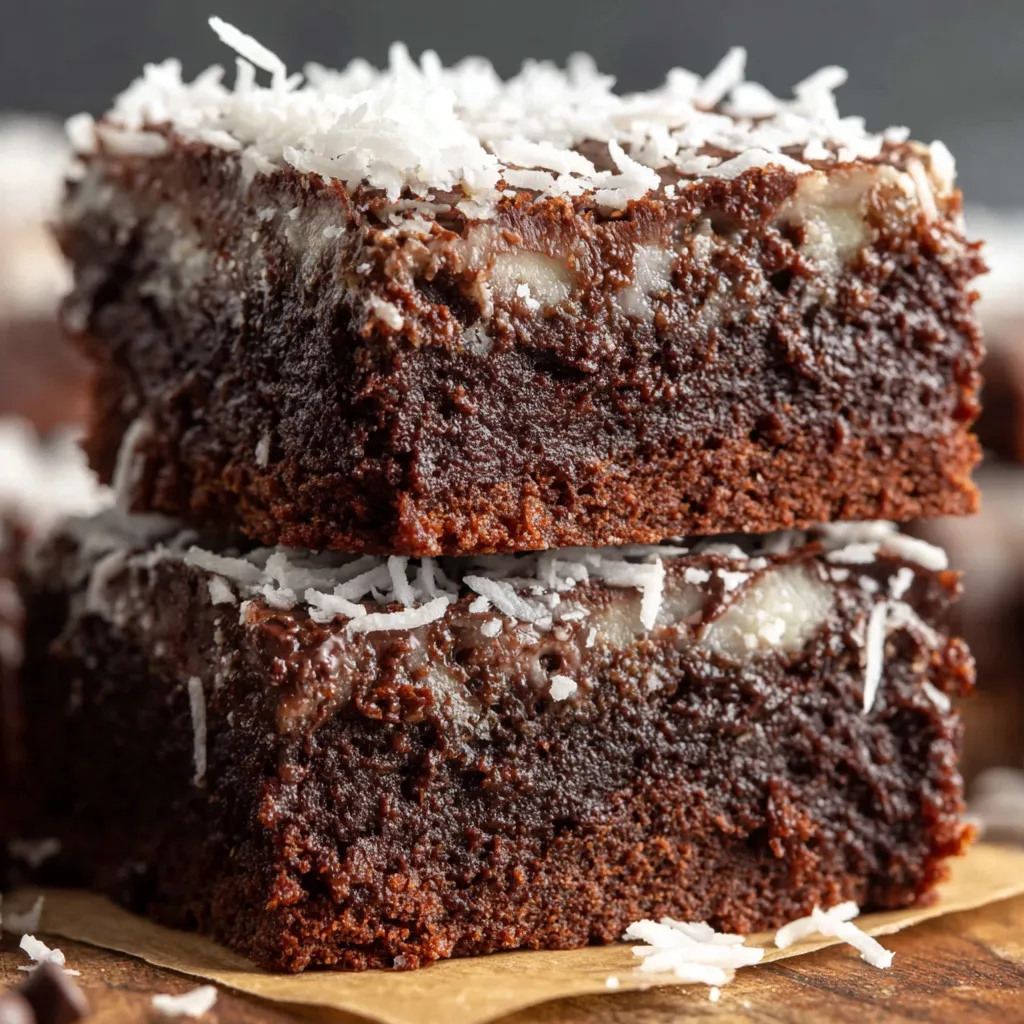
This batch of coconut brownies is one of those treats that instantly transports me back to family gatherings and school bake sales. I first layered chocolate and coconut together on a rainy afternoon when pantry staples were all I had on hand; the sticky, toasted-sweet coconut sandwiched between dense, fudgy chocolate turned out to be unexpectedly dreamy. Every bite balances a rich cocoa depth with a chewy, sweet coconut layer that keeps you coming back for another square. It’s the sort of dessert that vanishes quickly at parties and gets requested for birthdays.
What makes these squares special is the contrast of textures and the straightforward technique. The base is a classic chocolate batter — tender but not cakey — studded with mini chocolate chips for melty pockets. The middle layer, a mixture of sweetened coconut flakes and condensed milk, creates a custardy barrier that bakes to a sticky, sliceable filling. I learned to let these cool completely before slicing; otherwise the coconut pulls and the bars fall apart. Serve them slightly warmed or at room temperature for the best balance of gooeyness and structural integrity.
I remember bringing these to a summer block party; neighbors loved the unexpected coconut layer and a friend asked for the method right away. My kids call them "choco-coconut squares," and they’re the first thing requested for bake sales — perhaps because the combination feels both nostalgic and indulgent.
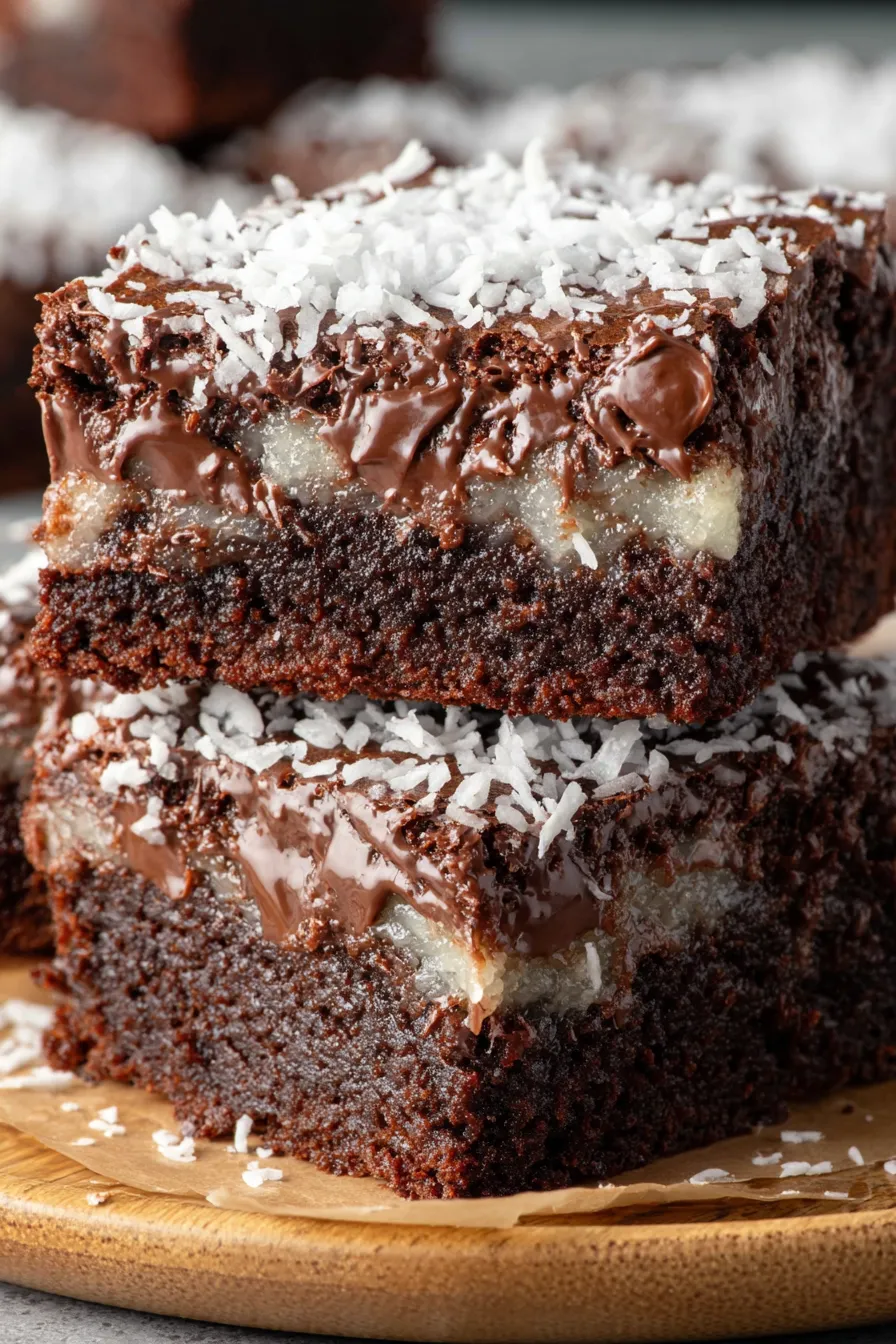
My favorite aspect is how the coconut layer transforms during baking: the condensed milk mellows the flakes into a sticky, almost caramel-like custard that contrasts with the dense chocolate. Family members often debate whether the top or bottom is the best bite, but everyone agrees that letting them rest yields the prettiest slices and the best mouthfeel. These squares travel well and are always a reliable conversation starter at casual gatherings.
Store cooled squares in an airtight container at room temperature for up to 3 days; place parchment between layers to avoid sticking. For longer storage, refrigerate for up to 1 week — refrigerated bars firm up and slice cleaner — or freeze for up to 3 months. To freeze, cut into squares, flash-freeze on a tray until solid, then transfer to a freezer-safe bag with parchment between layers. Reheat at 300°F for 8–10 minutes to restore a warm, just-baked feel or let thaw in the fridge overnight and bring to room temperature before serving.
Swap sweetened condensed milk with an equal amount of dulce de leche for a richer, caramel note; expect a slightly chewier center. If you prefer unsweetened coconut, add 2–3 tablespoons extra condensed milk or a tablespoon of honey to maintain moisture. For a dairy-free version, use dairy-free butter and a dairy-free condensed milk alternative; texture will be a touch less glossy but still delicious. To reduce sweetness, cut granulated sugar to 1 1/4 cups and use unsweetened coconut, though the coconut layer will be less custardy.
Serve squares at room temperature or slightly warmed alongside a dollop of vanilla ice cream or softly whipped cream — the cool cream contrasts nicely with the sticky coconut. Garnish with toasted coconut flakes or a light dusting of cocoa powder for presentation. Pair with coffee or a strong black tea; the bitterness cuts through the sweetness. For a party platter, trim edges and arrange on a tiered stand with small forks for an elegant touch.
Layered chocolate-and-coconut bars have roots in many home-bake traditions where sweetened coconut and condensed milk are used as a shortcut to custardy fillings. The combination echoes the textures of lamingtons, magic bars, and classic lamination of fillings in American bake sales from mid-20th century cookbooks. Coconut gained popularity in desserts when sweetened condensed milk became widely available, offering a time-saving way to create rich, candy-like centers without tempering or long stovetop cooking.
In winter, add 1/4 teaspoon ground cinnamon and a pinch of nutmeg to the coconut layer for warm spice notes. For a tropical summer version, fold in 1/4 cup chopped macadamia nuts and substitute half the chocolate chips with white chocolate for a brighter contrast. For holiday gifting, drizzle melted dark chocolate over cooled squares and sprinkle flaky sea salt for a festive salt-and-sweet finish.
Readers have told me they made these for school fundraisers and potluck picnics with rave reviews — one neighbor said they reminded her of a childhood treat and requested the pan size. Another baker noted that swapping in unsweetened coconut made them perfect for a slightly less-sweet crowd without sacrificing the gooey center. My own family affectionately calls these the "party bars" because they disappear faster than I can photograph them.
Make these ahead and portion into single-serve boxes for office events; add a small napkin to absorb any surface stickiness. If planning ahead, bake and cool, then freeze in an airtight container. Thaw in the fridge the day before serving and bring to room temperature for best texture. For grab-and-go breakfasts or snacks, pair a single square with Greek yogurt and fresh berries to balance richness with a bit of protein.
These coconut brownies are a dependable, joyful bake — simple enough for a weeknight and special enough for celebrations. Give them a go, adjust the coconut level to taste, and enjoy the sticky, chocolatey comfort that has become a favorite in my kitchen.
Toss chocolate chips with 1 teaspoon of flour to prevent them from sinking into the batter.
Let the pan cool completely before slicing; chilling for 30 minutes yields cleaner squares.
Use room-temperature eggs for better emulsion and even texture.
For extra flavor, toast half the coconut before mixing into the filling for a nuttier note.
This nourishing coconut brownies recipe is sure to be a staple in your kitchen. Enjoy every moist, high protein slice — it is perfect for breakfast or as a wholesome snack any time.
Allow the bars to cool completely before slicing; chilling 30–60 minutes helps achieve clean cuts.
Freeze wrapped squares for up to 3 months. Thaw in the refrigerator overnight and bring to room temperature before serving.
This Coconut Brownies recipe makes perfectly juicy, tender, and flavorful steak every time! Serve with potatoes and a side salad for an unforgettable dinner in under 30 minutes.
Preheat oven to 350°F. Line an 8×8-inch baking dish with parchment paper and lightly spray with nonstick spray; set aside.
In a medium bowl whisk together 1 cup flour, 1/2 cup cocoa powder, and 1/4 teaspoon salt until uniform; set aside.
Toss 1/2 cup mini semi-sweet chocolate chips with 1 teaspoon flour in a small bowl to prevent sinking; set aside.
Whisk together cooled melted butter, 1 1/2 cups granulated sugar, 2 eggs, and 2 teaspoons vanilla until glossy and combined.
Fold the dry mixture into the wet using a wooden spoon just until combined. Gently fold in the coated chocolate chips.
Spread half of the batter evenly into the prepared pan using an offset spatula or spoon to create a level base.
Stir together 2 1/2 cups coconut flakes, 2/3 cup sweetened condensed milk, 1 teaspoon vanilla, and 1/4 teaspoon salt until cohesive.
Spread the coconut filling over the bottom batter, then spread the remaining batter on top very gently to avoid mixing layers.
Bake at 350°F for 35–40 minutes until the top springs back slightly and a toothpick into the chocolate layer yields moist crumbs.
Cool completely on a wire rack, at least 1 hour. Lift from pan using parchment and slice into 16 (4×4) 2-inch squares.
Last Step: Please leave a rating and comment letting us know how you liked this recipe! This helps our business to thrive and continue providing free, high-quality recipes for you.
Leave a comment & rating below or tag
@whiskia on social media!

Tender, herb-laced meatballs baked to juicy perfection with Parmesan and garlic. Perfect over spaghetti, tucked into subs, or served with favorite dips.

Creamy, silky carbonara with smoky bacon, peppery bite, and perfectly coated spaghetti. Ready in 25 minutes for a comforting, crowd-pleasing dinner.

A rich, silky garlic pasta made in one pan with milk and Parmesan for a fast, comforting dinner that is ready in about 20 minutes.
Leave a comment & rating below or tag @whiskia on social media!
Enjoyed this recipe? Share it with friends and family, and don't forget to leave a review!
This recipe looks amazing! Can't wait to try it.
Comments are stored locally in your browser. Server comments are displayed alongside your local comments.

Join to receive our email series which contains a round-up of some of our quick and easy family favorite recipes.
