
>>

A silky, bright, and classic creamy hummus made with canned chickpeas, tahini, fresh lemon, and garlic — quick to prepare and perfect for snacking or entertaining.
This creamy hummus has been a weekday staple and a party favorite in my kitchen for years. I first perfected this small-batch version on a rainy Sunday when I had a single can of chickpeas and a jar of tahini left in the pantry. The balance of bright lemon, toasted sesame from the tahini, and the gentle warmth of cumin created a dip that changed my view of store-bought tubs forever. It’s smooth without being heavy, bright without being overly sharp, and versatile enough for everything from a dinner party to a kid’s lunchbox.
What I love most is how forgiving it is: a rough timing of pulse-and-check in the processor, a few tablespoons of water to adjust the texture, and you have a dip that tastes like you spent hours on it. The first bite is silky and slightly nutty; the finish is lemony with a hint of garlic heat. I often make a double batch for gatherings — family and friends always reach for the plate and ask for the recipe. This recipe is ideal for busy cooks who want impressive flavor with minimal fuss.
In my experience, the simple act of refrigerating the dip for 30 minutes after blending makes an enormous difference — the flavors knit together and the sharp edges of raw garlic soften. Family members who usually skip chickpea-based dishes come back for seconds. When I’ve served this at small gatherings, guests always comment on the silkiness and ask if I made it from scratch.
What I love about this hummus is its reliability: even when I improvise with lemon or the garlic clove is tiny, a final taste and tweak yields a dependable, delicious result. I often prepare it the evening before a gathering; chilling helps the acidity mellow and the tahini harmonize. Guests often assume it was made with sophisticated equipment or lengthy prep, which always makes me smile.
Store the hummus in an airtight container in the refrigerator for up to 5 days. Use a shallow container to allow quick chilling, which helps preserve texture and flavor. If you notice the top drying out slightly, stir in a teaspoon of water or olive oil to rejuvenate the surface before serving. For longer storage, spoon portions into a sealable freezer-safe container or ice cube tray; freeze for up to 3 months. Thaw overnight in the fridge and whisk briefly to reemulsify before serving.
If you don’t have tahini, you can substitute 3 tablespoons of natural peanut butter or almond butter for a different nutty profile, though the sesame character will change. For a milder garlic flavor, roast the cloves for 20–25 minutes at 375°F (190°C) and use them in place of raw garlic. Swap lemon juice for 2 tablespoons of white wine vinegar plus a teaspoon of zest if you want a slightly different acidic note. To lower carbs slightly, serve with vegetable crudités instead of pita chips.
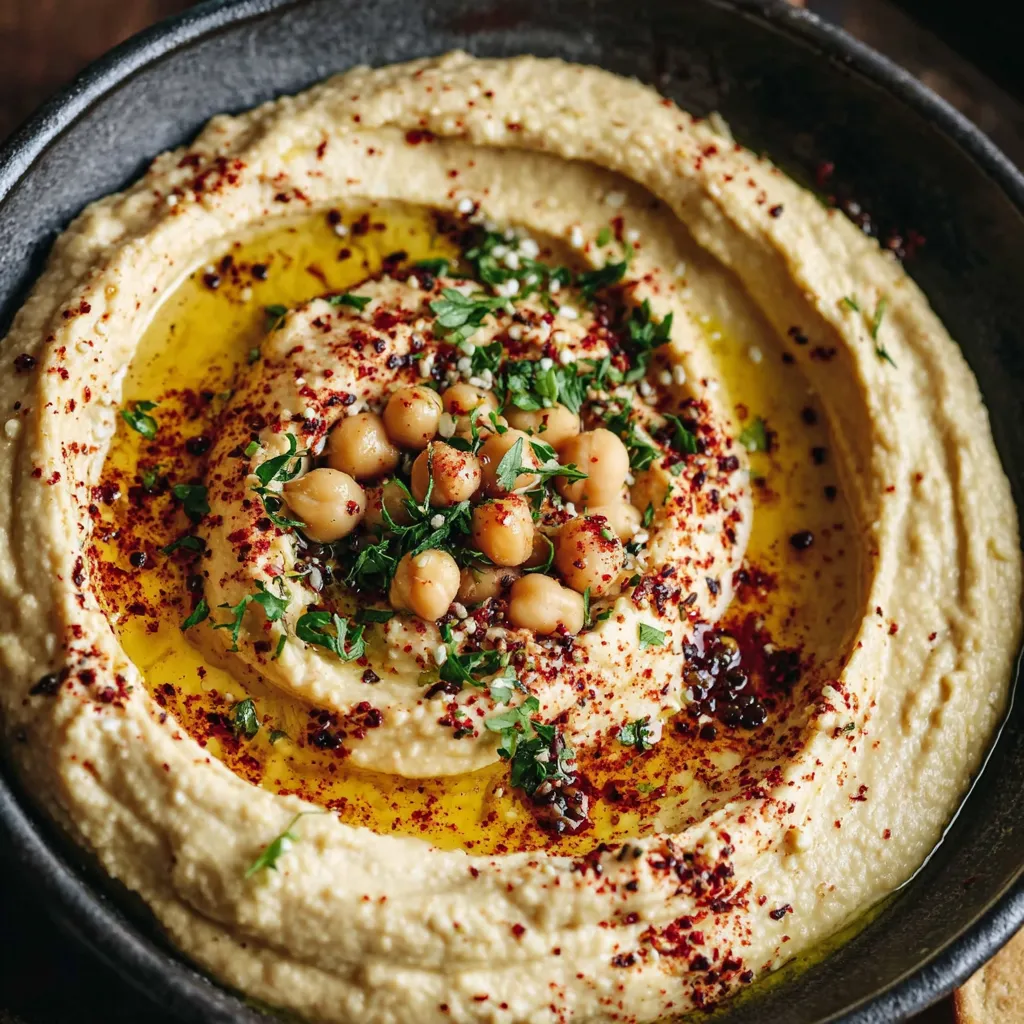
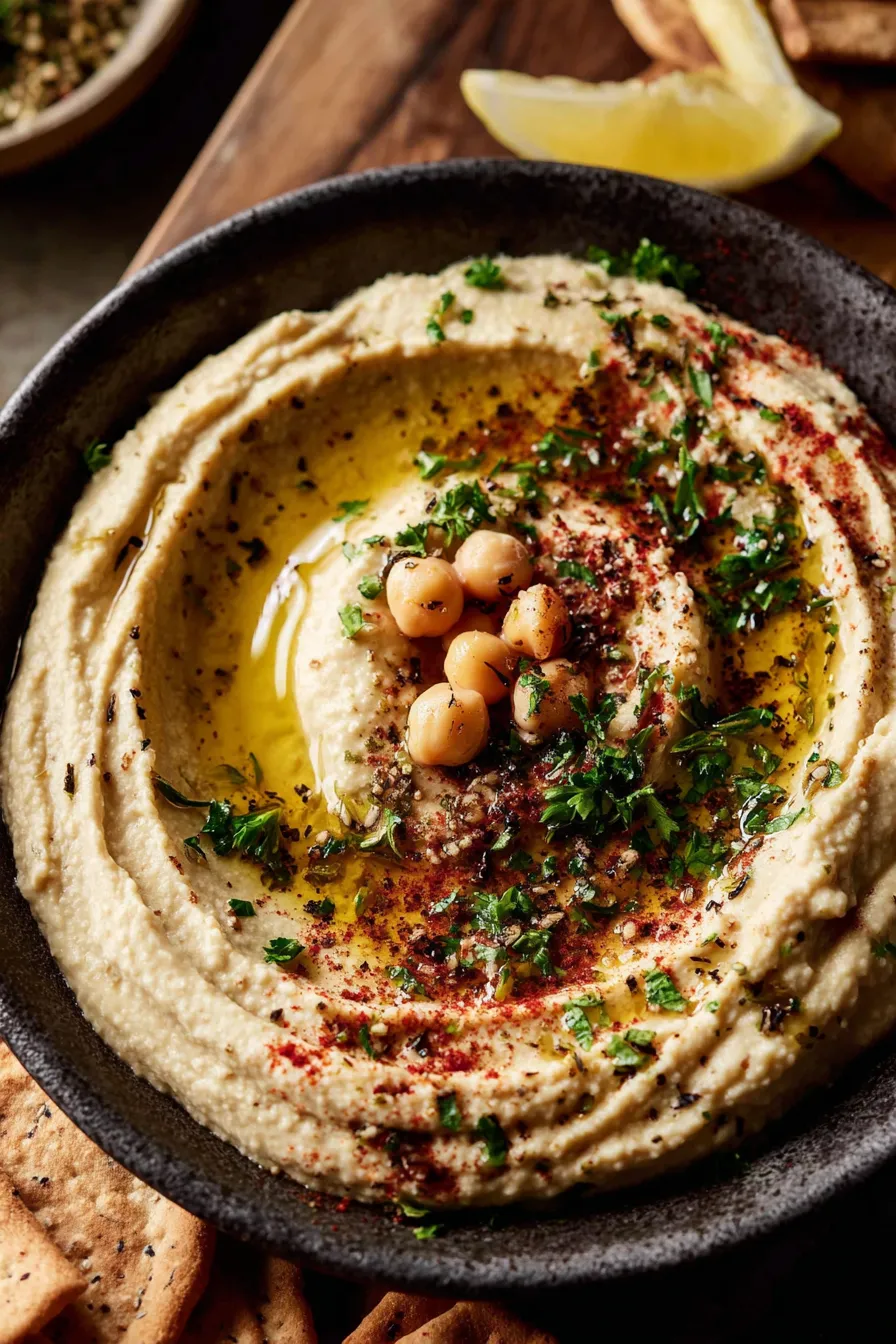
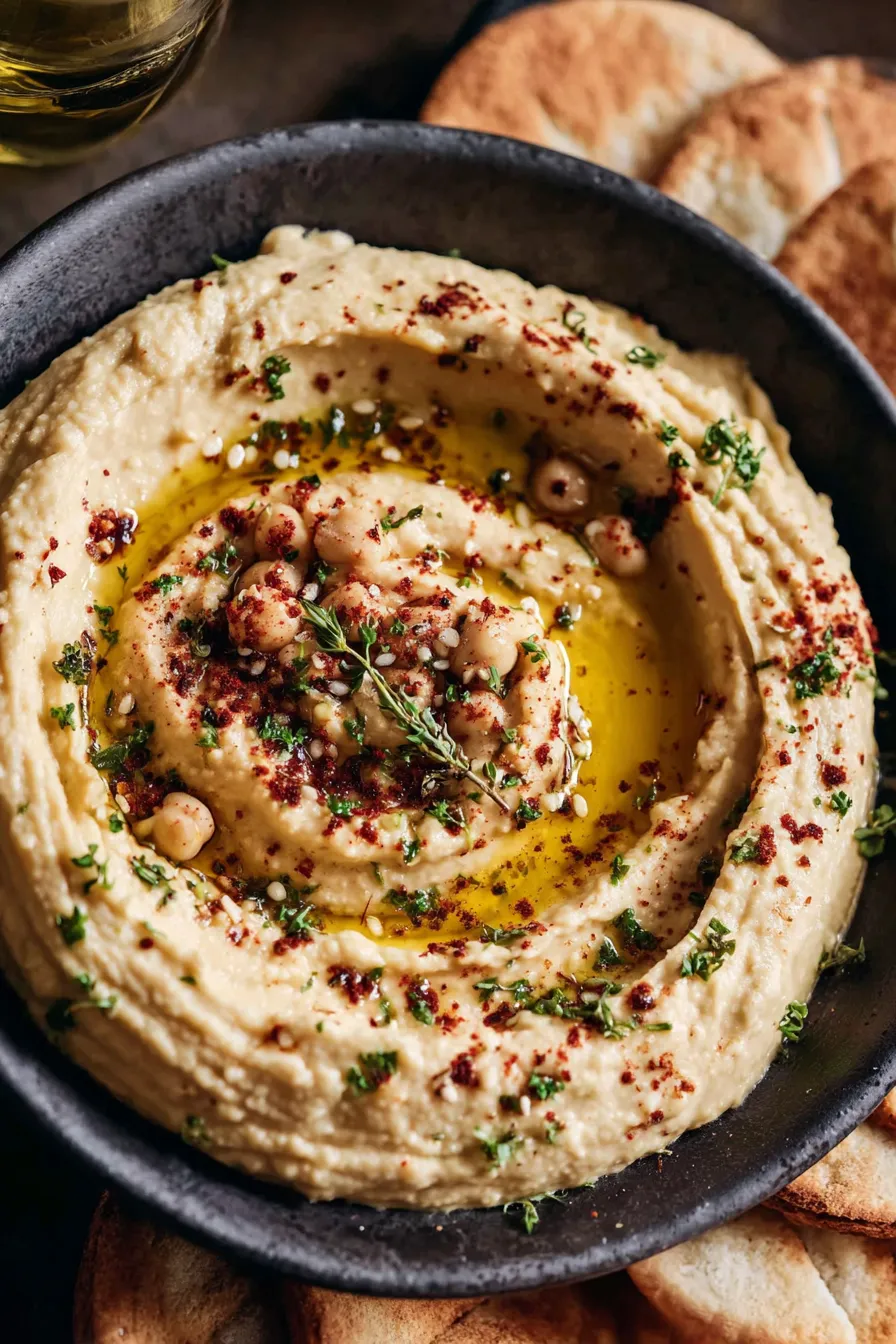
Present the hummus in a shallow bowl with a central well drizzled with high-quality extra virgin olive oil and a sprinkle of smoked paprika or za'atar. Pair with warm pita triangles, crisp cucumber sticks, bell pepper strips, or toasted flatbreads. It also makes a fantastic sandwich spread under roasted vegetables or grilled chicken. For a composed plate, top with roasted chickpeas, chopped parsley, and a few pine nuts for crunch.
Hummus has deep roots in Levantine and Mediterranean cuisines and is a staple across countries such as Lebanon, Israel, Palestine, and Syria. Traditionally, it’s made with simple pantry items—chickpeas, tahini, lemon, and garlic—and served as part of a mezze spread. Over centuries, regional variations emerged: some add yogurt for creaminess, while others include roasted peppers, beets, or herbs. This version stays true to the classic balance of tang, sesame richness, and chickpea body.
In summer, brighten the hummus with an extra tablespoon of lemon and top with fresh herbs such as dill or mint. In cooler months, stir in a tablespoon of olive oil and a pinch of smoked paprika or chipotle for a warmer profile. For holiday gatherings, offer flavored variations alongside the classic: add roasted red pepper, caramelized onion, or a swirl of pesto to create a seasonal assortment that appeals to different palates.
This spread is ideal for meal prep: portion into small containers for lunches or snacks, and pair with pre-cut vegetables or whole-grain crackers. Make a double batch on Sunday to have ready-made toppings for grain bowls during the week. If assembling grain bowls, reserve a spoonful of hummus to act as a creamy binder that adds both flavor and moisture without added dressing.
End with a thought: this creamy hummus is one of those simple pleasures that draws people together — easy to make, generous to share, and endlessly adaptable. Try it once and you’ll likely find it becoming a quiet hero in your routine.
Reserve a few tablespoons of the canning liquid (aquafaba) to use instead of water for extra creaminess and better emulsification.
For the silkiest texture, peel a handful of chickpeas by pinching the skins off before blending — it’s a small step that yields a noticeable difference.
Pulse and scrape: stop the processor every 30 seconds to scrape down the sides so all ingredients emulsify evenly and prevent grainy spots.
Chill the dip for at least 30 minutes before serving to allow the flavors to settle and mellow; acidity and garlic intensity soften with refrigeration.
This nourishing creamy hummus recipe is sure to be a staple in your kitchen. Enjoy every moist, high protein slice — it is perfect for breakfast or as a wholesome snack any time.
This Creamy Hummus recipe makes perfectly juicy, tender, and flavorful steak every time! Serve with potatoes and a side salad for an unforgettable dinner in under 30 minutes.
Open the 15 oz can and pour the chickpeas into a colander. Rinse thoroughly under cold running water to remove canning liquid and improve flavor. Optionally peel a few chickpeas to improve smoothness.
Add chickpeas, tahini, garlic, lemon juice, olive oil, cumin, and salt to a food processor. Pulse several times to break down the chickpeas, scraping down the sides as needed.
Run the processor on medium-high for 1–2 minutes until the mixture looks smooth. Stop to scrape down the bowl and ensure even texture before adding liquid adjustments.
With the processor running, add 3–4 tablespoons water or aquafaba one tablespoon at a time until you reach a creamy, spreadable texture. Pause and taste as you go.
Taste the hummus and add more salt, lemon juice, or garlic as needed. If flavors seem flat, a final squeeze of lemon brightens the dip.
Transfer to a serving bowl, smooth the top, chill for at least 30 minutes, then garnish with a drizzle of olive oil and a sprinkle of smoked paprika before serving.
Last Step: Please leave a rating and comment letting us know how you liked this recipe! This helps our business to thrive and continue providing free, high-quality recipes for you.
Leave a comment & rating below or tag
@whiskia on social media!

Tender, herb-laced meatballs baked to juicy perfection with Parmesan and garlic. Perfect over spaghetti, tucked into subs, or served with favorite dips.

Creamy, silky carbonara with smoky bacon, peppery bite, and perfectly coated spaghetti. Ready in 25 minutes for a comforting, crowd-pleasing dinner.

A rich, silky garlic pasta made in one pan with milk and Parmesan for a fast, comforting dinner that is ready in about 20 minutes.
Leave a comment & rating below or tag @whiskia on social media!
Enjoyed this recipe? Share it with friends and family, and don't forget to leave a review!
This recipe looks amazing! Can't wait to try it.
Comments are stored locally in your browser. Server comments are displayed alongside your local comments.

Join to receive our email series which contains a round-up of some of our quick and easy family favorite recipes.
