
>>

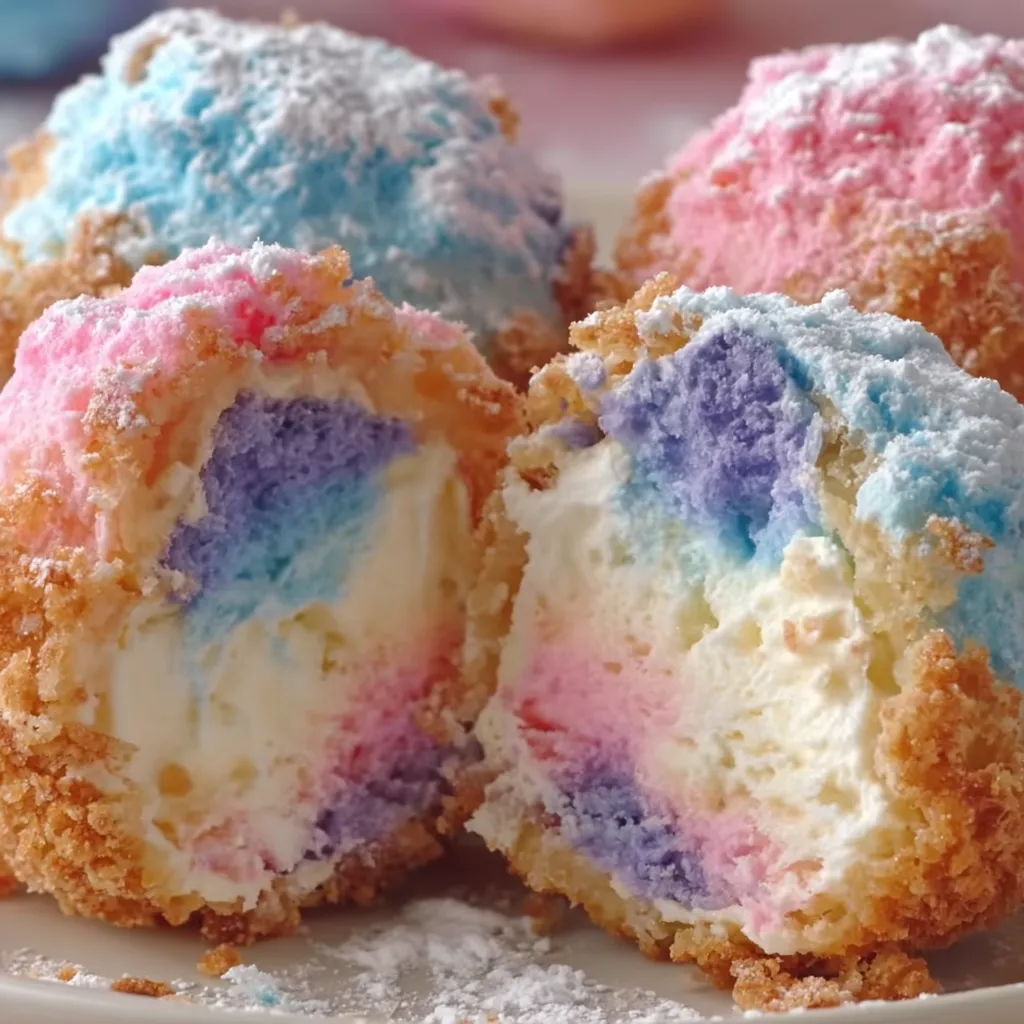
Crunchy golden shells give way to a pillowy cotton candy–scented cream cheese center, finished with a sparkling sugar coating and a tuft of fluffy cotton candy.
This crunchy, sweet treat started as a late-night experiment in my tiny kitchen and quickly became a party favorite. I was inspired by carnival sweets and the comfort of creamy cheesecake, and I wanted something handheld that delivered both the crunch of fried dough and the decadent creaminess of a classic filling. The first batch was made for a neighborhood block party; as soon as the first warm bite was shared, neighbors lined up for more. The contrast between the crisp, golden exterior and the cool, cotton candy-scented interior is playful and comforting at once.
I discovered this combination on a rainy weekend when I had a pack of refrigerated biscuits in the fridge and a craving for something nostalgic. The cotton candy flavor adds an unexpected bright note to a familiar cheesecake base, and rolling chilled filling into the dough is a simple, almost meditative process. These morsels are best eaten hot, right after frying, when the shell is still crisp and the filling has that perfect creamy give. They are celebration food and comfort food at the same time, and they are irresistibly fun to serve.
I remember my sister closing her eyes after the first bite and saying it tasted like childhood birthday parties. A neighbor announced they would start serving these at their next family gathering. Seeing people react to that first warm bite is my favorite part of making them. Simple ingredients, big reactions.
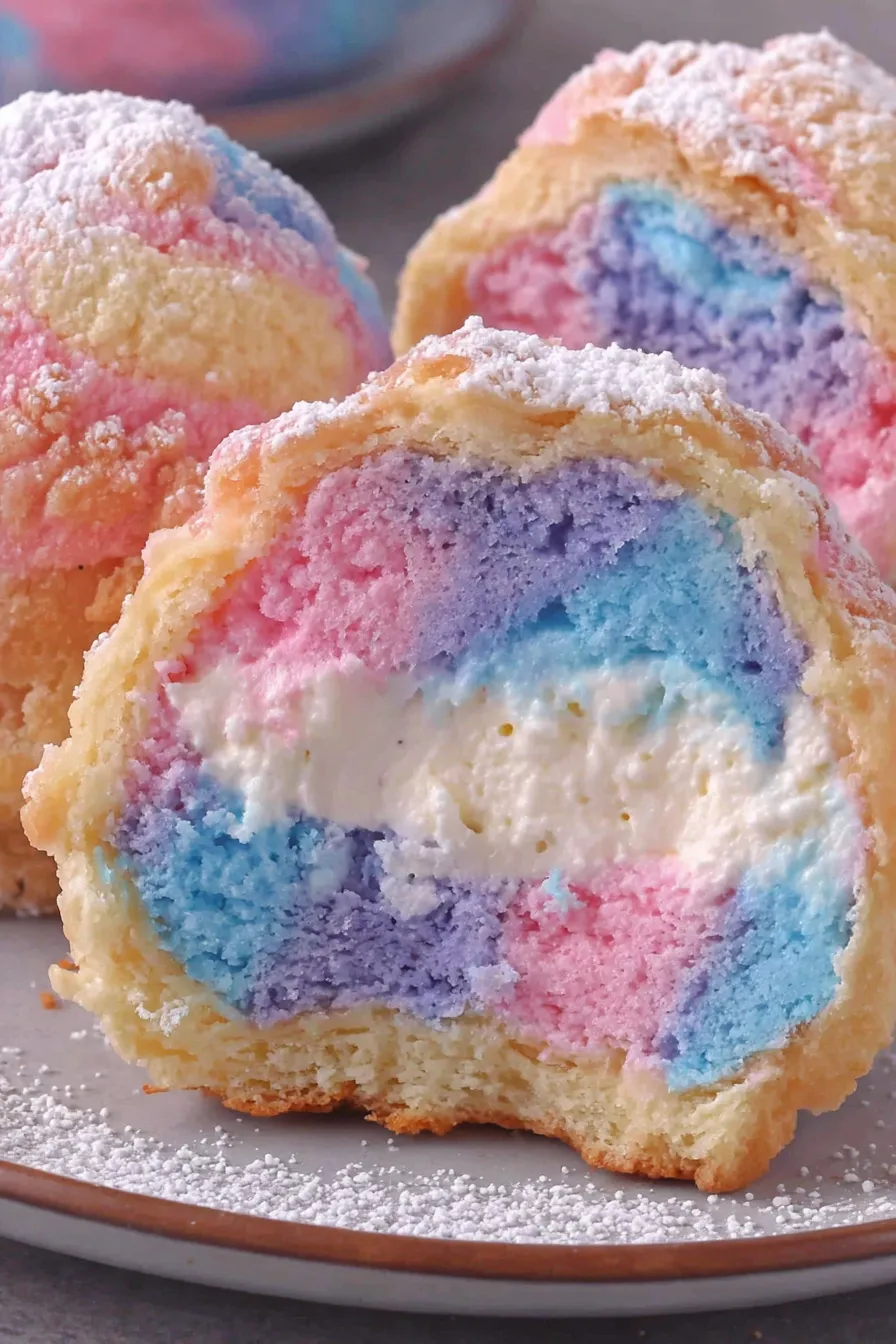
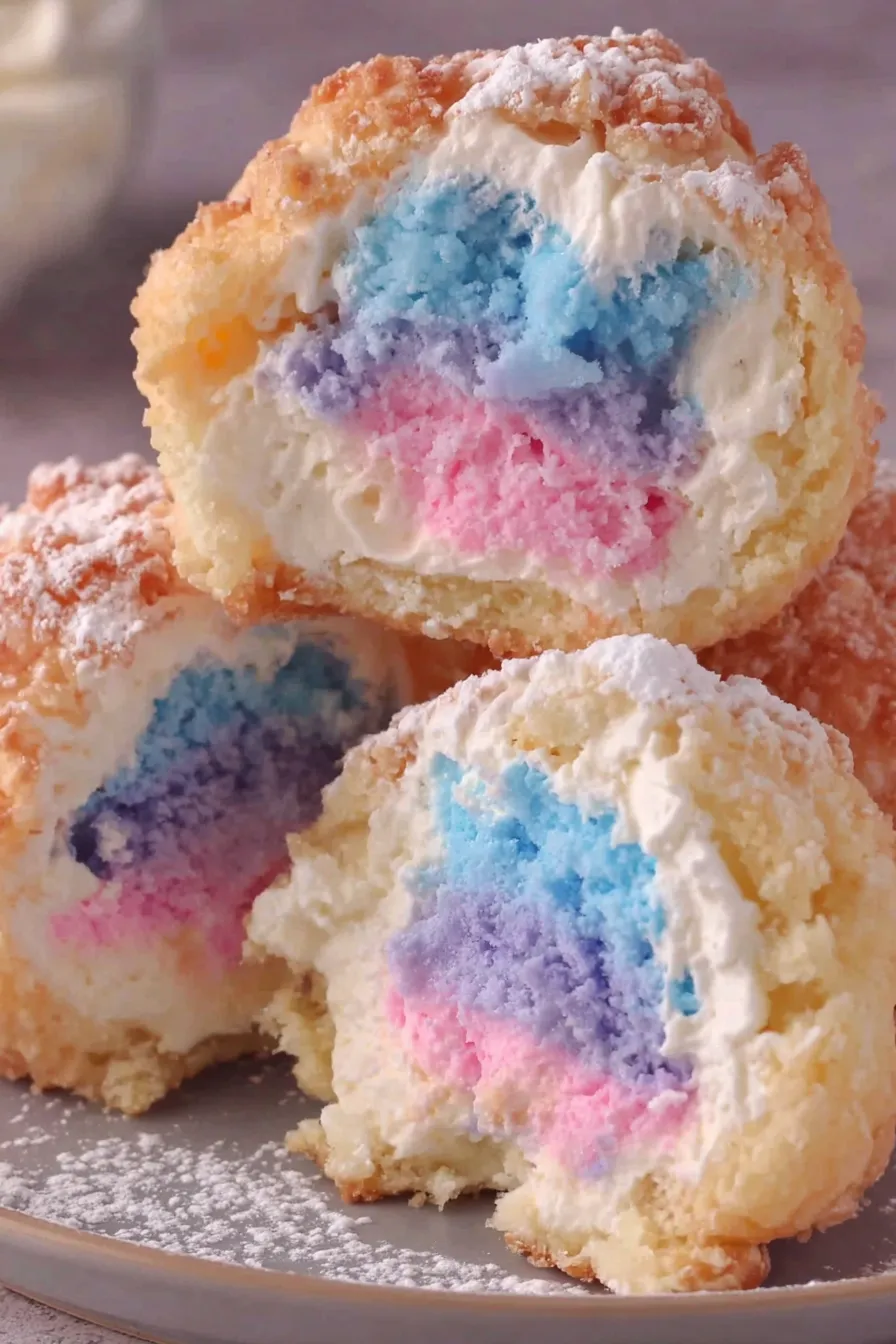
My favorite aspect is watching the reveal when someone bites in for the first time and sees the pale pink, cotton candy-scented center. At a recent birthday party, someone joked that these should come with confetti because they were that celebratory. They transform ordinary ingredients into something whimsical and shareable.
To store, let bombs cool completely and place in an airtight container with paper towels to absorb residual moisture. Refrigerate for up to 24 hours. For longer storage, freeze unfried shaped bombs on a baking sheet until solid, then transfer to a freezer bag for up to 3 months; fry from frozen, adding 30 to 60 seconds to the fry time. Reheat fried bombs in a 350 F oven for 4 to 6 minutes to restore crispness. Avoid microwaving, which will make the shell soggy and overheat the filling.
If you need dairy-free options, use a vegan cream cheese and a non-dairy whipped topping, though texture will be slightly softer and flavor different. For gluten-free, swap refrigerated gluten-free biscuit dough, understanding that baking properties differ and frying time may need adjustment. If you do not have cotton candy flavoring, a few drops of raspberry extract mixed with a touch of pink food coloring can mimic the profile, though the authentic carnival aroma is unique to cotton candy flavoring.
Serve these on a platter lined with wax paper and garnish with small tufts of cotton candy and a dusting of powdered sugar. Pair with a cold milk, a sparkling lemonade, or a vanilla milkshake for a fairground feel. For a grown-up twist, offer a small dish of salted caramel sauce on the side or a dusting of crushed freeze-dried raspberries for visual contrast and tartness against the sweet filling.
Fried, stuffed sweets are common at fairs in the United States, each region adapting with local flavors. These combine two carnival favorites, cotton candy and fried confections, and add cheesecake as a nod to classic American desserts. The result is a modern hybrid that plays on nostalgia and showmanship, perfect for festive gatherings where handheld fare is prized.
In spring and summer, use bright cotton candy flavors and pastel tufts for celebrations and outdoor parties. For winter holidays, replace the cotton candy flavoring with peppermint and finish with crushed candy cane for a seasonal twist. For Halloween, color the sugar coating and cotton candy in seasonal hues and add edible glitter for spooky sparkle.
Make the filling up to two days ahead and keep chilled. Shape the bombs and store them covered in the refrigerator for a few hours before frying, or freeze shaped bombs for later frying. Assemble and fry just before serving for best texture. Keep a tray in a low oven to hold finished bombs warm if you are frying in multiple batches for a crowd.
These are a playful, sharable dessert that invite smiles and second helpings. If you enjoy a little show with your sweets, try making them for your next gathering and watch how quickly they disappear.
Chill the filling for 30 minutes so it holds shape when rolled into balls.
Use a candy or deep-fry thermometer and maintain oil at 350 degrees Fahrenheit for even frying.
Seal seams tightly and chill shaped bombs briefly to prevent leakage during frying.
Work in small batches to avoid overcrowding the oil and temperature drop.
Roll in granulated sugar while warm for a crunchy, sparkling finish.
This nourishing crispy cotton candy cheesecake bombs recipe is sure to be a staple in your kitchen. Enjoy every moist, high protein slice — it is perfect for breakfast or as a wholesome snack any time.
Chill the filling at least 30 minutes to make it easy to roll. If it becomes too firm, let it sit at room temperature for 5 minutes before shaping.
Yes. You can freeze shaped bombs on a sheet until solid and then store in a freezer bag for up to 3 months. Fry from frozen, adding about 30 to 60 seconds to frying time.
Keep oil at 350 F for even browning. If the oil is too cool the dough will absorb oil and become greasy; if too hot the exterior will brown too fast and the filling may overheat.
This Crispy Cotton Candy Cheesecake Bombs recipe makes perfectly juicy, tender, and flavorful steak every time! Serve with potatoes and a side salad for an unforgettable dinner in under 30 minutes.
Beat cream cheese until smooth, add powdered sugar, vanilla and cotton candy flavoring. Fold in whipped topping and heavy cream, then chill 30 minutes.
Dust surface with flour, flatten each biscuit to about 1/8 inch thick, keeping rounds covered to prevent drying.
Scoop 1 to 2 tablespoons chilled filling into rounds, pinch seams tightly to seal and roll smooth. Chill shaped bombs briefly before frying.
Heat oil to 350 degrees Fahrenheit. Fry bombs in batches 1 to 2 minutes per side until golden brown, drain on paper towels.
While warm, roll in granulated sugar, dust with powdered sugar, top with cotton candy and serve immediately.
Last Step: Please leave a rating and comment letting us know how you liked this recipe! This helps our business to thrive and continue providing free, high-quality recipes for you.
Leave a comment & rating below or tag
@whiskia on social media!

Tender, herb-laced meatballs baked to juicy perfection with Parmesan and garlic. Perfect over spaghetti, tucked into subs, or served with favorite dips.

Creamy, silky carbonara with smoky bacon, peppery bite, and perfectly coated spaghetti. Ready in 25 minutes for a comforting, crowd-pleasing dinner.

A rich, silky garlic pasta made in one pan with milk and Parmesan for a fast, comforting dinner that is ready in about 20 minutes.
Leave a comment & rating below or tag @whiskia on social media!
Enjoyed this recipe? Share it with friends and family, and don't forget to leave a review!
This recipe looks amazing! Can't wait to try it.
Comments are stored locally in your browser. Server comments are displayed alongside your local comments.

Join to receive our email series which contains a round-up of some of our quick and easy family favorite recipes.
