
Fantasy Fudge

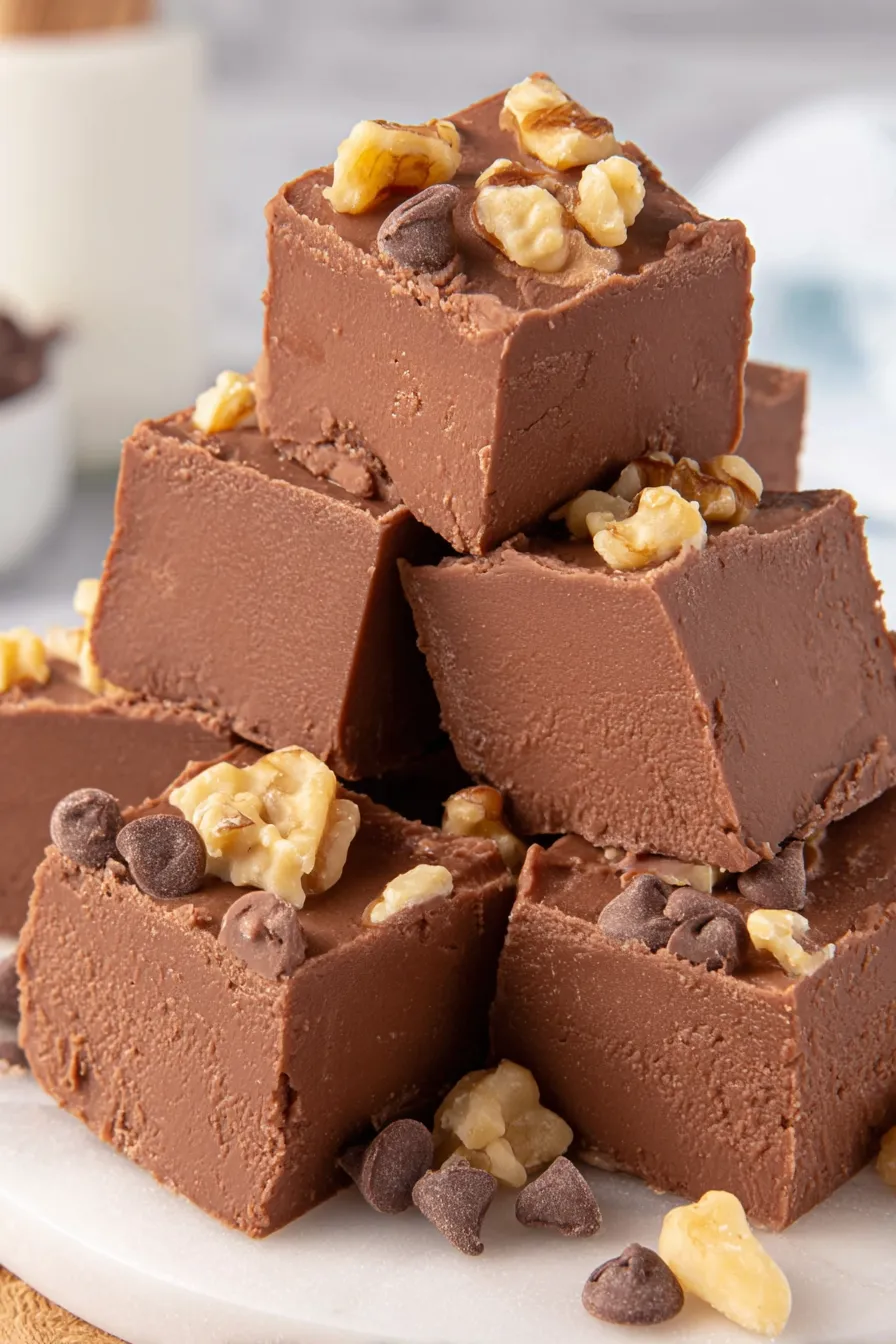
Old-fashioned, creamy fudge studded with walnuts and marshmallow cream — decadent, easy to make, and perfect for gifting or slicing into party-ready squares.
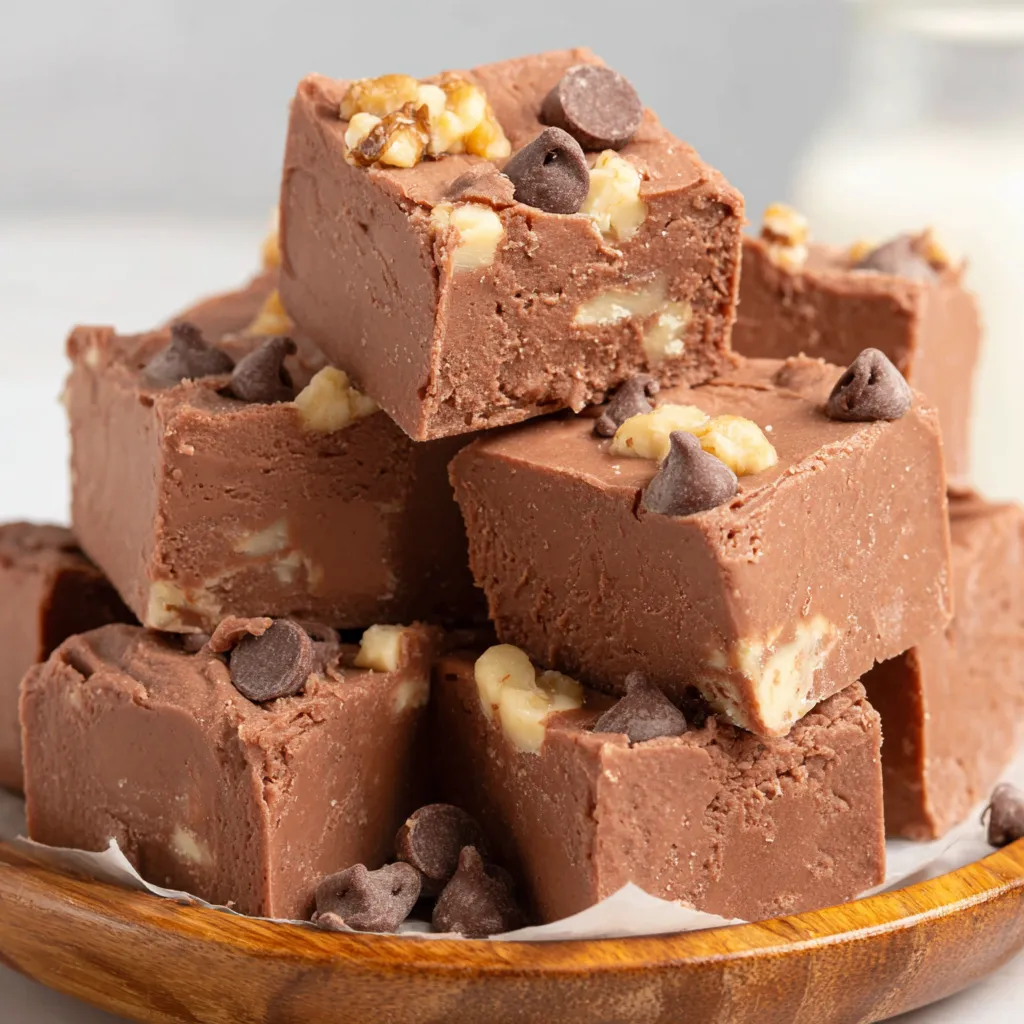
This Fantasy Fudge has been a holiday staple at my house for as long as I can remember. I first learned this version from my grandmother during a busy December when we were making trays of sweets for neighbors; the combination of semi-sweet chocolate, marshmallow creme, and chopped walnuts produced a texture that felt both nostalgic and indulgent. The fudge sets firm enough to slice into tidy little squares but keeps a soft, melt-in-your-mouth center that makes every bite slightly different depending on how you chip it. It’s the kind of confection that sparks conversation: someone will always ask what’s in it, and somebody else will always ask for seconds.
I discovered the precise timing for the hard boil stage after an afternoon of trial and error — too short and the fudge is sticky and weepy; too long and it becomes grainy. The marshmallow creme is the trick that gives this confection a silky sheen and that classic chew without needing to temper chocolate or use candy thermometers. The finished squares are rich yet approachable, balancing intense chocolate with pockets of walnut crunch and a glossy body that keeps well in an airtight tin. This version uses readily available ingredients like Nestle Toll House chips, Jet-Puff marshmallow creme, and Blue Bonnet margarine; they’re pantry staples in my kitchen and make this confection a go-to for last-minute celebrations.
Why You'll Love This Recipe
- Quick to pull together: active prep time is minimal and the sugar mixture only needs 5 minutes at a hard boil to set perfectly.
- Pantry-friendly: uses common grocery items—granulated sugar, semi-sweet chips, evaporated milk, and marshmallow creme—no specialty candy tools required.
- Make-ahead friendly: can be made a day or two in advance and stored in a tin, making it ideal for parties or gift boxes.
- Stable texture: marshmallow creme keeps the finish shiny and smooth while the walnuts add a pleasant contrast in every bite.
- Crowd-pleaser: familiar flavors with a homemade touch; great for family gatherings, cookie exchanges, and holiday trays.
- Slicing is simple: line a 9x13 pan with parchment for easy removal and clean 1x1-inch pieces every time.
In my kitchen the first pan rarely survives more than a day — my kids and neighbors always come by to sample. Over the years I learned to trust a good offset spatula for smoothing and to let the pan cool completely before lifting the fudge out; those small touches make slicing so much cleaner. When I bring this to potlucks, people always ask for the recipe and remember the walnut crunch or the glossy top as signature details.
Ingredients
- Granulated sugar (3 cups): This provides structure and sweetness. Use regular white granulated sugar for the classic flavor; avoid superfine as the grain size helps the confection set correctly.
- Margarine (3/4 cup): I used Blue Bonnet in my trials; margarine keeps the texture slightly softer than butter and helps the candy stay sliceable at room temperature.
- Evaporated milk (2/3 cup): Contributes body and a mild caramel note when heated. Make sure it’s canned evaporated milk, not sweetened condensed milk.
- Semi-sweet chocolate chips (12 ounces): Nestle Toll House chips melt reliably and bring a dependable chocolate intensity; chop quality baking bars if you prefer a slightly less sweet finish.
- Marshmallow creme (7-ounce jar): Jet-Puff is what I used — it gives shine, chewiness, and helps prevent graininess in the finished product.
- Vanilla extract (1 teaspoon): Fresh vanilla rounds out the chocolate and adds warmth; pure extract is best for depth of flavor.
- Chopped walnuts (1 cup): Toast lightly for extra aroma and crunch; pecans can be substituted if you prefer.
Instructions
Prepare the pan: Line a 9x13-inch straight-sided baking pan with parchment paper allowing an overhang on two sides for easy lifting. Grease the parchment lightly so the fudge releases cleanly. This step saves time when slicing and prevents sticking. Combine and heat sugar mixture: In a 3- to 4-quart saucepan over medium heat, add 3 cups granulated sugar, 3/4 cup margarine, and 2/3 cup evaporated milk. Stir constantly to dissolve the sugar and combine the fats with the milk. Bring to a hard (rolling) boil — you should see large bubbles that do not subside when stirred. Once at hard boil, continue cooking for exactly 5 minutes while stirring constantly to avoid scorching; this timing produces a firm set without becoming grainy. If you prefer, use a candy thermometer and hold at 238°F–240°F (soft-ball stage to firm set), but the visual cue of a constant rolling boil works well. Incorporate chocolate: Remove the pan from heat immediately after the 5-minute hard boil. Add 12 ounces semi-sweet chocolate chips and stir until the chips fully melt and the mixture becomes smooth and homogeneous. If pieces remain, return to very low heat briefly while stirring — avoid prolonged heating. Add marshmallow creme and flavor: Stir in the 7-ounce jar marshmallow creme and 1 teaspoon vanilla extract until the gloss is uniform and no marshmallow streaks remain. Fold in 1 cup chopped walnuts at the end to keep them from breaking down and to maintain crunch in each bite. Set and slice: Pour the hot mixture into the prepared 9x13 pan and use a small offset spatula to spread into an even layer. Allow the confection to cool completely at room temperature — several hours is best. When fully set, lift the slab out using the parchment overhang and slice into 1x1-inch squares with a sharp knife. For cleaner edges chill slightly before slicing if desired.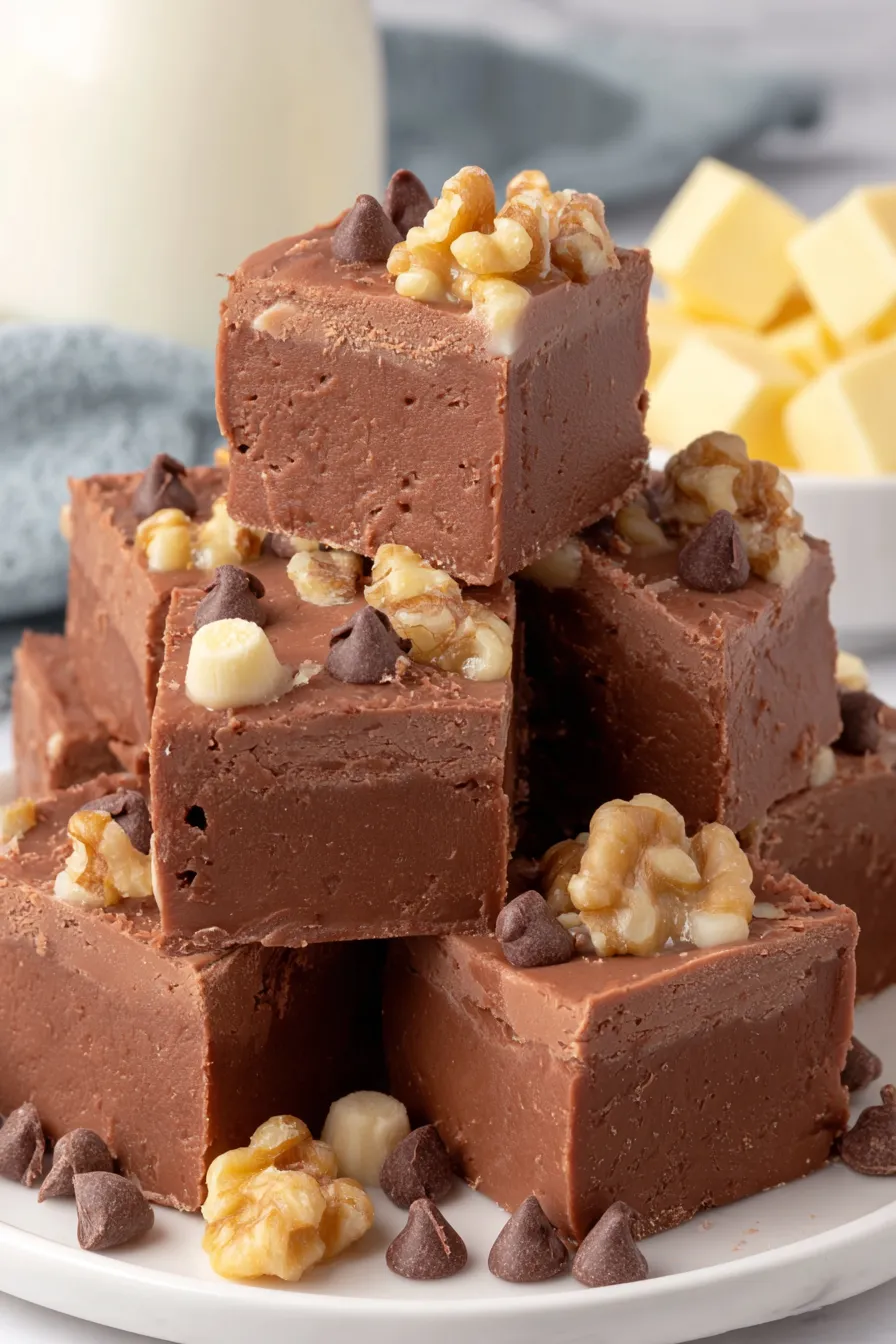
You Must Know
- Store at room temperature in an airtight container for up to 5 days, or refrigerate for 2 weeks; freezes well for 3 months wrapped tightly.
- This confection is calorie-dense and high in sugar — serve in small 1-inch squares for portion control.
- Walnuts provide protein and texture; omit for nut-free needs and replace with toasted seeds or leave plain.
- Marshmallow creme prevents crystallization and yields a glossy, smooth finish compared with recipes that use powdered sugar only.
My favorite part is how the top light catches the glossy surface after it cools — it always looks almost professional even when I’m rushing. This has been the centerpiece of many cookie exchanges and gift tins, and I often double the batch when I know friends are coming over. The balance of semi-sweet chocolate with walnuts gives it a classic profile that people remember.
Storage Tips
Store cooled squares in a single layer separated by parchment in an airtight tin or container to preserve texture. At room temperature the confection keeps best for up to five days; refrigeration will extend shelf life to about two weeks but can slightly firm the pieces, so allow to come to room temperature before serving for the best mouthfeel. For longer storage, wrap individual squares tightly in plastic wrap and place them in a freezer bag; frozen pieces keep well for up to three months. Thaw in the refrigerator overnight or at room temperature for an hour prior to unwrapping.
Ingredient Substitutions
If you need a dairy-free version, swap margarine for a dairy-free stick spread and use dairy-free evaporated milk alternatives; check labels on chocolate chips and marshmallow creme as many contain milk derivatives. For nut-free options, omit walnuts entirely or replace them with toasted sunflower seeds for crunch. To make the confection richer, use chopped baking chocolate instead of chips; for a lighter sweetness, choose a darker semi-sweet or bittersweet chocolate. Adjusting the chocolate type will affect sweetness and firmness slightly.
Serving Suggestions
Serve 1x1-inch squares on decorative plates or lined cookie tins for gifting. Pair with bold coffee or a robust black tea to balance the sweetness, or offer alongside salted nuts and dried fruit on a dessert platter. Garnish with a few whole walnut halves on top before the confection fully sets for a rustic look, or dust with a light sprinkle of cocoa powder for an elegant finish. This confection also makes a sweet addition to a dessert board alongside cookies and candied citrus.
Cultural Background
This style of confection traces its roots to classic American candy-making traditions where boiled sugar and dairy form the base of many confections. The addition of marshmallow creme is a mid-20th century convenience that simplified old-fashioned fudge methods by reducing the need for specialized candy stages. Variations showing up in regional cookbooks reflect local nut preferences — walnuts in some Southern blends, pecans elsewhere — making this treat a nostalgic staple across family gatherings and holiday celebrations in the United States.
Seasonal Adaptations
During the holidays I like to fold in 1/2 teaspoon ground cinnamon and 1/4 teaspoon ground nutmeg for a warm spice profile, or sprinkle crushed peppermint candy over the top before it sets for a festive twist. In summer try substituting half the walnuts for toasted coconut flakes and adding a pinch of sea salt on top. Small changes in inclusions or toppings let this confection adapt to different seasons without changing the core method that makes it reliably glossy and sliceable.
Meal Prep Tips
To prep ahead for parties, make the confection up to two days in advance and store in a cool, dry place. If wrapping for gifting, cut the squares, chill them briefly to firm, and then wrap each piece individually in parchment or wax paper for a tidy presentation. When producing multiple pans, prepare the sugar mixture in a heavy-bottomed saucepan to ensure even heating and reduce the risk of scorching; also have your chips, marshmallow creme, and vanilla measured and ready so you can work quickly once the mixture reaches hard boil.
There’s nothing quite like pulling a pan from the counter, lifting it out on the parchment overhang, and making that first clean slice. Share these squares with friends and family, experiment with small substitutions, and make the method your own — I promise you’ll be asked for the recipe before the end of the event.
Pro Tips
Stir constantly during the hard boil stage to prevent graininess and scorching.
Line the pan with parchment and leave an overhang to lift the slab cleanly for slicing.
Use an offset spatula to spread the mixture for an even thickness and cleaner slices.
Toast walnuts briefly to enhance aroma, then cool before folding into the hot mixture.
This nourishing fantasy fudge recipe is sure to be a staple in your kitchen. Enjoy every moist, high protein slice — it is perfect for breakfast or as a wholesome snack any time.
Tags
Fantasy Fudge
This Fantasy Fudge recipe makes perfectly juicy, tender, and flavorful steak every time! Serve with potatoes and a side salad for an unforgettable dinner in under 30 minutes.
Instructions
Prepare the pan
Line a 9x13-inch straight-sided pan with parchment paper, leaving an overhang for easy removal. Lightly grease the parchment if desired.
Combine ingredients and bring to hard boil
In a 3- to 4-quart saucepan over medium heat, combine 3 cups sugar, 3/4 cup margarine, and 2/3 cup evaporated milk. Stir constantly until mixture reaches a rolling hard boil.
Hold at hard boil for 5 minutes
Once at a hard boil, continue cooking for exactly 5 minutes while stirring constantly to avoid burning and ensure proper setting characteristics.
Add chocolate and melt
Remove from heat and add 12 ounces semi-sweet chocolate chips, stirring until fully melted and the mixture is smooth.
Finish with marshmallow creme, vanilla, and nuts
Stir in the 7-ounce jar marshmallow creme and 1 teaspoon vanilla until uniform. Fold in 1 cup chopped walnuts.
Pour, cool, and slice
Pour into the prepared pan, smooth into an even layer, cool completely, then lift out using the parchment overhang and slice into 1x1-inch squares.
Last Step: Please leave a rating and comment letting us know how you liked this recipe! This helps our business to thrive and continue providing free, high-quality recipes for you.
Nutrition
Did You Make This?
Leave a comment & rating below or tag
@whiskia on social media!
Categories:
You might also like...

Savory Baked Meatballs
Tender, herb-laced meatballs baked to juicy perfection with Parmesan and garlic. Perfect over spaghetti, tucked into subs, or served with favorite dips.

Classic Bacon Carbonara Pasta
Creamy, silky carbonara with smoky bacon, peppery bite, and perfectly coated spaghetti. Ready in 25 minutes for a comforting, crowd-pleasing dinner.

One Pot Creamy Garlic Pasta
A rich, silky garlic pasta made in one pan with milk and Parmesan for a fast, comforting dinner that is ready in about 20 minutes.
Did You Make This?
Leave a comment & rating below or tag @whiskia on social media!
Rate This Recipe
Share This Recipe
Enjoyed this recipe? Share it with friends and family, and don't forget to leave a review!
Comments (1)
This recipe looks amazing! Can't wait to try it.
Comments are stored locally in your browser. Server comments are displayed alongside your local comments.

Hi, I'm Victoria!
What's Popular

30-Minute Meals!
Join to receive our email series which contains a round-up of some of our quick and easy family favorite recipes.