
>>

A blissful hybrid of brownie and cookie — fudgy, chewy, and crackly on top. Simple technique, pantry-friendly ingredients, and utterly addictive.
This hybrid of brownie and cookie — a browkie or brookie — has a permanent place in my baking rotation. I first made these on a rainy Saturday when the pantry offered little more than chocolate, sugar, and a stubborn jar of raw sugar I wanted to use up. The result was an instant hit: a crackly top like a brownie, a chewy, slightly caramelized edge from the Demerara, and an indulgent fudgy center from the melted dark chocolate. My family gathered in the kitchen while they were still warm and the feedback was unanimous: make them again and make lots.
What makes these particularly special is the contrast of textures — a lift from whisked eggs that gives a lightness in the crumb while the concentrated chocolate keeps the middle dense and fudgy. I love that they are forgiving: the batter can be scooped with a tablespoon for generously sized bites or a teaspoon for dainty treats. They are equally welcome as an afternoon pick-me-up with coffee or a last-minute dessert before guests arrive. I usually make a double batch when entertaining because they disappear fast.
From my first test to the version I now bake for friends, the crowd-pleasing nature of these has surprised me. They’re often requested at potlucks and class parties because they travel well and keep their fudgy texture after cooling. My sister called them “dangerously good” after stealing three straight from the cooling rack, and that’s high praise in our house.
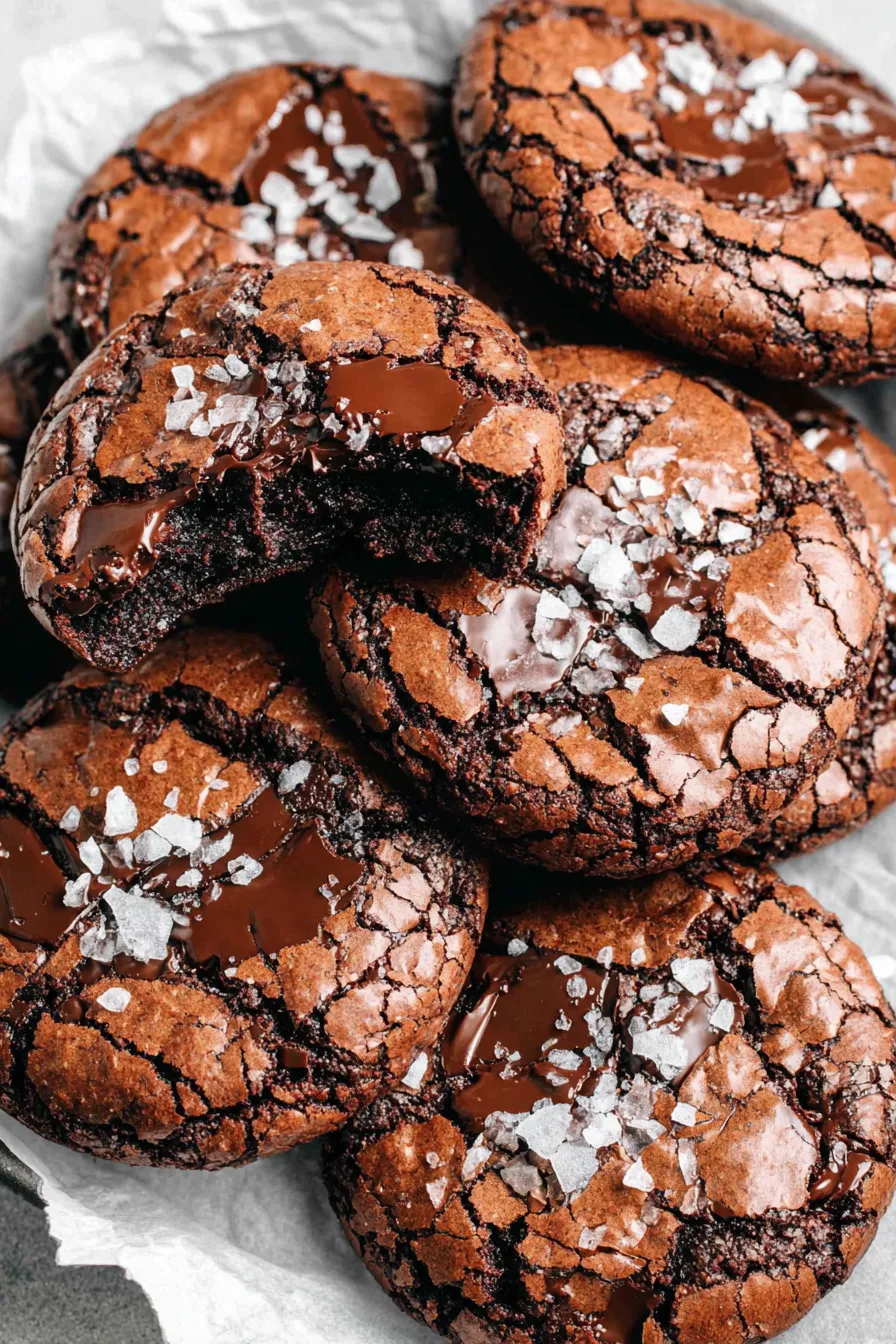
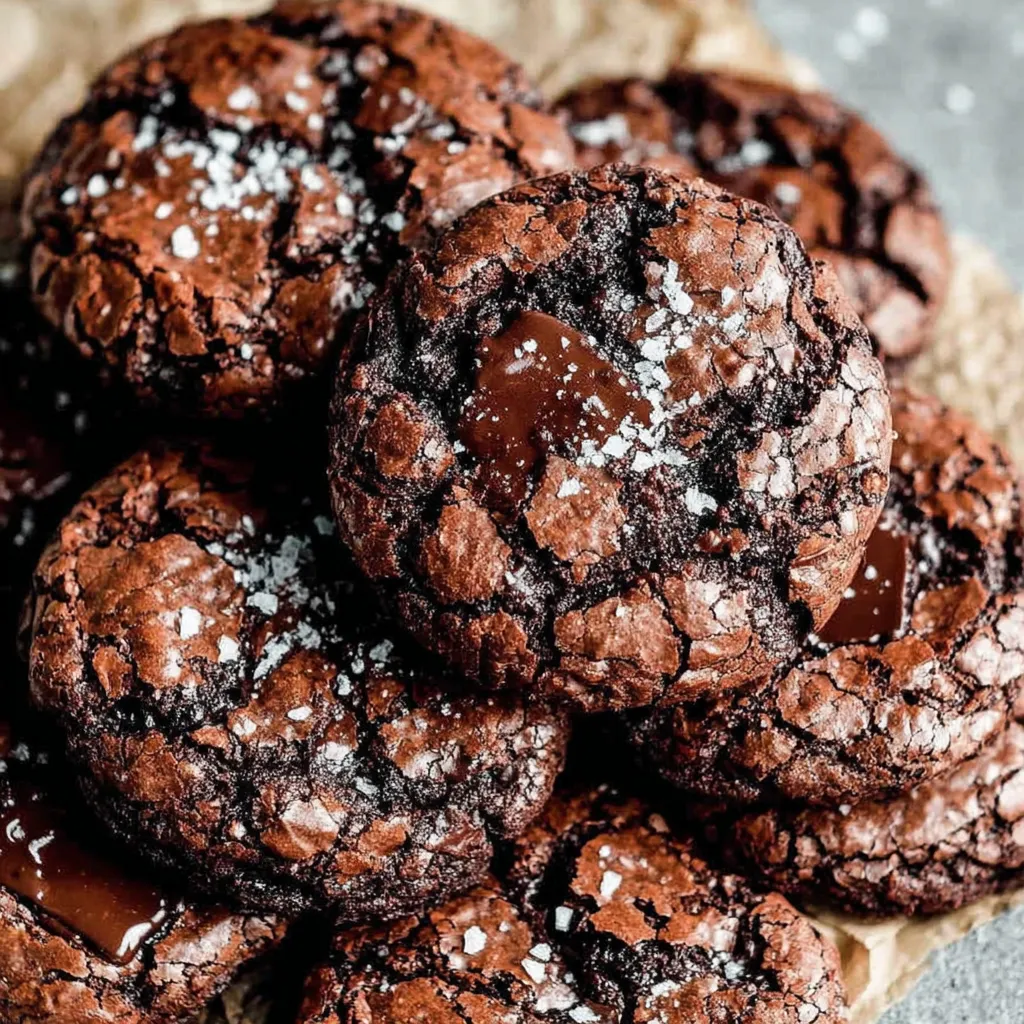
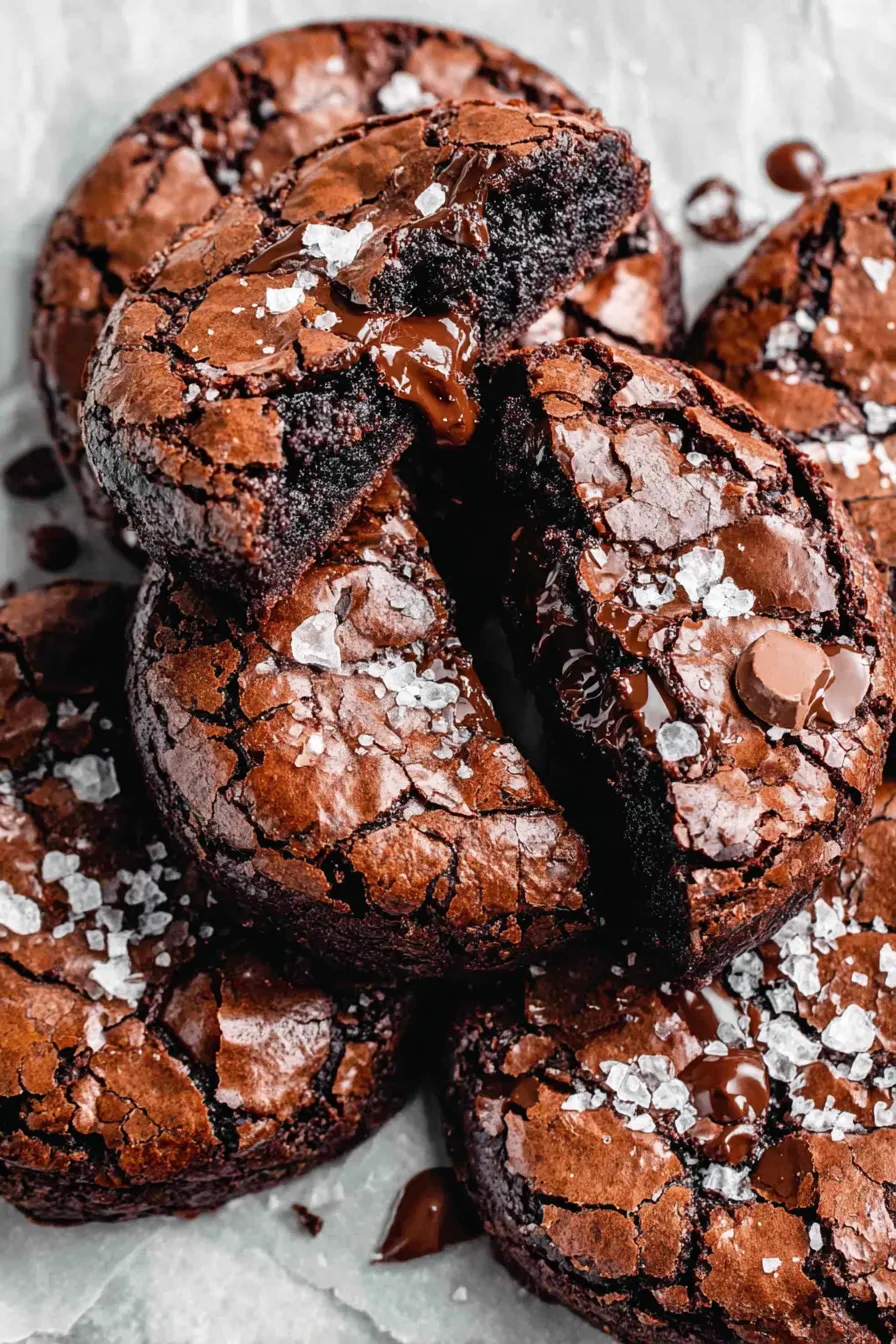
My favorite part is watching the tops develop that glossy, crackled sheen — it’s a small baking joy that signals success. When I make these for gatherings I often finish with a tiny pinch of flaky salt on each one; the salt punctuates the chocolate and makes the experience decidedly more grown-up. My kids love them warm with a spoon of ice cream on top, while friends often request them plain and packed in bags to take home.
Store cooled pieces in an airtight container layered with parchment to prevent sticking. At room temperature they remain fresh for about 48 hours; refrigeration extends life to 4–5 days but can slightly firm the texture — bring to room temperature before serving to restore chewiness. For longer-term storage, freeze individually wrapped brookies in a single layer on a tray, then transfer to a sealed freezer bag; they will keep for up to three months. To reheat, thaw at room temperature and warm in a 300°F oven for 5–8 minutes for that just-baked feel.
If you don’t have Demerara, use light brown sugar for similar moisture and toffee notes; substitute one-to-one. For a dairy-free version, replace butter with a plant-based block butter and choose dairy-free chocolate; expect a slightly different mouthfeel. Gluten-free flour blends can be used cup-for-cup but choose a blend with xanthan gum for structure. If you prefer a sweeter brookie, use milk chocolate chips in place of dark chips, or add a tablespoon of maple syrup to intensify flavor and keep them moist.
Serve warm with a scoop of vanilla or salted caramel ice cream for a decadent dessert, or pair with espresso for an afternoon pick-me-up. For a more elevated presentation, scatter flaked sea salt and a few edible gold flakes or drizzle warm caramel across the tops. These also work well plated alongside fresh berries or a dollop of crème fraîche to cut richness. For casual gatherings, stack them on a rustic board with coffee and bright fruit for contrast.
The brookie is a playful American-born hybrid that blends the dense indulgence of brownies with the crisp-chewy charm of cookies. It evolved from the desire to combine two beloved sweets into a single treat and has seen many regional variations — from fudgier, cake-like versions to cookie-heavy renditions studded with nuts or white chocolate. Its popularity soared with home baking communities sharing creative spin-offs, and today it’s a beloved staple at bake sales and home gatherings across North America.
In winter, stir in 1/2 teaspoon cinnamon and a pinch of nutmeg to the dry mix for warming spice. For autumn, fold in 1/3 cup chopped toasted pecans and a tablespoon of maple syrup. Spring and summer benefit from bright additions: swap half the chocolate chips for chopped strawberries or raspberries folded in post-bake as a fresh garnish. Holiday versions can include peppermint chips and a drizzle of white chocolate for festive contrast.
To make ahead, prepare batter and portion onto a tray lined with parchment, then freeze the scoops. When frozen solid, transfer mounds to a bag; bake from frozen adding 1–2 minutes to baking time. For grab-and-go breakfasts, pack a brookie with yogurt and fruit in a lunchbox. If you’re prepping for an event, bake a day ahead and store in airtight tins layered with parchment — they retain texture and flavor beautifully.
These brookies are a reliable comfort-bake: straightforward, forgiving, and endlessly adaptable. Whether you serve them warm from the oven or gift them wrapped in parchment, they bring that familiar chocolatey comfort everyone loves. Try a batch this week and tweak the mix-ins until they become your signature treat.
Whisk the eggs and sugars until light and ribboning to get a glossy, crackly top.
Remove from the oven when centers look slightly underdone; they’ll set as they cool.
Chill scooped dough to reduce spread and concentrate flavor.
Use quality chocolate for the melted base; it’s the primary flavor driver.
This nourishing fudgy chewy browkies (brookies) recipe is sure to be a staple in your kitchen. Enjoy every moist, high protein slice — it is perfect for breakfast or as a wholesome snack any time.
This Fudgy Chewy Browkies (Brookies) recipe makes perfectly juicy, tender, and flavorful steak every time! Serve with potatoes and a side salad for an unforgettable dinner in under 30 minutes.
Preheat to 320°F for convection/fan ovens or 340°F for conventional ovens. Line a baking sheet with parchment paper and ready a tablespoon scoop.
Combine chopped dark chocolate and butter in a heatproof bowl set over simmering water, ensuring the bowl doesn’t touch the water. Stir until smooth and glossy, about 3–5 minutes, then stir in vanilla and let cool slightly.
In a separate bowl, beat the eggs with granulated and Demerara sugars on high speed until very light and ribboning, approximately 4–6 minutes. This step is key for a glossy crackly top.
Sift together flour, cocoa, baking powder, and salt. Fold in the chocolate chips to distribute evenly and remove lumps.
Gently fold the warm melted chocolate into the whipped egg mixture, keeping as much air as possible. Mix until just combined and glossy.
Carefully fold the dry mix into the wet mixture until no streaks of flour remain. Stop mixing as soon as combined to preserve texture.
Spoon tablespoon-sized mounds onto parchment, leaving space for spread. Bake 12–14 minutes until tops are set and crackly but centers still slightly soft. Cool 8–10 minutes on the tray, then transfer to a rack.
Last Step: Please leave a rating and comment letting us know how you liked this recipe! This helps our business to thrive and continue providing free, high-quality recipes for you.
Leave a comment & rating below or tag
@whiskia on social media!

Tender, herb-laced meatballs baked to juicy perfection with Parmesan and garlic. Perfect over spaghetti, tucked into subs, or served with favorite dips.

Creamy, silky carbonara with smoky bacon, peppery bite, and perfectly coated spaghetti. Ready in 25 minutes for a comforting, crowd-pleasing dinner.

A rich, silky garlic pasta made in one pan with milk and Parmesan for a fast, comforting dinner that is ready in about 20 minutes.
Leave a comment & rating below or tag @whiskia on social media!
Enjoyed this recipe? Share it with friends and family, and don't forget to leave a review!
This recipe looks amazing! Can't wait to try it.
Comments are stored locally in your browser. Server comments are displayed alongside your local comments.

Join to receive our email series which contains a round-up of some of our quick and easy family favorite recipes.
