
Homemade Hard Candy

Classic hard candy made from sugar, corn syrup, and flavoring — bright, crystalline, and perfect for gifting or snacking.
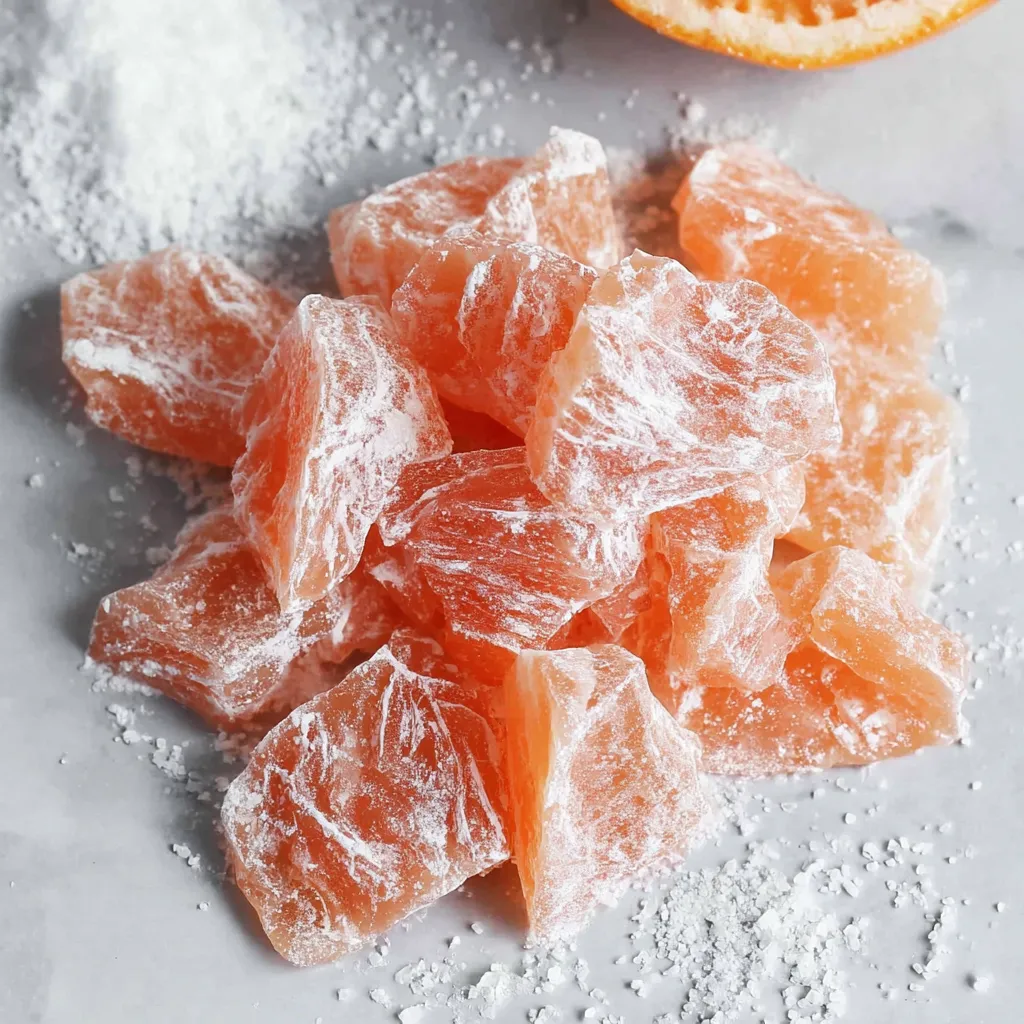
This homemade hard candy has been a small holiday tradition in my kitchen for years. I first learned the technique during a chilly December when my pantry was full of sugar and my curiosity outpaced my patience. The result was a batch of translucent, glass-like pieces flavored with orange extract that disappeared faster than I could wrap them. What makes this particular method special is its simplicity: three pantry staples and a handful of confectioners’ sugar create candy that snaps with a satisfying brittle texture and carries pure, concentrated flavor. It’s one of those projects that feels technical and indulgent at the same time, and the hands-on nature of pouring and cutting the hot syrup is oddly meditative.
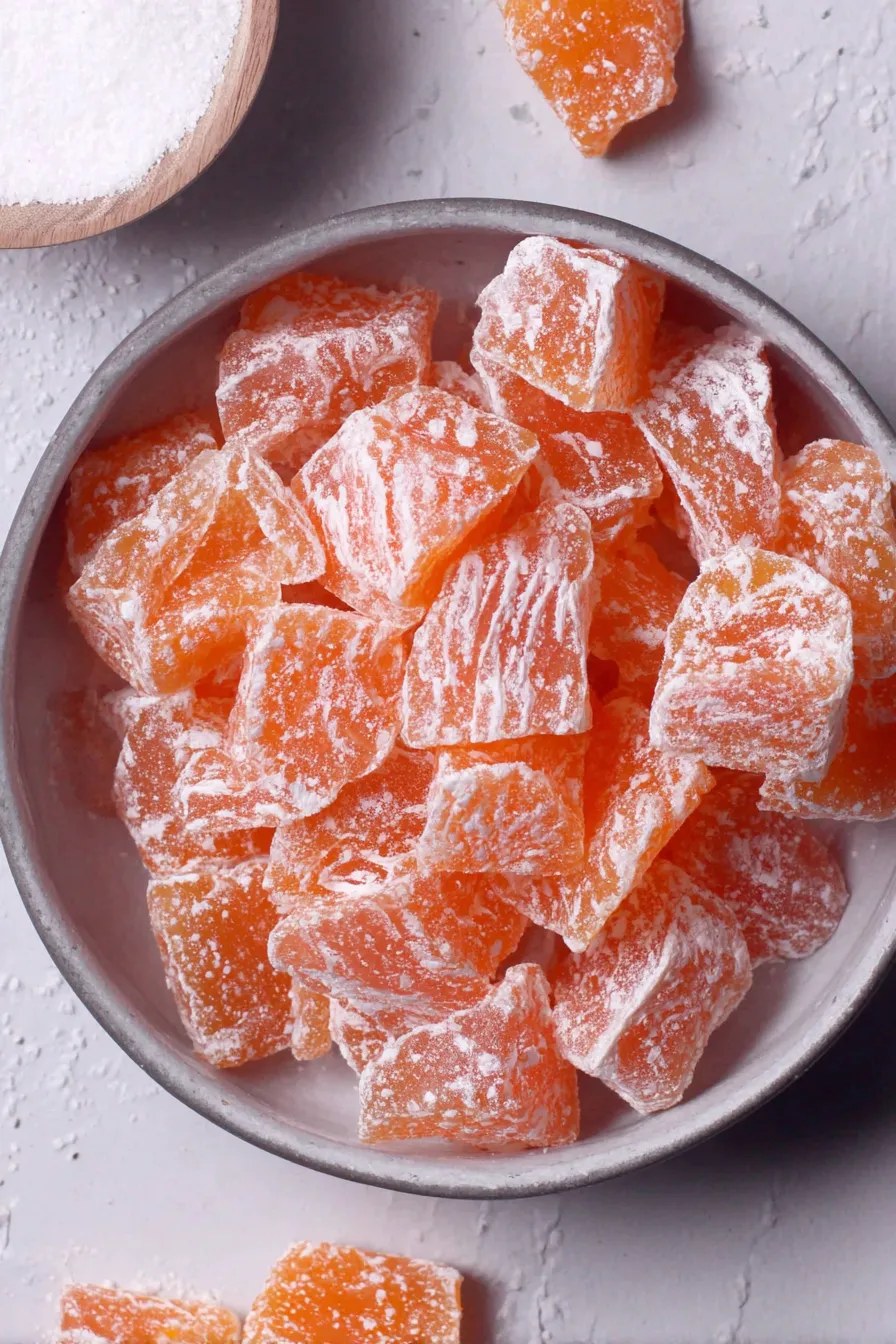
Every time I make this candy, the house fills with warm, sweet aroma that carries memories of childhood treats and neighborhood confectioners. The texture is crisp and clean — no chew, no graininess — and the flavor options are endless: anise for a classic twist, lemon for a bright zing, or orange for nostalgic citrus warmth. I love making a double batch and packaging pieces in small bags to give to friends; they always ask for the recipe. Read on for a detailed, step-by-step approach, plus storage tips, variations, and troubleshooting notes so you can feel confident making these at home.
Why You'll Love This Recipe
- This method yields clear, glassy pieces that snap cleanly because the syrup is cooked to the hard-crack stage (300°F) — perfect for classic candies.
- Ready in under an hour from start to finish, it uses pantry staples: granulated sugar, light corn syrup, and water, with confectioners’ sugar for finishing.
- Highly customizable: swap extracts or color the syrup for festive hues, and cut sizes to suit snacking or gift bags.
- Make-ahead friendly — these keep well in a covered container for weeks if stored correctly, making them ideal for gifts or party favors.
- Minimal equipment required: heavy saucepan, candy thermometer, and a baking pan lined with confectioners’ sugar are all you need.
- Kid-friendly presentation: let little helpers shake the pan of confectioners’ sugar (away from the hot syrup) to coat pieces once cooled.
I’ve given these to neighbors, taken them to potlucks, and wrapped them up for teachers. The bright candies always disappear first, and making them has become one of those small rituals that mark the season for me. Family members love the orange version best, while friends appreciate the more sophisticated anise flavor.
Ingredients
- Granulated sugar (2 cups): Use regular white sugar for the cleanest flavor and best clarity. Avoid raw or unrefined sugars — their molasses content will cloud the syrup and affect the final texture.
- Light corn syrup (3/4 cup): Prevents premature crystallization and helps the candy set with a smooth, glassy finish. Karo Light is a reliable brand; glucose syrup can be substituted but results vary slightly.
- Water (1/2 cup): Just enough to dissolve the sugar at the start; it evaporates as the mixture cooks to the hard-crack stage.
- Confectioners’ sugar (5 to 6 cups): Used to bed the candy and coat the surface so pieces don’t stick. Sifted confectioners’ sugar with cornstarch (standard commercially) works best.
- Extract (1 to 2 teaspoons): Choose anise, lemon, or orange extract depending on the flavor profile you want. Use pure extract for bold, authentic flavor; artificial extracts will work but may be sharper.
- Liquid food coloring (optional): Red, yellow, or orange drops give festive color. Gel colors can be concentrated — use sparingly to avoid altering consistency.
Instructions
Prepare the Pan: Choose a 15 x 10 x 1-inch rimmed baking pan and pour 5 to 6 cups of confectioners’ sugar so it forms a 1/2-inch layer. Use the rounded handle of a wooden spoon to press a continuous curved indentation into the sugar — this becomes your pouring channel and guides cutting later. Set the pan aside near the stove but away from drafts; a still surface helps the candy set evenly. Combine Candy Ingredients: In a large, heavy-bottomed saucepan combine 2 cups granulated sugar, 3/4 cup light corn syrup, and 1/2 cup water. Cook over medium heat, stirring only until the sugar dissolves. Switch to a heatproof spatula briefly if needed, then stop stirring to prevent introducing crystals. Dissolve Sugar Crystals: Once the mixture reaches a rolling boil, cover the pan and let it cook, covered, for 3 minutes without stirring. This step ensures stray undissolved crystals on the sides melt and reduces the chance of unwanted crystallization later. Cook to Hard-Crack Stage: Uncover and increase heat to medium-high. Clip a digital candy thermometer to the side and cook, without stirring, until it reaches 300°F (the hard-crack stage). This can take 8–12 minutes depending on your stove. Watch for color change — the syrup should be a pale amber when done. Add Flavor and Color: Remove the saucepan from heat immediately when the thermometer reads 300°F. Wait a few seconds for the bubbling to settle, then stir in 1 to 2 teaspoons of your chosen extract and a few drops of liquid coloring if using; mix briskly to distribute evenly. Pour into the Mold: Pour the hot syrup carefully into a glass measuring cup with a pouring spout for control. Working quickly, pour the syrup into the curved indentation in the confectioners’ sugar bed. The sugar will help the syrup hold shape and cool more evenly. Coat and Cool: Immediately dust the poured surface generously with more confectioners’ sugar to prevent surface stickiness. Allow the candy to cool at room temperature until firm, about 30–60 minutes depending on room temperature. Cut and Store: Once completely cooled and hard, use sharp scissors to cut along the indentation into bite-sized pieces. Brush off excess confectioners’ sugar and store pieces in a tightly covered container at room temperature. Keep away from humidity to preserve the crisp texture.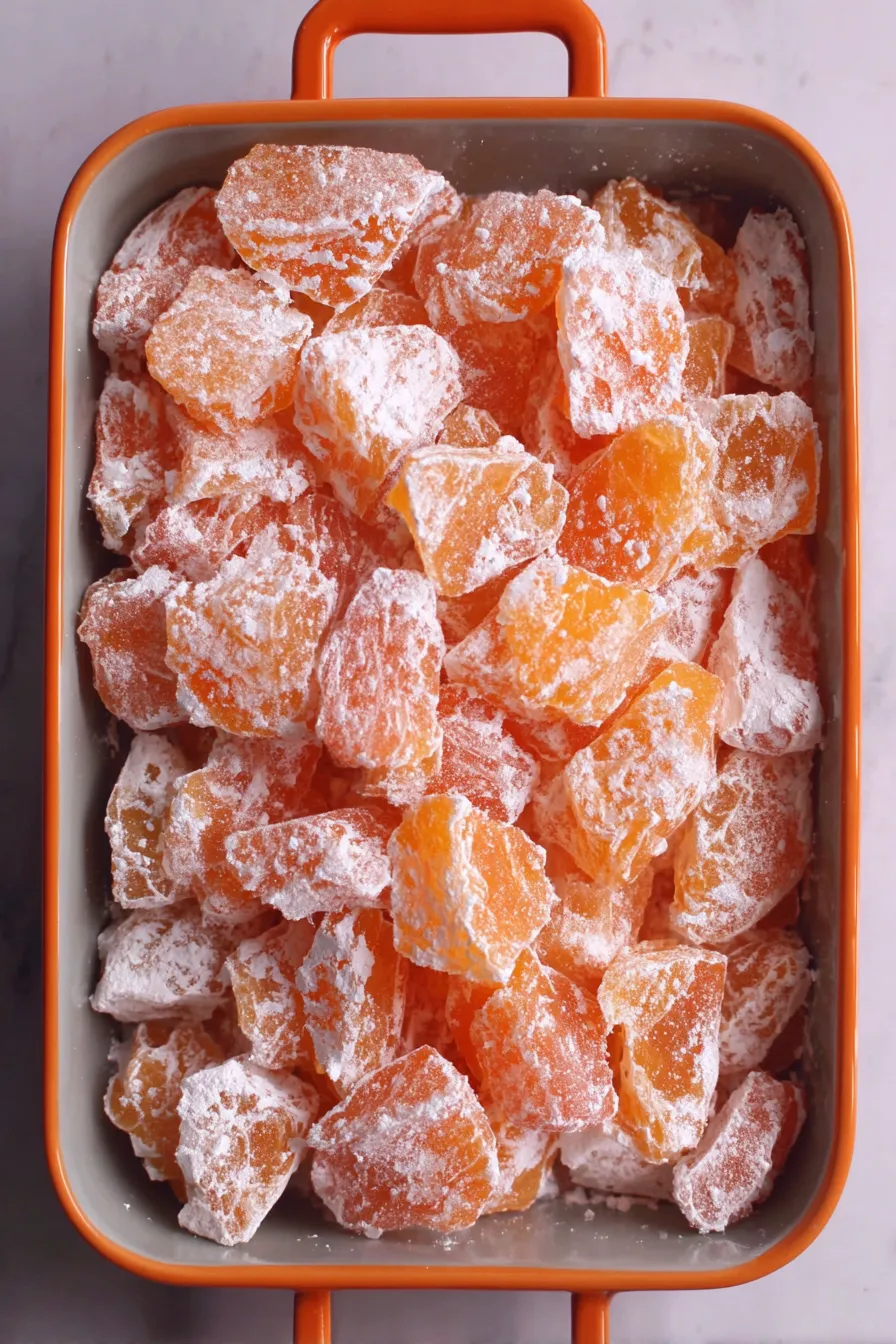
You Must Know
- Cooking to 300°F is essential: anything lower yields softer candy; higher risks burning and off-flavors. Use a reliable candy thermometer.
- Work safely: the syrup is extremely hot and will cause severe burns. Use long-handled tools and keep children at a safe distance.
- These pieces keep well stored in a cool, dry container for up to 2–3 weeks; humidity will make them sticky quickly.
- Confectioners’ sugar prevents sticking but can cake if exposed to moisture; store with a dry desiccant packet if you live in a humid climate.
My favorite thing about this candy is how customizable it is: a single base allows you to explore seasonal flavors, from spiced anise for winter gifts to bright citrus for summer parties. Making a batch always sparks conversations — people love watching the syrup transform and are amazed at the glossy final pieces.
Storage Tips
Store cooled pieces in a shallow, airtight container lined with parchment to prevent scratches and moisture exposure. Keep the container in a cool, dry place — not the refrigerator, as condensation can make the candy tacky. If you plan to keep them longer than a week, pack small batches in wax paper or cellophane bags with a twist tie; these are perfect for gifting. For longer storage, keep them in an airtight tin with a silica packet to control humidity. Check for stickiness before serving; if pieces have become slightly tacky, toss them briefly in sifted confectioners’ sugar and shake off excess.
Ingredient Substitutions
If you don’t have light corn syrup, you can try a small quantity of golden corn syrup or glucose syrup, but expect subtle differences in clarity and snap. Avoid using honey or maple syrup — their flavor and moisture content alter setting and taste. For flavor, concentrated oil-based extracts can be very potent; start with 1/2 teaspoon and add more if needed. Gel food coloring works but use a toothpick to add tiny amounts since gels are more concentrated. For a naturally colored version, consider using small amounts of reduced fruit juice, but note that additional water content can affect the final set and may require a longer cooking time.
Serving Suggestions
Serve hard candy in small glass bowls for parties, tuck pieces into cellophane bags for hostess gifts, or include them in holiday candy dishes. Citrusy pieces pair well with shortbread or tea service, while anise-flavored candies make an elegant after-dinner treat with coffee. For festive presentation, stack alternating colors in clear jars and tie with ribbon. Larger cut pieces can be used as edible toppers for cupcakes or packaging accents for gift boxes.
Cultural Background
Hard candy has a long history across many cultures, often associated with celebrations and street vendors. In the United States, hand-pulled and poured candies became popular in the 19th and 20th centuries with the rise of confectionery shops. Flavorings like anise and citrus reflect regional tastes and available extracts; sugar’s role as a celebratory ingredient made these candies staples at fairs and holiday markets. Making candy at home connects you to that tactile tradition — heating, pouring, and cutting are time-honored techniques that produce a simple, elegant sweet.
Seasonal Adaptations
In winter, add a drop of peppermint oil or a pinch of finely ground cinnamon for holiday-themed pieces. For spring and summer, choose light citrus extracts and pale pastel colors. Halloween invites bold orange and black combinations (use cocoa powder lightly dusted for black accents), while Valentine’s Day is a perfect time for rose or raspberry extracts and red or pink hues. Adjust extract amounts cautiously — essential oils and concentrated flavorings can overpower the sugar base.
Meal Prep Tips
Make a double batch and cool the candy fully before portioning into small zipper bags for grab-and-go treats. For efficient prep, set up an assembly line: bed the pan with confectioners’ sugar, have extracts and colors measured, and keep a glass measuring cup ready for pouring. Clean-up is simplest when you soak the saucepan immediately in hot water — never pour water into hot sugar. Label bags with flavor and date, and rotate older batches to the front to use first.
These candies are simple, striking, and deeply satisfying to make. Whether you’re gifting them or keeping them for yourself, the process of turning three pantry staples into glossy, colored jewels is a reward in itself. Try different extracts and colors and make the recipe your own — I always discover a new favorite combination each season.
Pro Tips
Use a heavy-bottomed saucepan to promote even heating and reduce hot spots that can burn the syrup.
Cover the pan once the mixture reaches a boil for 3 minutes to ensure stray crystals melt, which prevents grainy candy.
Pour the hot syrup using a glass measuring cup with a spout for better control and safety when transferring.
Work quickly after adding flavoring and color: the syrup cools fast and will thicken in seconds.
Avoid stirring once the syrup has boiled; stirring encourages crystallization and grainy texture.
This nourishing homemade hard candy recipe is sure to be a staple in your kitchen. Enjoy every moist, high protein slice — it is perfect for breakfast or as a wholesome snack any time.
FAQs about Recipes
What do I do if the syrup crystallizes?
If the syrup crystallizes while cooking, discard and start over; crystallization often comes from stirring at the wrong time or sugar crystals on the pan sides. Wiping the sides with a wet pastry brush before boiling helps.
How long will the candies stay fresh?
Yes — store in a cool, dry place in an airtight container; humidity will make them sticky. Do not refrigerate as condensation forms.
Can I make this without a candy thermometer?
Use a reliable candy thermometer and remove from heat right at 300°F. If you don’t have a thermometer, drop a small amount into very cold water — it should form hard, brittle threads that snap.
Tags
Homemade Hard Candy
This Homemade Hard Candy recipe makes perfectly juicy, tender, and flavorful steak every time! Serve with potatoes and a side salad for an unforgettable dinner in under 30 minutes.
Ingredients
Candy Base
Preparation and Finishing
Instructions
Prepare the Pan
Pour 5 to 6 cups of confectioners’ sugar into a 15 x 10 x 1-inch rimmed pan to a 1/2-inch depth and make a continuous curved indentation with the handle of a wooden spoon to form the pouring channel.
Combine Ingredients
In a heavy saucepan combine 2 cups granulated sugar, 3/4 cup light corn syrup, and 1/2 cup water. Heat over medium, stirring only until sugar dissolves to avoid introducing crystals.
Dissolve Crystals
When the mixture begins to boil, cover the pan and let it cook, covered, for 3 minutes to melt undissolved sugar on the sides, then uncover and continue.
Cook to Hard-Crack
Uncovered, increase heat to medium-high and cook without stirring until the candy thermometer reads 300°F (hard-crack). Watch color; remove at pale amber.
Add Flavor and Color
Remove from heat and stir in 1 to 2 teaspoons extract and a few drops of food coloring as desired, mixing quickly to distribute before the syrup thickens.
Pour and Cool
Pour the hot syrup into a glass measuring cup and then into the sugar-lined indentation. Immediately dust with confectioners’ sugar, allow to cool completely until firm.
Cut and Store
Once cooled, use scissors to cut along the lines into bite-sized pieces, brush off excess sugar, and store in an airtight container in a cool, dry place.
Last Step: Please leave a rating and comment letting us know how you liked this recipe! This helps our business to thrive and continue providing free, high-quality recipes for you.
Nutrition
Did You Make This?
Leave a comment & rating below or tag
@whiskia on social media!
Categories:
You might also like...

Savory Baked Meatballs
Tender, herb-laced meatballs baked to juicy perfection with Parmesan and garlic. Perfect over spaghetti, tucked into subs, or served with favorite dips.

Classic Bacon Carbonara Pasta
Creamy, silky carbonara with smoky bacon, peppery bite, and perfectly coated spaghetti. Ready in 25 minutes for a comforting, crowd-pleasing dinner.

One Pot Creamy Garlic Pasta
A rich, silky garlic pasta made in one pan with milk and Parmesan for a fast, comforting dinner that is ready in about 20 minutes.
Did You Make This?
Leave a comment & rating below or tag @whiskia on social media!
Rate This Recipe
Share This Recipe
Enjoyed this recipe? Share it with friends and family, and don't forget to leave a review!
Comments (1)
This recipe looks amazing! Can't wait to try it.
Comments are stored locally in your browser. Server comments are displayed alongside your local comments.

Hi, I'm Victoria!
What's Popular

30-Minute Meals!
Join to receive our email series which contains a round-up of some of our quick and easy family favorite recipes.