
No Bake Christmas Cheesecake Bites

Festive, creamy bite-sized cheesecake balls coated in colored candy melts and holiday sprinkles. Perfect for parties, gift boxes, and easy entertaining.
Why You'll Love This Recipe
- Ready in about one hour with minimal hands-on time, making it ideal for last minute entertaining and cookie swaps.
- Uses pantry staples like cream cheese, white chocolate, and graham crackers with an option to use store bought crumbs for even faster prep.
- Make ahead friendly: the filling can be chilled for up to two days and the finished bites freeze well for gift boxes or later serving.
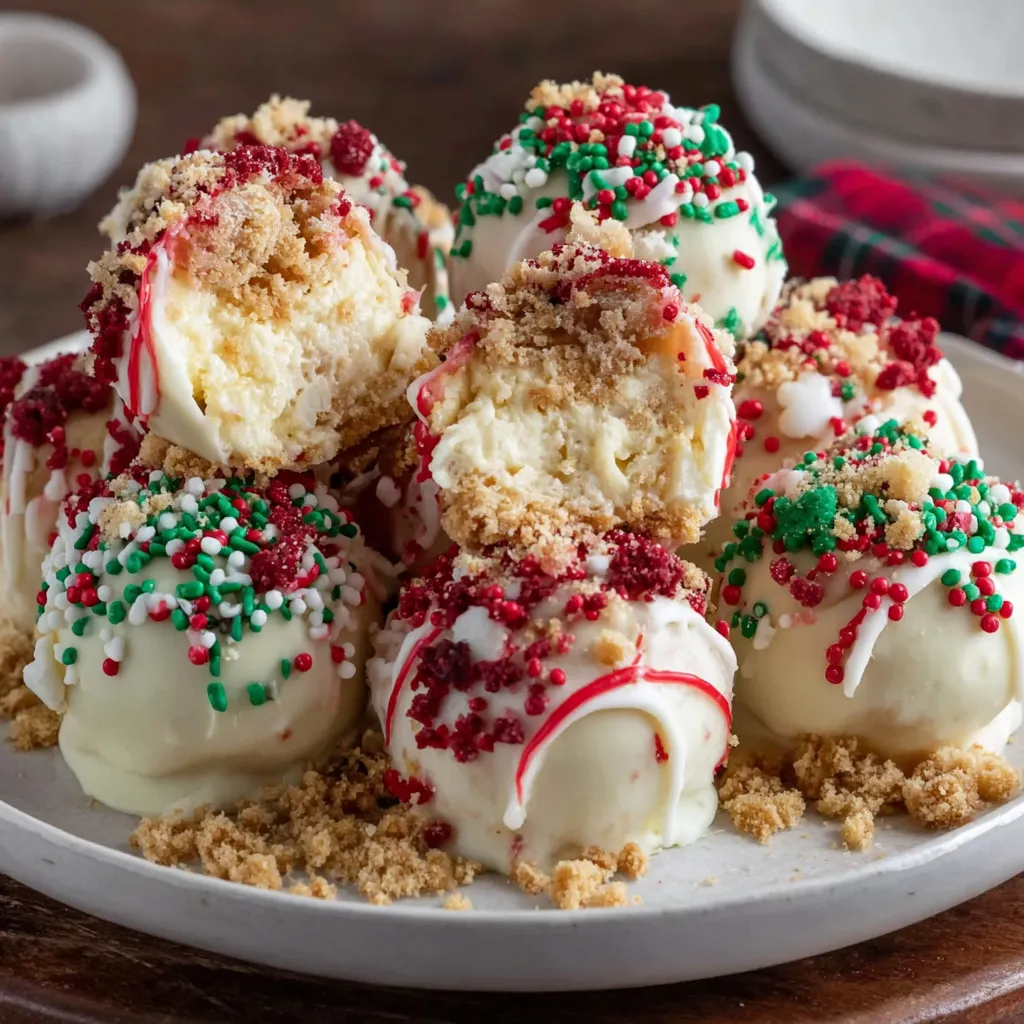
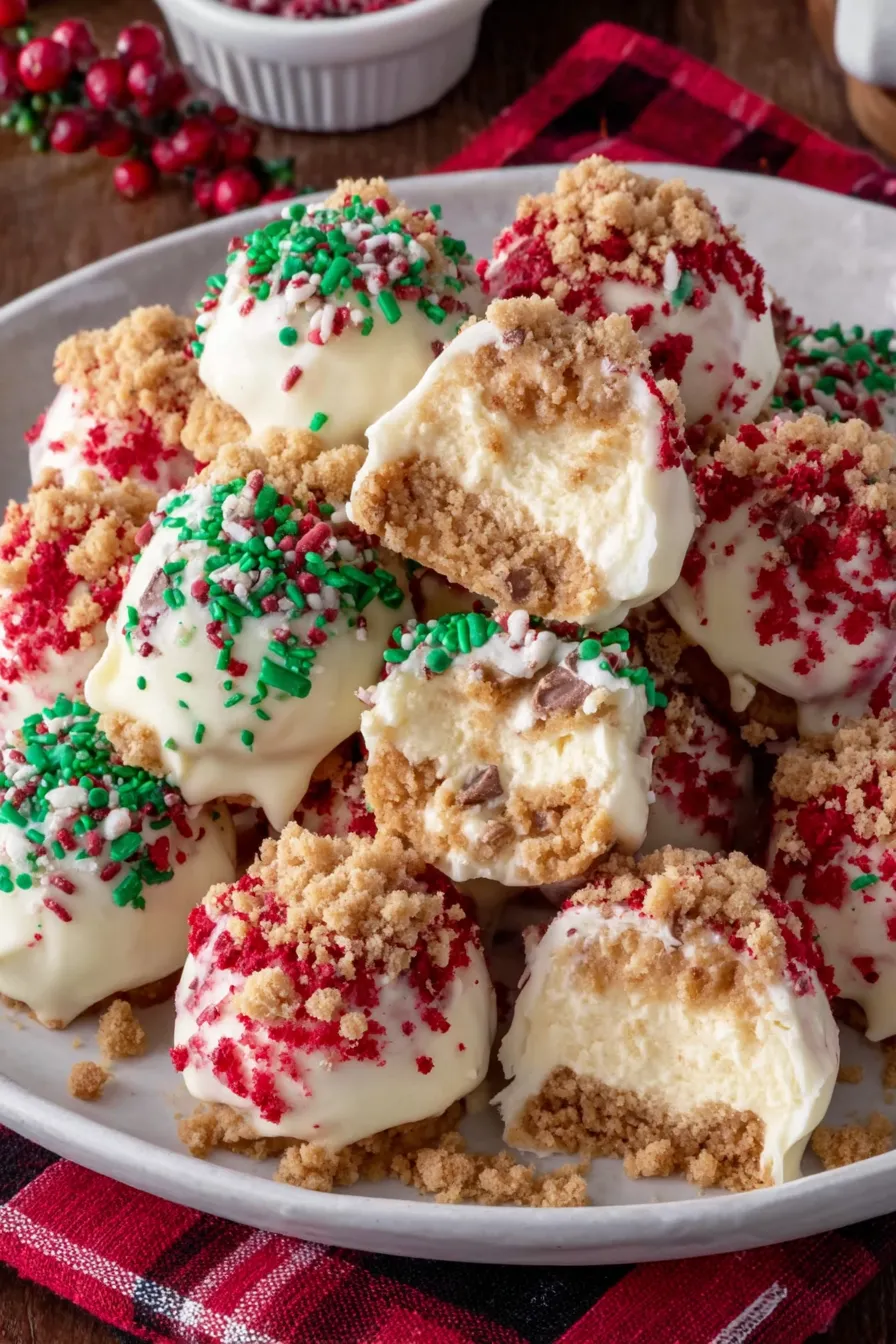
- Visually festive: coat in red and green candy melts and add holiday sprinkles for a show stopping platter that looks store bought.
- Crowd pleasing and kid approved: small, portable, and easy to serve at parties or in treat bags.
In my house these bites became the benchmark for holiday gathering success. One year I took them to a family potluck and an aunt who never liked white chocolate asked for the recipe. The glossy candy coating and tiny sprinkle toppers always get compliments and often inspire friends to request a second batch to take home.
Ingredients
- Cream cheese: 8 ounces softened cream cheese. Use full fat for best texture and flavor. I buy a block style brand rather than spreadable tubs because it gives a firmer, silkier filling.
- Powdered sugar: 1/2 cup powdered sugar adds sweetness and helps stabilize the mixture. Sift it if it is lumpy to keep the filling smooth.
- Vanilla extract: 1 teaspoon pure vanilla for warm aromatic depth. Good quality vanilla makes a noticeable difference.
- White chocolate chips: 1 cup white chocolate chips, melted. Choose a brand with a creamy finish. If you prefer a less sweet filling, reduce slightly to 3/4 cup.
- Crumbs: 1 cup crushed graham crackers or cookie crumbs. Graham crackers give a classic cheesecake note; digestive style cookies or golden Oreos are delicious alternatives.
- Whipped topping: 1/2 cup thawed whipped topping such as Cool Whip to lighten the filling. Fold gently to retain air and a fluffy texture.
- Red and green candy melts: For coating and decorating. Melt in separate bowls according to package directions for vibrant holiday colors.
- Holiday sprinkles: A selection of small festive sprinkles to finish. Use nonpareils, stars, or tiny jimmies for best effect.
Instructions
Prepare the cream cheese: Start with cream cheese at room temperature to avoid lumps. Beat 8 ounces in a large bowl using a hand mixer until completely smooth, about 2 minutes. Scrape the sides frequently to ensure even texture. Add 1/2 cup powdered sugar and 1 teaspoon vanilla extract and beat until incorporated. Properly softened cream cheese gives a glossy filling and prevents graininess from overworking the mixture. Melt the white chocolate: Place 1 cup white chocolate chips in a microwave safe bowl and heat in 20 second intervals, stirring between each interval, until smooth. Let cool for 1 to 2 minutes so the chocolate is warm but not hot before adding to the cream cheese. Adding very hot chocolate can loosen the filling too much and make chilling take longer. Combine crumbs and whipped topping: Stir 1 cup crushed graham crackers into the cream cheese mixture until combined. Gently fold in 1/2 cup thawed whipped topping to lighten the texture. Folding preserves air and creates a tender bite. If the mixture seems too loose, add a tablespoon more crumbs until it holds shape when scooped. Chill and shape the bites: Cover the bowl and refrigerate for 30 to 40 minutes to make the mixture firm enough to roll. Use a 1 inch cookie scoop or a teaspoon to portion and roll the filling into tight balls between your palms. Place each ball on a parchment lined baking sheet. Chilling prevents the balls from flattening and helps them hold a uniform shape. Melt and color the coating: Melt red and green candy melts in separate bowls following package instructions. Work with one color at a time. The coating should be smooth and fluid enough to dip but not so thin it drips off completely. If necessary, add a small amount of vegetable oil or confectioners glaze made for candy melts to thin slightly. Coat and decorate: Dip each chilled ball into the melted candy, shake off excess, and return to the parchment. While the coating is wet sprinkle with holiday decorations. For two tone looks, drizzle the second color across the top using a fork or piping bag. Let set at room temperature for 15 minutes or pop the tray into the refrigerator for quick setting.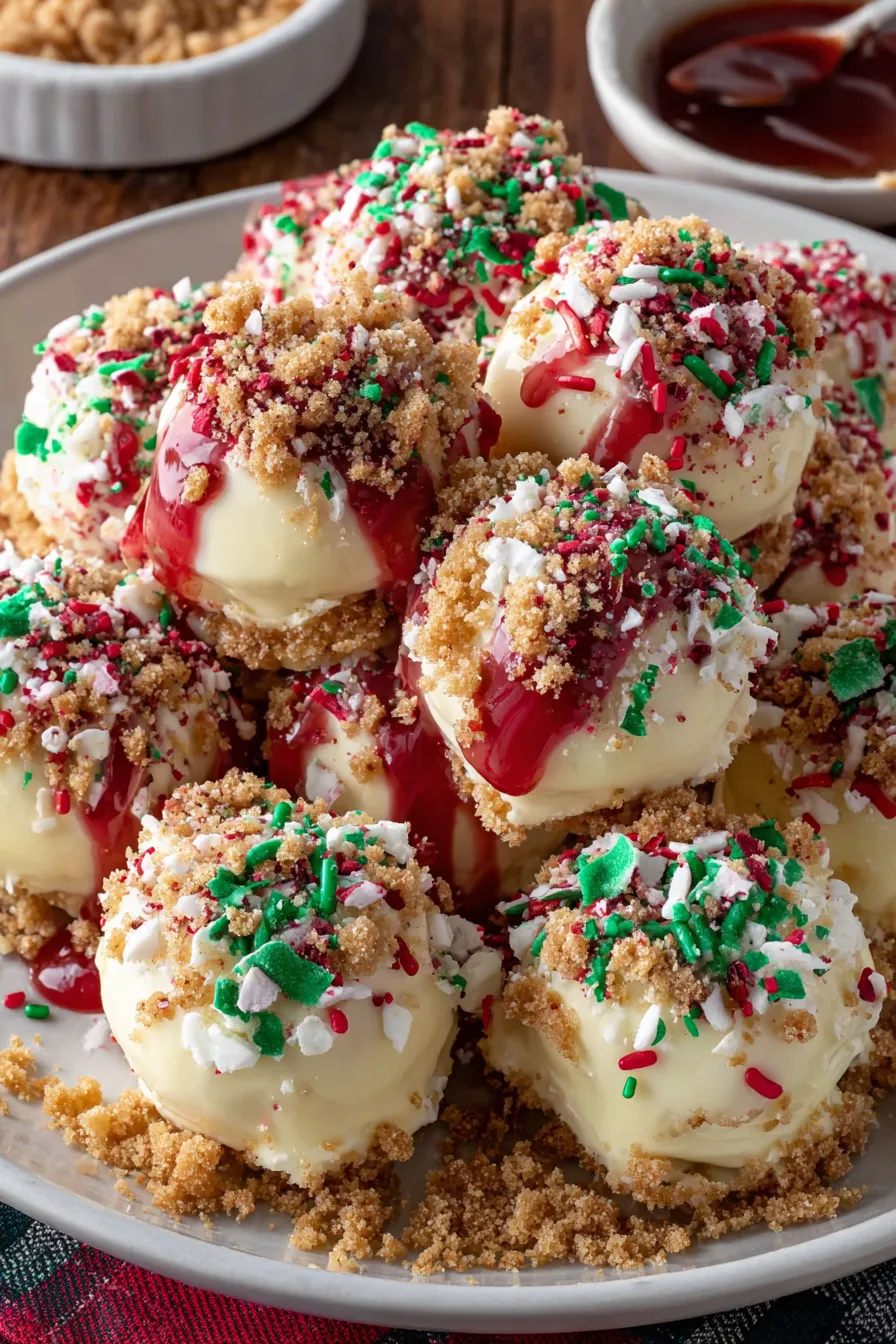
You Must Know
- These bites freeze well for up to three months when stored in a single layer and then in an airtight container.
- Keep refrigerated in a sealed container and consume within five days for best texture and flavor.
- The interior is best served slightly chilled and will soften at room temperature quickly, so do not leave out for long periods.
- Because white chocolate and many candy melts contain soy lecithin and the crumbs may contain gluten, this is not suitable for strict dairy free or gluten free diets without substitutions.
My favorite culinary moment is watching different generations at family parties try these for the first time. Grandparents remark on the familiar cheesecake flavor while children delight in the colored coatings. It is a simple recipe that bridges tastes and age groups and always starts conversations around the dessert table.
Storage Tips
Store finished bites in a single layer in a shallow airtight container or arrange in layers separated by parchment to protect the coating. Refrigerate and consume within five days for best texture. For longer storage, place the sheet of coated bites on a baking tray and freeze until firm, then transfer to a resealable freezer safe bag with parchment between layers. Thaw in the refrigerator for a few hours before serving to prevent condensation and preserve the shine of the coating.
Ingredient Substitutions
To make a gluten free version, replace graham crackers with certified gluten free graham crumbs or finely ground almond flour. For a lower sugar option, reduce white chocolate by one quarter cup and increase crushed nuts for texture. If you need dairy free, use dairy free cream cheese and coconut based whipped topping and swap in vegan white chocolate melts. Note that each substitution will slightly alter texture and sweetness, so adjust chilling times and crumb ratios until the filling holds shape.
Serving Suggestions
Serve these on a tiered dessert stand with other small cookies and candies for a festive platter. They pair beautifully with hot cocoa, mulled cider, or a sparkling wine for adults. Add fresh mint sprigs and edible gold dust for an elegant presentation or place in clear treat bags tied with ribbon for neighbor gifts. Small paper cups or mini liners make them easier to pick up at parties while keeping the coating intact.
Cultural Background
Small, bite sized confections are a staple of holiday tables in many cultures where sharing and sampling are central to celebrations. These bites are a modern American take on classic cheesecake flavors reduced to a portable form. They borrow from truffle making technique where a stabilized creamy center is chilled and coated in chocolate. Over time this format has been adapted for regional flavors such as eggnog, peppermint, and gingerbread to align with seasonal ingredients and traditions.
Seasonal Adaptations
For winter holidays add a teaspoon of ground cinnamon or a pinch of nutmeg to the filling for warm spice. Swap red and green melts for peppermint white chocolate and dark chocolate stripes for a winter white theme. In summer swap sprinkles for toasted coconut and use pastel colors to match seasonal celebrations. Adjust the crumb component to lemon cookies for a bright spring variant.
Meal Prep Tips
Prepare the filling up to two days ahead and keep refrigerated. Roll into balls and freeze on the sheet pan until solid then transfer to a container. On the day of serving, dip straight from frozen and allow a touch more set time. Use a 1 inch cookie scoop for uniform size which helps with even coating and consistent serving. Line your work surface with parchment to catch drips and make clean up fast.
These tiny cheesecake bites are joyful to make and share. They are forgiving, customizable, and small enough that even the undecided dessert eater will try one. Package them for gifts or display them with other treats for a holiday spread that tastes as good as it looks.
Pro Tips
Chill the mixture for at least 30 minutes to ensure clean rolling and even coating.
Use a small cookie scoop to portion evenly and achieve consistent size.
Work with one coating color at a time and keep extra candy melts warm to prevent hardening.
If candy melts are too thick, stir in a small amount of vegetable oil to thin slightly for smoother dipping.
This nourishing no bake christmas cheesecake bites recipe is sure to be a staple in your kitchen. Enjoy every moist, high protein slice — it is perfect for breakfast or as a wholesome snack any time.
FAQs about Recipes
Can I freeze these for later?
Yes. Arrange in a single layer on a baking sheet and freeze until firm, then transfer to a freezer safe bag with parchment between layers. Thaw in the refrigerator before serving.
How do I get uniform balls?
Use a small cookie scoop to portion evenly and chill before rolling to make shaping neater.
Tags
No Bake Christmas Cheesecake Bites
This No Bake Christmas Cheesecake Bites recipe makes perfectly juicy, tender, and flavorful steak every time! Serve with potatoes and a side salad for an unforgettable dinner in under 30 minutes.
Ingredients
Cheesecake mixture
Coating and decoration
Instructions
Prepare the Cream Cheese
Beat softened cream cheese until smooth, add powdered sugar and vanilla, then mix until fully incorporated. This makes the base smooth and free of lumps.
Melt the White Chocolate
Melt white chocolate chips in 20 second intervals, stirring between intervals, and cool slightly before adding to the cream cheese to prevent overheating the mixture.
Combine Crumbs and Whipped Topping
Stir in crushed graham crackers and gently fold in whipped topping to lighten the texture. Adjust crumbs if mixture is too loose.
Chill and Shape Bites
Refrigerate the mixture for 30 to 40 minutes. Use a 1 inch scoop and roll into balls, then place on parchment lined baking sheet.
Melt and Color the Coating
Melt red and green candy melts in separate bowls according to package instructions and adjust consistency with a small amount of oil if necessary.
Coat and Decorate
Dip chilled balls in melted candy, tap off excess, add sprinkles while wet, and allow to set at room temperature or refrigerate briefly.
Last Step: Please leave a rating and comment letting us know how you liked this recipe! This helps our business to thrive and continue providing free, high-quality recipes for you.
Nutrition
Did You Make This?
Leave a comment & rating below or tag
@whiskia on social media!
Categories:
You might also like...

Savory Baked Meatballs
Tender, herb-laced meatballs baked to juicy perfection with Parmesan and garlic. Perfect over spaghetti, tucked into subs, or served with favorite dips.

Classic Bacon Carbonara Pasta
Creamy, silky carbonara with smoky bacon, peppery bite, and perfectly coated spaghetti. Ready in 25 minutes for a comforting, crowd-pleasing dinner.

One Pot Creamy Garlic Pasta
A rich, silky garlic pasta made in one pan with milk and Parmesan for a fast, comforting dinner that is ready in about 20 minutes.
Did You Make This?
Leave a comment & rating below or tag @whiskia on social media!
Rate This Recipe
Share This Recipe
Enjoyed this recipe? Share it with friends and family, and don't forget to leave a review!
Comments (1)
This recipe looks amazing! Can't wait to try it.
Comments are stored locally in your browser. Server comments are displayed alongside your local comments.

Hi, I'm Victoria!
What's Popular

30-Minute Meals!
Join to receive our email series which contains a round-up of some of our quick and easy family favorite recipes.