
>>

Irresistible no-bake Oreo truffles dressed up for Halloween — creamy, colorful, and perfect for parties or classroom treats.
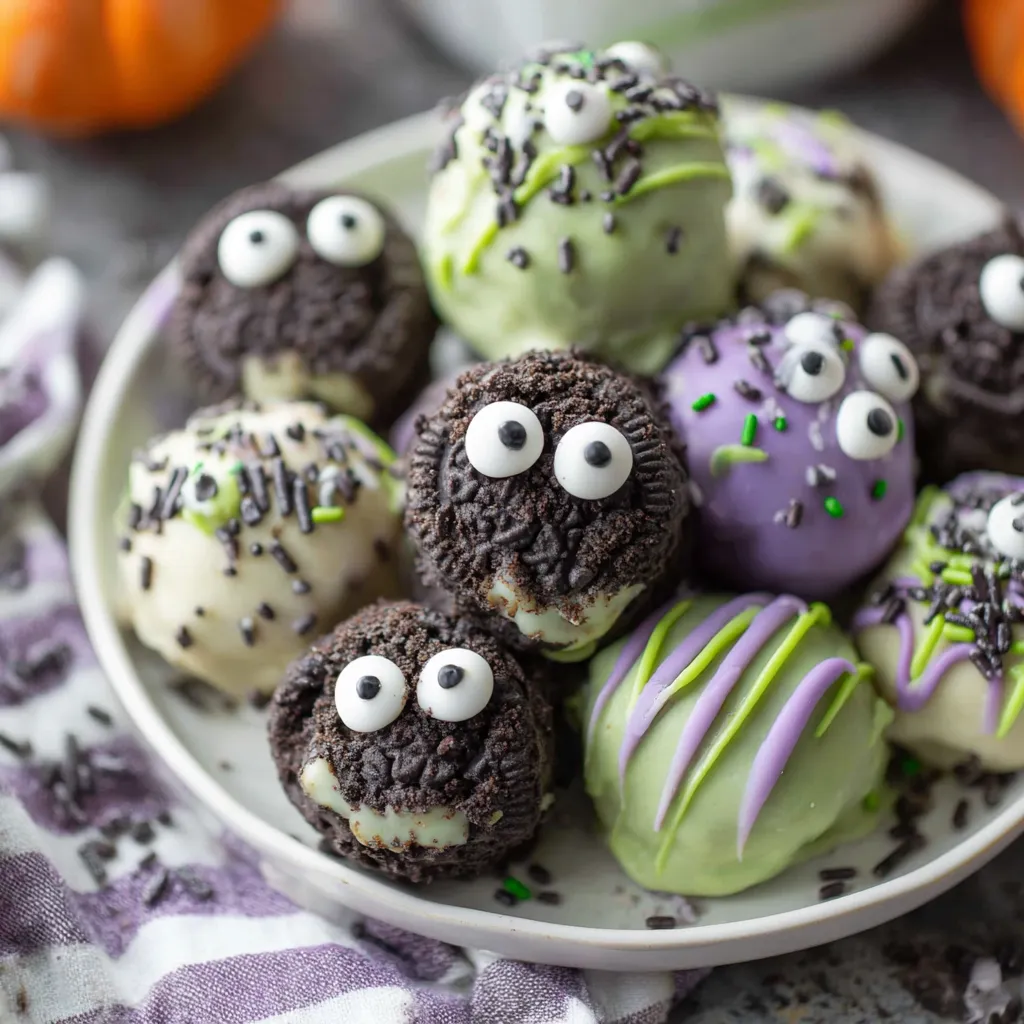
This batch of Halloween treats began as a playful experiment in my kitchen one October when I wanted something that felt festive but didn’t require an oven. These no-bake monster truffles — essentially Oreo balls dressed up with white chocolate, colorful drizzles, candy eyes, and sprinkles — quickly became a seasonal obsession. They’re crunchy-then-creamy, sweet without being cloying, and small enough that everyone can try one (or three). I first made them for a neighborhood potluck and watching little kids’ faces light up as they chose their “monsters” is one of my favorite memories.
What makes these special is the balance of textures: finely processed sandwich cookies form a dense, fudgy center once mixed with cream cheese, then a smooth white chocolate shell adds a crisp bite. The decorating step is where the fun lives — adding colored drizzles and mismatched candy eyes turns each bite into a personality. I discovered the color combinations that work best after a few trial runs and now have a routine that’s fast, reliable, and just messy enough to be fun. Because they require no baking, they’re ideal for school events, last-minute parties, and weekend baking with kids.
I remember my niece insisting on “purple monsters” and pairing them with green ones for a spooky duo — those two colors have become my go-to. Family and friends always remark how dense and satisfying each bite is, and the quick chill step means these are genuinely doable on a tight schedule.
My favorite aspect is how forgiving the process is: if your coating gets a few streaks, drizzle more color on top and press a candy eye — it becomes a design feature. We once did an all-silver batch for a space-themed party and another time made tiny “monster families” by grouping 3-4 truffles together on a plate.
Store finished truffles in a single layer in an airtight container. If stacking is necessary, separate layers with parchment paper. Keep refrigerated for up to 7 days; to freeze, place on a baking sheet until solid then transfer to a freezer-safe bag or container for up to 3 months. Thaw in the refrigerator for a few hours before serving to avoid condensation on the chocolate shell. For transport, keep them chilled in a cooler pack to prevent melting during warm weather.
If you need dairy-free options, use dairy-free cream cheese and vegan white melting wafers; texture will be slightly softer but still delicious. For a gluten-free version, choose certified gluten-free sandwich cookies and check that candy melts are gluten-free. If you prefer darker flavors, substitute half the white chocolate with milk or semi-sweet chocolate for the coating — the coloring will be muted, so use darker sprinkles or colored sanding sugar instead. To reduce sweetness, swap 6–8 cookies for 6–8 crushed graham crackers for a subtler center.
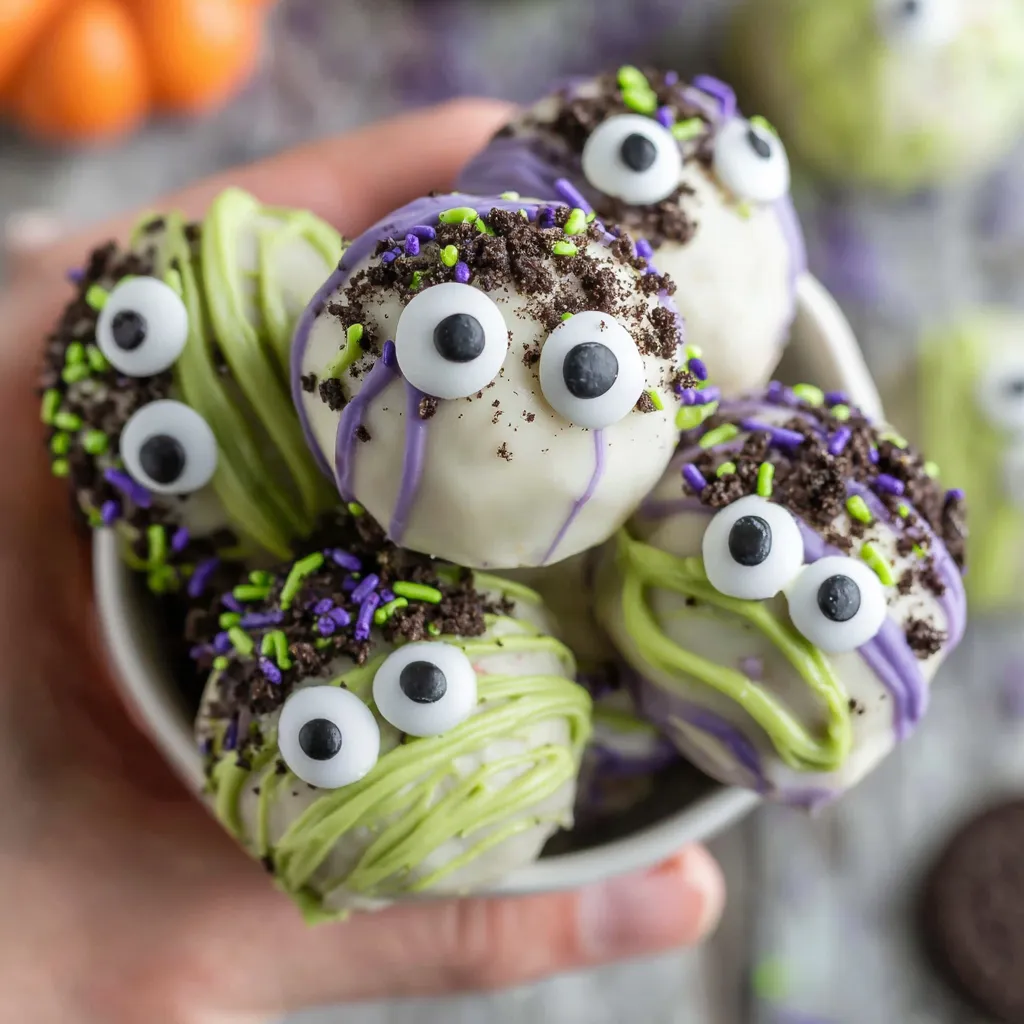
Arrange on a themed platter with shredded paper grass for a spooky display. Serve alongside small bowls of extra sprinkles and candy eyes so guests can personalize their own monsters. These are a perfect finger food for Halloween parties; pair them with hot cider or a milky chocolate punch. For adult gatherings, add a plate of salted nuts to balance the sweetness and offer coffee or espresso to cut through the richness.
The idea of chocolate-covered cookie truffles is rooted in simple European confection techniques where cake or cookie crumbs are mixed with a binding fat to form bonbon centers, then enrobed in chocolate. The Oreo-based version is a modern American adaptation that turned these techniques into an every-kitchen project thanks to accessible packaged cookies and melting wafers. Decorating them for holidays has become a home-crafting tradition, making these treats both nostalgic and contemporary.
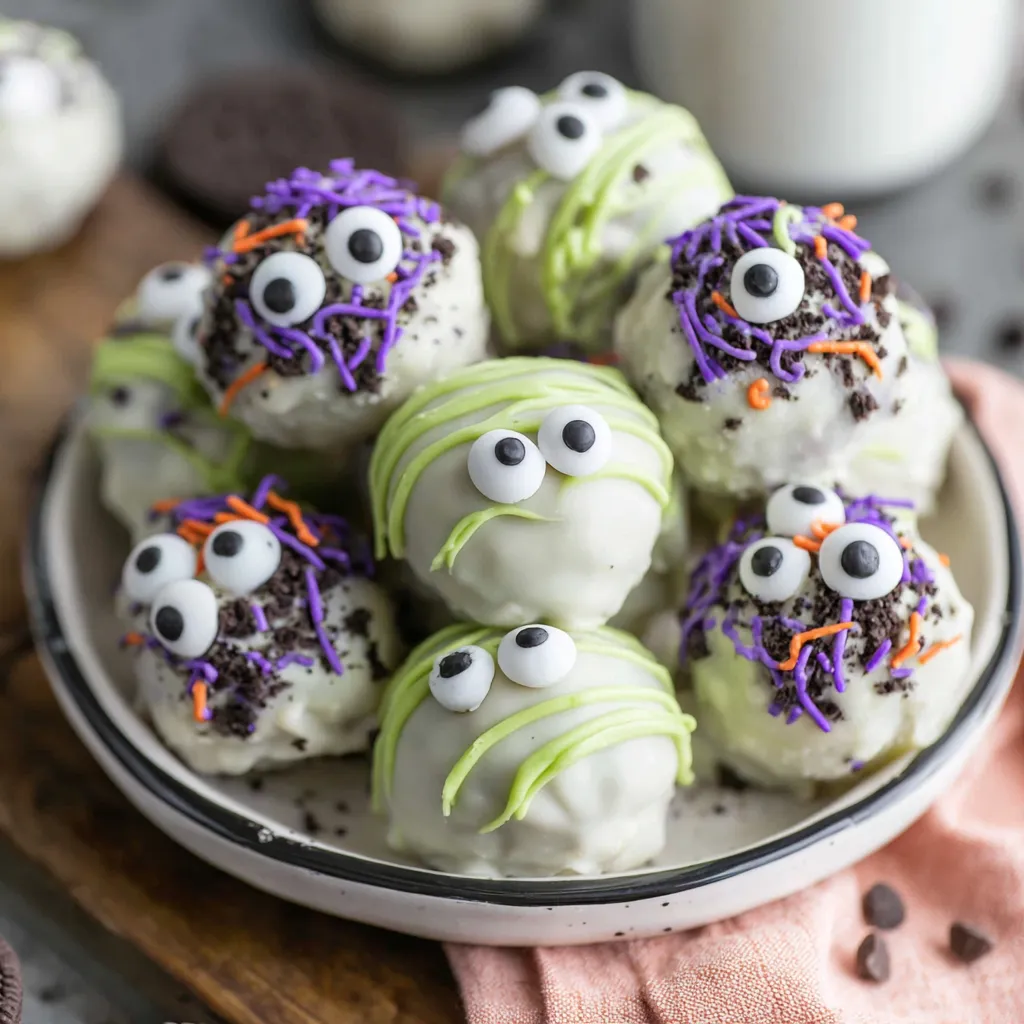
Change colors and sprinkles to match seasons: pastel drizzles and mini eggs for spring, orange and brown sugars for autumn, or red and green for winter holidays. Swap candy eyes for tiny holiday-themed toppers — snowflakes or mini candy canes work wonderfully. For a summer barbecue twist, dip in dark chocolate and finish with toasted coconut and lime zest for a tropical touch.
To prep for a party, form all centers up to 3 days in advance and keep them frozen on the tray. Melt and color your coatings the day of the event for the freshest shell. If making multiple colors, use small microwave-safe bowls and keep a towel nearby for wiping drips. Use disposable piping bags for easy cleanup and label each color bowl so kids can safely help without cross-contamination of colors.
These monster truffles are one of those small recipes that make big memories — easy to scale, fun to decorate, and beloved by kids and adults alike. Give the colors a twist and make them your own; once you’ve tried one, you’ll be plotting new combinations for the next party.
Soften cream cheese to room temperature for a smoother center and easier mixing.
Freeze formed balls for at least 20 minutes before dipping to prevent melting while coating.
Use gel food coloring to tint white chocolate without seizing or thinning the coating.
Work on a parchment-lined tray for quick cleanup and easy transfer to storage containers.
This nourishing no bake monster truffles (halloween oreo balls) recipe is sure to be a staple in your kitchen. Enjoy every moist, high protein slice — it is perfect for breakfast or as a wholesome snack any time.
This No Bake Monster Truffles (Halloween Oreo Balls) recipe makes perfectly juicy, tender, and flavorful steak every time! Serve with potatoes and a side salad for an unforgettable dinner in under 30 minutes.
Place 24 Oreo cookies in a food processor and pulse until fine crumbs form. If using an alternative method, place cookies in a sealed bag and crush with a rolling pin until sand-like.
Add 4 ounces softened cream cheese to the crumbs and pulse until the mixture forms a cohesive dough. Scrape sides and pulse again for even consistency.
Scoop the mixture into 1–1.25 inch balls using a small ice cream scoop or 2 tablespoons. Place on parchment-lined baking sheet and freeze 20 minutes to firm up.
Melt 12 ounces of white melting chocolate in a microwave-safe bowl in 30-second intervals, stirring between intervals. Stir in 3–4 drops green gel color until evenly tinted.
Dip chilled balls into the green chocolate using a fork, tapping off excess and returning them to the parchment sheet to set for a few minutes.
Melt the remaining white chocolate and tint with purple gel. Use piping bags or a snipped zip-top bag to drizzle purple over the green shells. Add additional green drizzle if desired.
Press 1–2 candy eyes into each truffle before the drizzle sets and sprinkle with Halloween decorations. Allow chocolate to fully set (about 10–15 minutes) before storing or serving.
Last Step: Please leave a rating and comment letting us know how you liked this recipe! This helps our business to thrive and continue providing free, high-quality recipes for you.
Leave a comment & rating below or tag
@whiskia on social media!

Tender, herb-laced meatballs baked to juicy perfection with Parmesan and garlic. Perfect over spaghetti, tucked into subs, or served with favorite dips.

Creamy, silky carbonara with smoky bacon, peppery bite, and perfectly coated spaghetti. Ready in 25 minutes for a comforting, crowd-pleasing dinner.

A rich, silky garlic pasta made in one pan with milk and Parmesan for a fast, comforting dinner that is ready in about 20 minutes.
Leave a comment & rating below or tag @whiskia on social media!
Enjoyed this recipe? Share it with friends and family, and don't forget to leave a review!
This recipe looks amazing! Can't wait to try it.
Comments are stored locally in your browser. Server comments are displayed alongside your local comments.

Join to receive our email series which contains a round-up of some of our quick and easy family favorite recipes.
