
>>

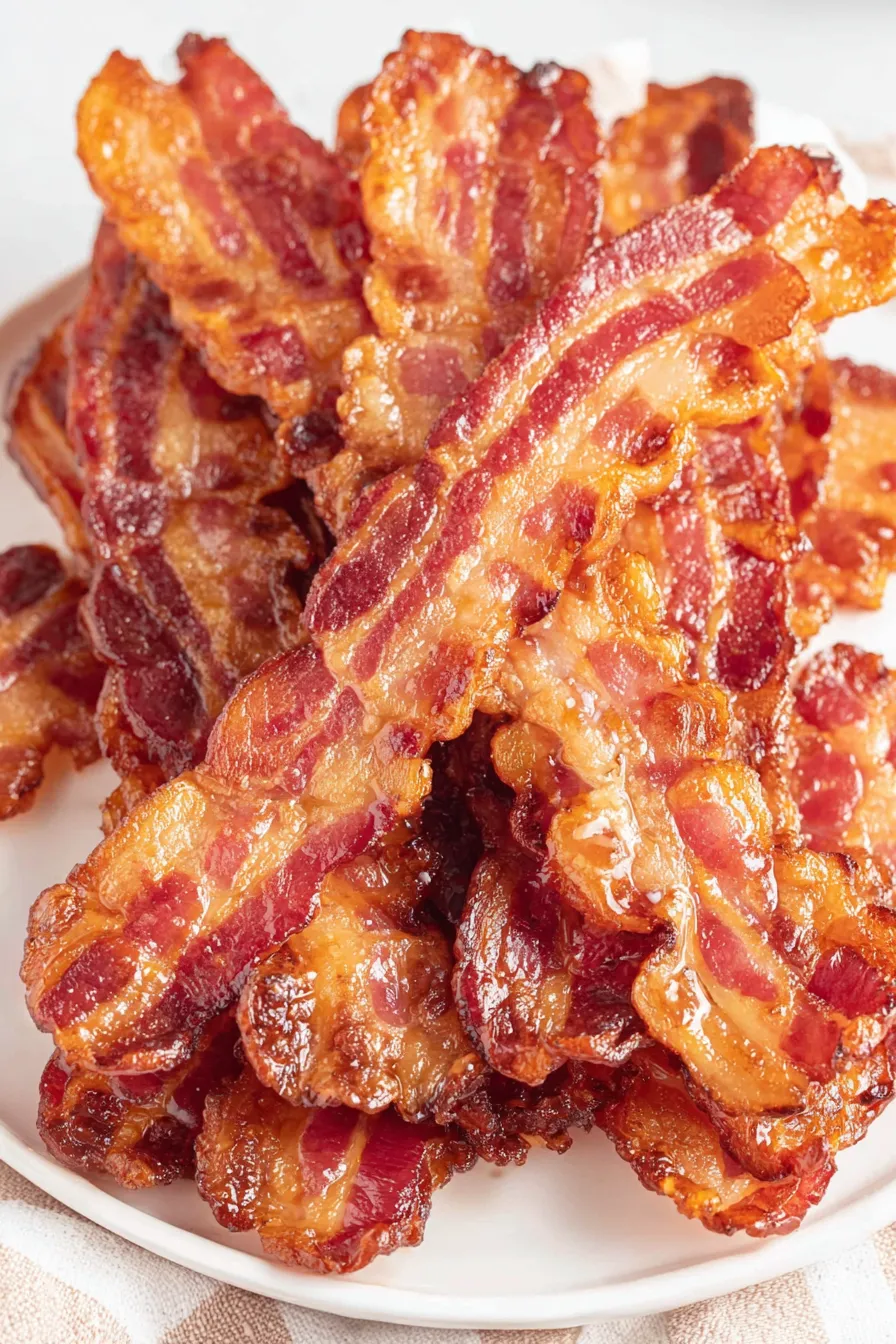
Crispy, evenly baked bacon with minimal mess — an easy oven method that yields perfect slices every time.

This oven baked bacon method became a weekday lifesaver the first winter I tried it. I was making breakfast for a small crowd and wanted bacon that cooked evenly, stayed flat for sandwiches, and didn’t require constant babysitting at the stove. The oven technique turned out to be a revelation: the strips cook at a steady temperature, render fat uniformly, and finish with a perfect balance of crisp and chew depending on how long you leave them. It’s a simple technique that has saved countless mornings and elevated sandwich lunches and brunches ever since.
I discovered this approach during a busy holiday brunch when stovetop batches weren’t keeping up. After testing temperatures and timing, 350°F in the oven proved ideal for regular slices — 15 minutes per side for a reliably crisp result, or 20 minutes per side for thicker cuts. What I love most is the minimal cleanup: two parchment-lined baking sheets and a forgiving process that lets you focus on the rest of the meal. The aroma fills the kitchen without the sputter and popping of pan-frying, and family members always ask where the bacon came from — they assume a diner made it.
I’ve served this at casual Sunday breakfasts and holiday brunches, and guests always comment on how flat and crisp the slices are compared with pan-fried bacon. My partner prefers the slightly chewier edge while I like it fully crisp — this method lets us hit both preferences simply by adjusting time. It’s become my go-to when I want dependable results with little fuss.
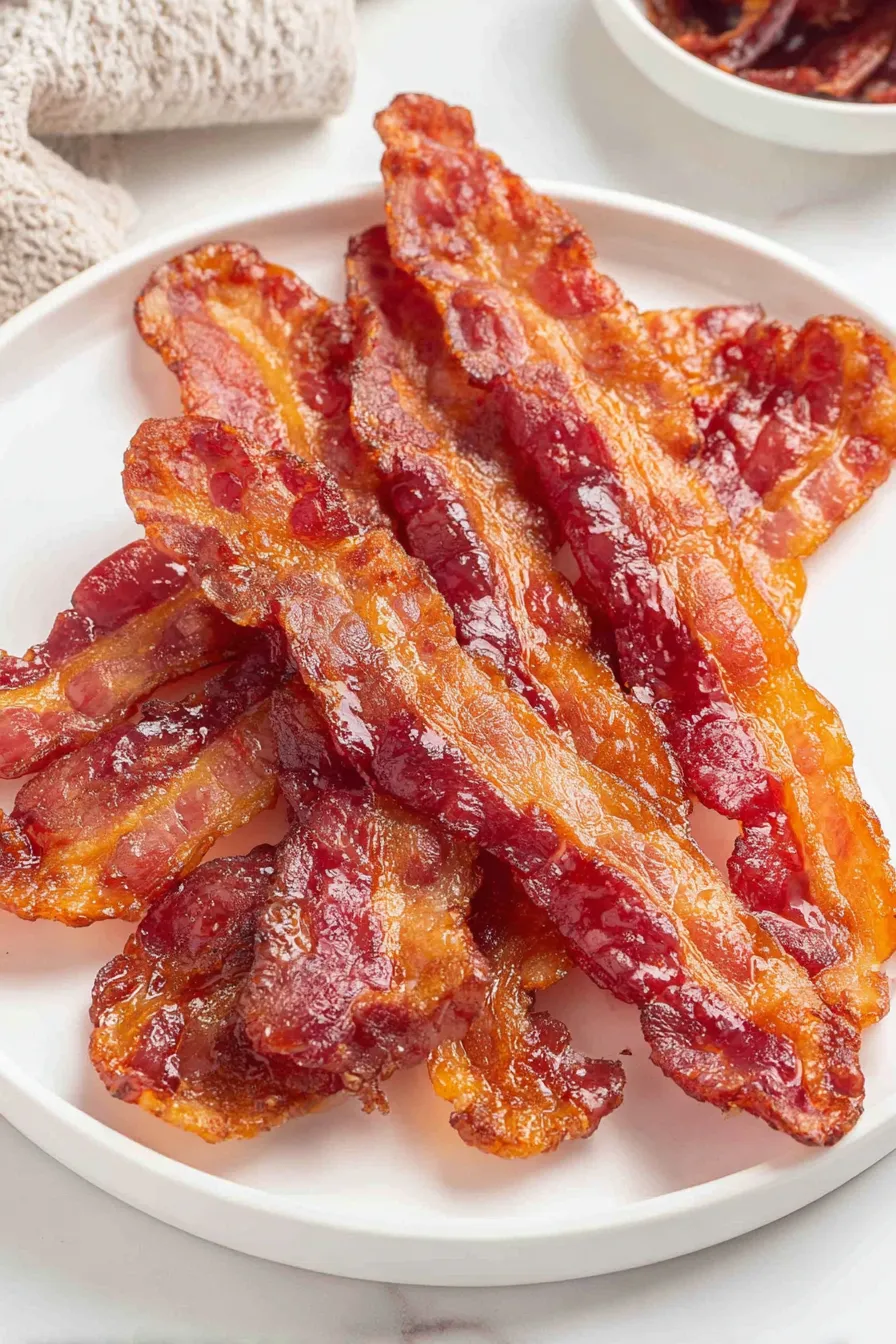
My favorite part is how the bacon stays flat — perfect for BLTs and club sandwiches — and how easily you can scale up for guests. I remember once cooking three pounds for a holiday morning and having everything else ready while the bacon baked evenly in two rounds. It’s a straightforward method that rewards you with consistency and less time spent hovering by the stove.
Store cooked slices in an airtight container in the refrigerator for up to 4–5 days. For longer storage, freeze individually on a sheet pan until firm, then transfer to a freezer bag for up to 1 month. Reheat frozen slices directly in a 350°F oven on a parchment-lined sheet for 6–8 minutes, or crisp them in a warm skillet for 1–2 minutes per side. If microwaving, place between paper towels and use 15–20 second bursts to avoid chewy spots; the oven method preserves texture much better than the microwave.
If you don’t eat pork, substitute smoked turkey bacon or tempeh bacon made from seared, marinated tempeh slices. Note: turkey and tempeh cook faster and can dry out; reduce bake times by 20–30% and check frequently. For lower-sodium options, look for reduced-sodium brands or rinse bacon briefly under cold water and pat dry before baking — this will remove some surface salt but also mild flavor. For a sweet-savory twist, brush maple syrup on slices in the final 1–2 minutes and broil for 20–30 seconds while watching closely.
Serve on a classic bacon and eggs plate, stack into a BLT with ripe tomatoes and toasted sourdough, crumble over a wedge salad, or pair with pancakes and a drizzle of maple syrup. For brunch spreads, arrange on a board with fruit and cheese; the flat, uniform slices make attractive presentation. Garnish with a few grinds of black pepper or a sprinkle of chopped chives for a fresh contrast.
Bacon has a long culinary history across many cultures as a preserved pork product; in American cuisine, it is synonymous with breakfast and comfort food. The oven-baked approach grew in home kitchens as a practical evolution from stovetop frying — it mirrors commercial methods that emphasize even heat and consistent texture. Many regions have their own cured pork variations (like British back bacon or Italian pancetta); this method adapts well to cured slices that benefit from gentle, even heat.
In colder months, pair oven-baked bacon with warm root vegetable hashes and hearty breads. For summer brunches, crisp slices complement tomato-and-lettuce salads and grilled fruit. Around holidays, add a glaze of maple and cracked black pepper for a festive touch, or layer slices on holiday sandwiches with roasted turkey. Adjust cooking times for sugar-coated or heavily seasoned versions to prevent burning.
For efficient meal prep, bake 2–3 packages of bacon at once across multiple sheets and cool completely before portioning into single-serving containers. Keep a stack of pre-toasted English muffins and containers of shredded cheese to assemble breakfast sandwiches quickly. Bacon reheats beautifully in the oven or toaster oven and can be used to add flavor to lunches, salads, and grain bowls throughout the week.
Give this method a try next weekend — it will change how you think about cooking bacon. With minimal effort, consistent results, and easy cleanup, it’s a small shift that makes mornings noticeably calmer and tastier.
Line baking sheets with parchment to catch fat and make cleanup fast.
For evenly browned slices, rotate baking sheets halfway through cooking if they are on different racks.
Reserve strained bacon drippings in a jar in the refrigerator for up to 2 weeks to flavor vegetables and eggs.
Watch closely when glazing with sugar or syrup — caramelization happens quickly and can burn.
This nourishing oven baked bacon recipe is sure to be a staple in your kitchen. Enjoy every moist, high protein slice — it is perfect for breakfast or as a wholesome snack any time.
This Oven Baked Bacon recipe makes perfectly juicy, tender, and flavorful steak every time! Serve with potatoes and a side salad for an unforgettable dinner in under 30 minutes.
Preheat oven to 350°F. Use an oven thermometer if your oven runs hot or cold to ensure accurate temperature before baking.
Line two rimmed baking sheets with parchment paper. Using two sheets allows a single layer across both trays for even cooking.
Place bacon slices in a single layer with a small gap between pieces so air circulates and fat renders evenly. Avoid overlapping slices.
Bake for 15 minutes for regular slices (20 minutes if thick-cut). Check for rendered fat and initial browning — color is a good visual cue.
Remove sheets, flip each slice with tongs, then bake an additional 15 minutes for regular bacon (20 minutes per side for thick-cut) or until it reaches desired crispiness.
Transfer slices to a paper towel-lined plate and top with another towel to soak up excess grease. Let rest 1–2 minutes before serving to allow final crisping.
Last Step: Please leave a rating and comment letting us know how you liked this recipe! This helps our business to thrive and continue providing free, high-quality recipes for you.
Leave a comment & rating below or tag
@whiskia on social media!

Tender, herb-laced meatballs baked to juicy perfection with Parmesan and garlic. Perfect over spaghetti, tucked into subs, or served with favorite dips.

Creamy, silky carbonara with smoky bacon, peppery bite, and perfectly coated spaghetti. Ready in 25 minutes for a comforting, crowd-pleasing dinner.

A rich, silky garlic pasta made in one pan with milk and Parmesan for a fast, comforting dinner that is ready in about 20 minutes.
Leave a comment & rating below or tag @whiskia on social media!
Enjoyed this recipe? Share it with friends and family, and don't forget to leave a review!
This recipe looks amazing! Can't wait to try it.
Comments are stored locally in your browser. Server comments are displayed alongside your local comments.

Join to receive our email series which contains a round-up of some of our quick and easy family favorite recipes.
