
Peanut Butter Cake in a Mug

A quick, single-serve peanut butter mug cake that's rich, tender, and ready in under three minutes—perfect for an instant dessert or midnight craving.
This peanut butter cake in a mug has been my late-night lifesaver and a weekend treat rolled into one. I first discovered this combination on an exhausted Tuesday evening when I wanted something sweet and satisfying but didn't want to bake an entire cake. The result was a warm, tender crumb threaded with peanut butter flavor—comforting, nutty, and surprisingly indulgent for such a small recipe. It feels like a personal celebration when every spoonful offers that balance of sweet sugar, creamy peanut butter, and buttery richness.
What makes this version special is its simplicity and reliability. The batter comes together with just a few spoons and a microwave, and the texture is soft and cakey rather than dense or rubbery when timed correctly. I've learned tiny tweaks—like stirring until the batter is smooth but not overmixed and letting the cake rest briefly after microwaving—that consistently produce a light center and a slightly crisp top. Serve it straight from the mug with a dollop of peanut butter melting into the warm surface for pure comfort in under three minutes.
Why You'll Love This Recipe
- This single-serve treat is ready in about 3 minutes from start to finish—ideal for urgent dessert cravings or quick snacks. It uses pantry staples: self-rising flour, sugar, peanut butter, milk, and butter—no eggs or special equipment required beyond a microwave-safe mug.
- The texture is reliably tender: the self-rising flour gives lift and a delicate crumb while the melted salted butter adds depth and keeps the cake moist without greasiness. It’s forgiving—small timing variations won’t ruin the result.
- Make-ahead friendly: mix the dry ingredients in a small jar ahead of time, then add wet ingredients and microwave when ready. Great for solo servings, dorm rooms, and busy households where everyone wants something different.
- Crowd-pleaser with easy customizations: top with an extra tablespoon of peanut butter, chopped chocolate, or a spoonful of jam to create different flavor profiles in seconds. It’s also a handy base to experiment with add-ins like chia seeds or a splash of coffee.
- Accessible for cooks of every skill level—no baking mastery required. The recipe is naturally portion-controlled and easy to scale by making multiple mugs.
On the nights I've made this, family members have wandered into the kitchen drawn by the scent of warm peanut butter. One evening my partner declared it the best “emergency dessert” and asked for a second mug—high praise for a recipe that takes so little time and so few ingredients.
Ingredients
- Self-rising flour (4 tablespoons): Use store-bought self-rising flour or make your own by combining plain flour with baking powder and a pinch of salt. Self-rising flour gives an airy crumb without measuring leavening agents; King Arthur or Gold Medal brands work well.
- Granulated sugar (3 tablespoons): Standard white sugar balances the nuttiness of the peanut butter and helps create a tender crumb. If you prefer a slightly deeper flavor, swap one tablespoon for light brown sugar.
- Creamy peanut butter (4 tablespoons + 1 tablespoon optional): Use a classic creamy variety for smooth incorporation—Jif, Skippy, or a natural creamy brand. Four tablespoons are mixed into the batter; an extra tablespoon can be used as a melting garnish on top.
- Whole milk (3 tablespoons): Adds moisture and richness. Full-fat milk produces the best texture; you can substitute 2% for a slightly lighter result, but avoid using non-dairy milks unless adjusted for flavor.
- Salted sweet cream butter, melted (3 tablespoons): Melted butter enriches the cake and provides a subtly salted counterpoint to the sweet peanut butter. Unsalted butter can be used—just add a small pinch of salt.
- Pure vanilla extract (1/2 teaspoon): A small amount of vanilla brightens the peanut butter flavor and rounds the sweetness.
Instructions
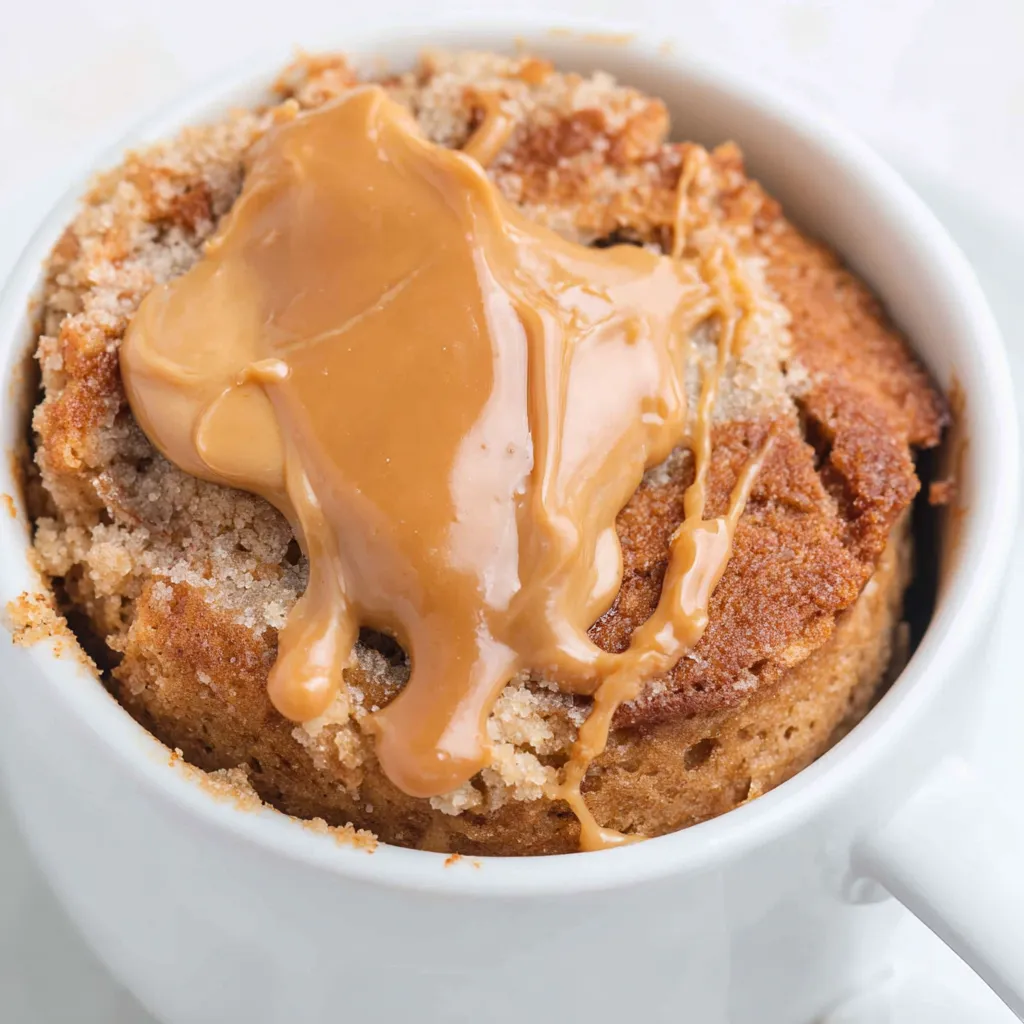
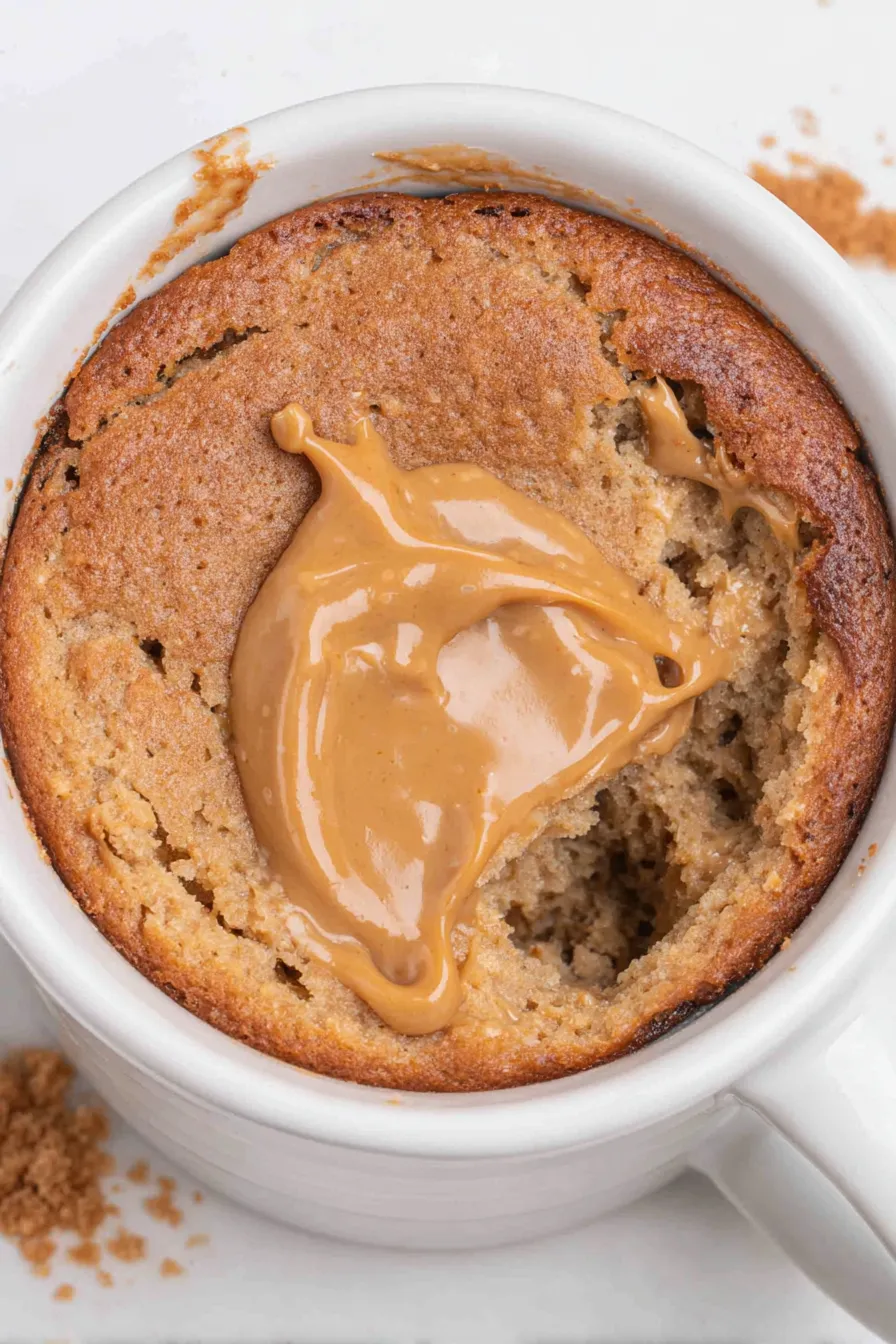
Mix the dry ingredients:Add 4 tablespoons of self-rising flour and 3 tablespoons of granulated sugar directly into a 14-ounce microwave-safe mug. Stir with a spoon until the sugar is distributed and there are no lumps in the flour. This ensures an even rise and prevents sugary pockets in the baked cake.Add the peanut butter:Spoon 4 tablespoons of creamy peanut butter into the mug. Break it up with the spoon and begin to fold it into the dry mixture. The goal is to distribute the peanut butter so it melts into little ribbons during cooking rather than leaving large clumps.Incorporate wet ingredients:Pour in 3 tablespoons of whole milk, 3 tablespoons of melted salted butter, and 1/2 teaspoon of pure vanilla extract. Stir briskly until the batter is completely smooth and reaches a consistency similar to thick pancake batter. Smooth batter traps air and creates a lighter structure when microwaved.Microwave the mug:Place the mug in the microwave and cook on high for 1 minute 30 seconds to 1 minute 45 seconds. Microwave power varies—start timing at 1:30 for a 1000W-equivalent unit and increase by 10–15 second increments if needed. The cake is done when the surface springs back lightly to the touch and a toothpick inserted near the center comes out with a few moist crumbs but not raw batter.Cool and finish:Allow the mug cake to cool for 2–3 minutes so the structure sets. While it cools, dollop 1 tablespoon of creamy peanut butter on top; the residual heat will melt it into a glossy topping. If desired, gently spread the melted peanut butter to coat the surface before serving.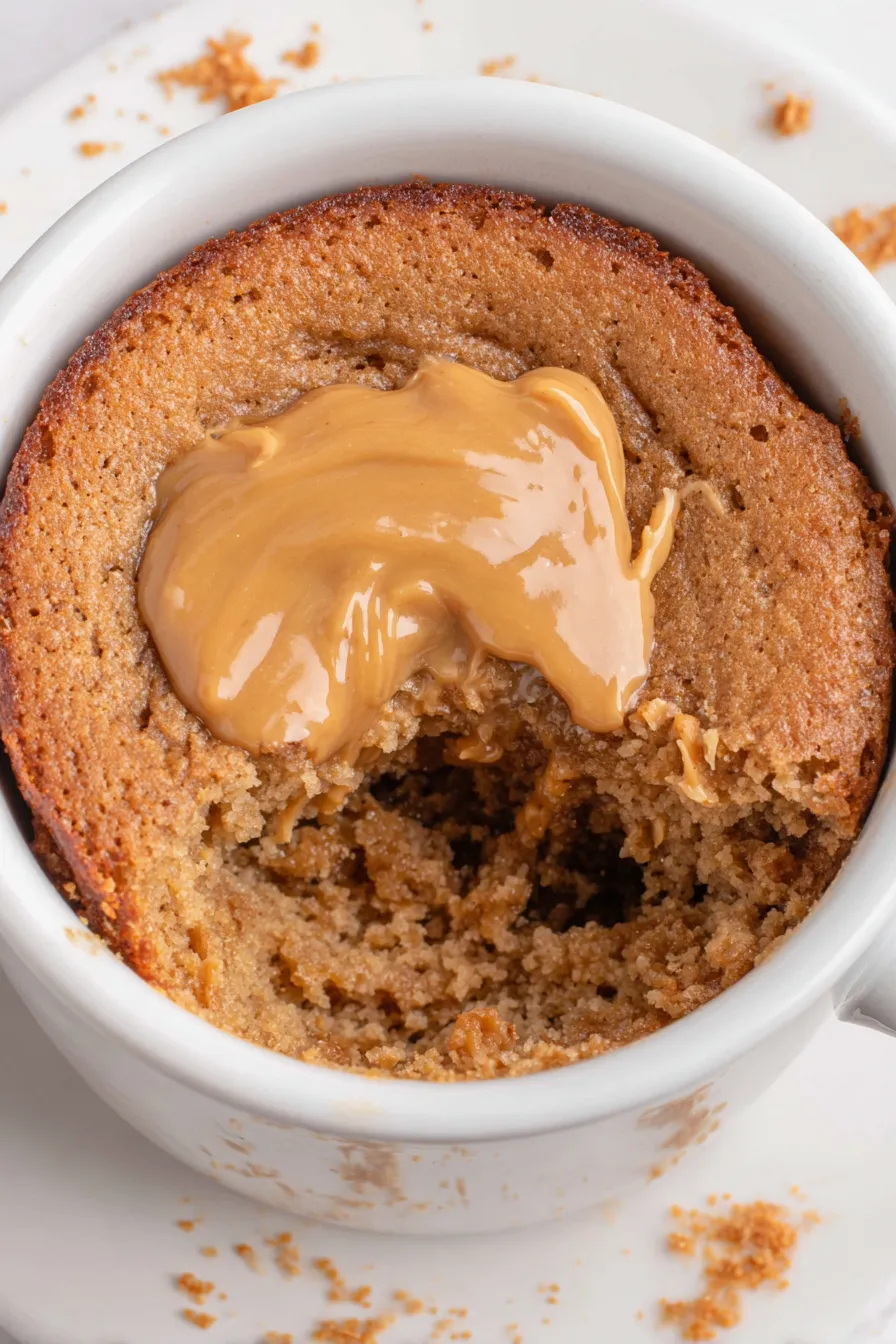
You Must Know
- This single serving contains concentrated calories and fats—ideal as an occasional treat; it also freezes poorly but reheats fine for a short time if stored chilled.
- Microwave wattage matters: lower-watt microwaves will need an extra 10–20 seconds. Start short to avoid overcooking; the cake continues to set after microwaving.
- Storage: keep leftover cake in an airtight container in the refrigerator for up to 2 days; reheat gently in 15–20 second bursts to avoid drying out.
- Allergy note: the recipe contains peanuts, dairy, and gluten unless you swap ingredients—see substitutions below for allergy-friendly alternatives.
My favorite part of this little recipe is the ritual—stirring the batter in the same mug I’ll eat from, microwaving, then watching a small pool of peanut butter become molten on top. Friends who visit love the immediacy; I once made a tray of these for a sleepover, and they disappeared in minutes.
Storage Tips
Store any leftover mug cake in the refrigerator in an airtight container or cover the mug with plastic wrap. Refrigerated cakes remain palatable for up to 48 hours; beyond that the texture will decline. Reheat in the microwave for 15–25 seconds on high—check frequently to avoid overheating. For portability, transfer slices or scoops into small airtight containers and add a fresh dab of peanut butter before reheating. Do not freeze the cake whole in the mug: freezing changes the texture and often results in a gummy crumb upon thawing. If you must freeze, scrape the crumb into an airtight container and consume within one month, reheating gently.
Ingredient Substitutions
For a gluten-free option, substitute a 1-to-1 gluten-free self-rising flour blend; be aware some blends absorb more moisture, so add a teaspoon or two of milk if the batter feels too thick. To make this dairy-free, use a plant-based butter substitute melted in place of butter and swap whole milk for full-fat coconut milk—expect a slightly different mouthfeel and extra coconut notes. For a lower-sugar version, reduce sugar to 2 tablespoons and add a teaspoon of maple syrup or a sugar substitute that measures like sugar; texture will be a touch less tender. Natural-style peanut butter (oil-separated) works, but stir thoroughly to reincorporate oil before measuring.
Serving Suggestions
Serve directly from the mug for the coziest presentation. Garnish with a swirl of extra peanut butter, a dusting of powdered sugar, chopped roasted peanuts for texture, or a spoonful of chocolate hazelnut spread for a decadent twist. Pair with a small scoop of vanilla ice cream or a simple dollop of whipped cream to contrast warmth and creaminess. For a brunch-worthy plate, serve the mug cake alongside fresh berries and a strong coffee.
Cultural Background
This quick treat is a modern adaptation of classic single-serve microwave cakes that became popular with the rise of countertop microwaves. Peanut butter itself is deeply rooted in American culinary traditions—originating in late 19th-century innovations and later becoming a pantry staple. Combining peanut butter with cake in a mug compresses the comfort-food history of sandwiches and baked goods into an instant experience reminiscent of home baking, but trimmed down to a personal portion.
Meal Prep Tips
To meal-prep multiple servings, pre-measure dry blends (flour and sugar) into small jars for up to a week. When ready, add peanut butter, milk, and melted butter to each jar, stir, and microwave. This makes mornings and after-school snacks fast. Store dry mixes in a cool, dry place; keep melted butter and milk separate until assembly. Label jars with cook times if you have different microwave wattages at home to avoid overcooking.
End on a note of encouragement: this mug cake is forgiving, comforting, and quick—perfect for anyone who wants a single warm dessert without fuss. Make it yours with toppings and tiny tweaks, and enjoy the simple pleasure of a fresh, warm bite anytime.
Pro Tips
Stir the batter thoroughly until smooth but avoid overmixing to keep the cake tender.
Start with the shorter microwave time and add increments—overcooked mug cakes become dry quickly.
Use a 14-ounce microwave-safe mug to allow room for rise and avoid spills.
If using natural peanut butter, stir it first to reincorporate oils for even texture.
This nourishing peanut butter cake in a mug recipe is sure to be a staple in your kitchen. Enjoy every moist, high protein slice — it is perfect for breakfast or as a wholesome snack any time.
FAQs about Recipes
How long do I microwave this mug cake?
Microwave wattage affects cooking time—start with 1 minute 30 seconds on a 1000W-equivalent microwave and add 10–15 second increments if the center remains undercooked.
Can I save leftovers?
Store in the fridge for up to 48 hours in an airtight container; reheat in 15–25 second bursts.
Tags
Peanut Butter Cake in a Mug
This Peanut Butter Cake in a Mug recipe makes perfectly juicy, tender, and flavorful steak every time! Serve with potatoes and a side salad for an unforgettable dinner in under 30 minutes.
Ingredients
Mug Cake
Instructions
Combine dry ingredients
Add 4 tablespoons self-rising flour and 3 tablespoons granulated sugar to a 14-ounce microwave-safe mug and stir to combine, ensuring no lumps remain.
Add peanut butter
Add 4 tablespoons creamy peanut butter and break it up; fold into the dry mix so it distributes throughout the batter.
Add wet ingredients and mix
Pour in 3 tablespoons whole milk, 3 tablespoons melted salted butter, and 1/2 teaspoon vanilla. Stir until the batter is smooth and thick, similar to pancake batter.
Microwave
Microwave on high for 1 minute 30 seconds to 1 minute 45 seconds depending on wattage. The surface should spring back slightly and a toothpick should come out with a few moist crumbs.
Cool and top
Let the cake cool 2–3 minutes, then dollop 1 tablespoon peanut butter on top to melt and spread if desired. Serve warm directly from the mug.
Last Step: Please leave a rating and comment letting us know how you liked this recipe! This helps our business to thrive and continue providing free, high-quality recipes for you.
Nutrition
Did You Make This?
Leave a comment & rating below or tag
@whiskia on social media!
Categories:
You might also like...

Savory Baked Meatballs
Tender, herb-laced meatballs baked to juicy perfection with Parmesan and garlic. Perfect over spaghetti, tucked into subs, or served with favorite dips.

Classic Bacon Carbonara Pasta
Creamy, silky carbonara with smoky bacon, peppery bite, and perfectly coated spaghetti. Ready in 25 minutes for a comforting, crowd-pleasing dinner.

One Pot Creamy Garlic Pasta
A rich, silky garlic pasta made in one pan with milk and Parmesan for a fast, comforting dinner that is ready in about 20 minutes.
Did You Make This?
Leave a comment & rating below or tag @whiskia on social media!
Rate This Recipe
Share This Recipe
Enjoyed this recipe? Share it with friends and family, and don't forget to leave a review!
Comments (1)
This recipe looks amazing! Can't wait to try it.
Comments are stored locally in your browser. Server comments are displayed alongside your local comments.

Hi, I'm Victoria!
What's Popular

30-Minute Meals!
Join to receive our email series which contains a round-up of some of our quick and easy family favorite recipes.