
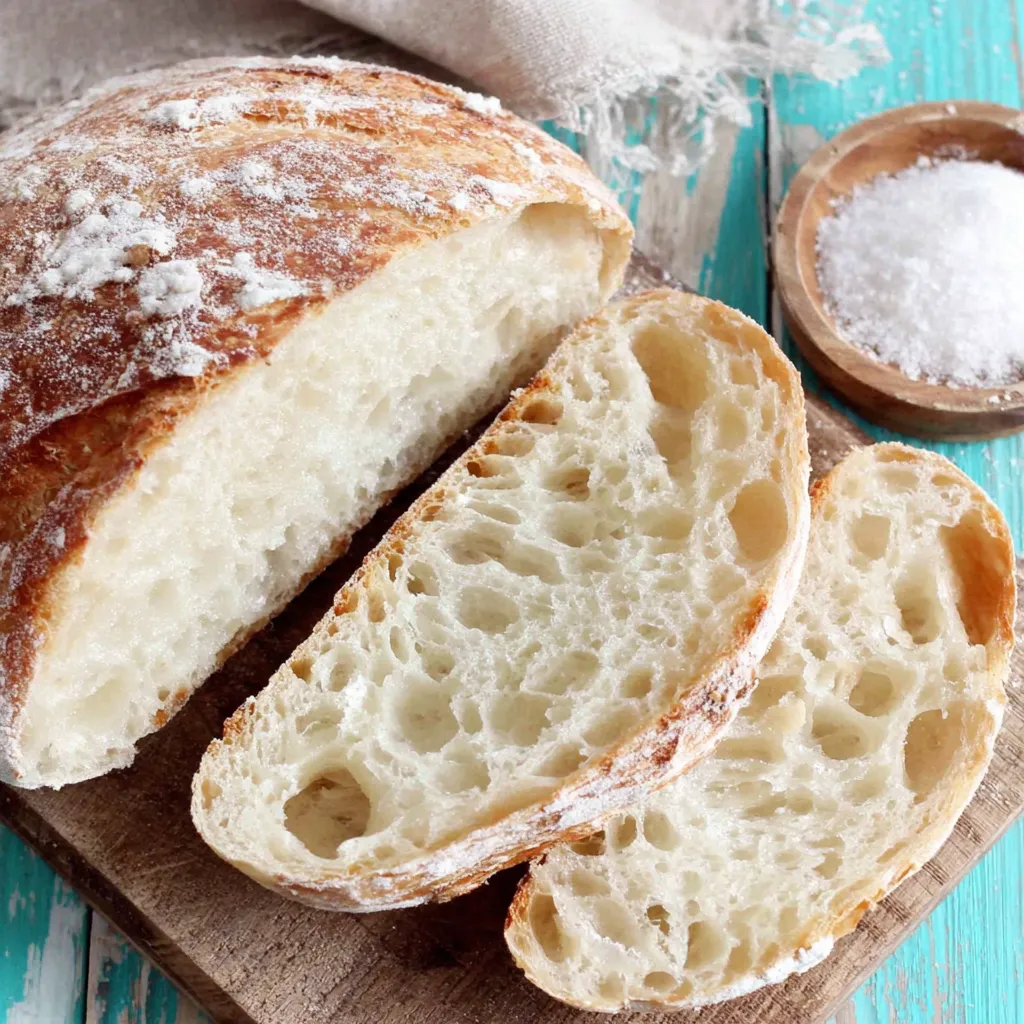
Rustic Italian Crusty Bread

A simple, hands-on loaf with a crisp crust and tender crumb that channels the best of rustic Italian baking. Perfect for sandwiches, soups, and sharing.
This rustic Italian crusty bread is the sort of everyday bake that became a ritual in my kitchen. I first learned this approach on a rainy afternoon when I wanted a loaf with real structure and flavor but without complicated techniques. The result was an honest, golden crust with an open, slightly chewy crumb that made even the simplest olive oil and salt feel celebratory. Since then I make it whenever a weekend lingers and guests drop by unexpectedly.
The loaf balances a delicate crust and a resilient interior. The crust develops a satisfying crackle while the interior remains soft enough to tear by hand. The method uses a brief rise and straightforward shaping so you can enjoy fresh-baked bread without a long professional timetable. I love how the aroma fills the house, prompting family members to gather and taste while it cools on the rack.
Why You'll Love This Recipe
- This method yields a crusty exterior and tender crumb using only basic pantry ingredients and one rise, so you can have fresh bread in under two hours.
- Techniques are adaptable; use a stand mixer for ease or knead by hand to connect with the dough and burn a little energy at the same time.
- The loaf shapes into a batard that is excellent for slicing or tearing for bread boards, making it versatile for breakfasts, soups, and sandwiches.
- It relies on simple equipment and affordable ingredients, so it is beginner friendly while delivering artisan results with practice.
- Make-ahead options are easy: shape and cold ferment for enhanced flavor or bake on the same day for a mild, fresh profile.
I learned small tricks while making the loaf with friends. Letting the yeast foam gives a quick confidence check, and a gentle stretch and fold helps develop strength without long kneading. Family members always comment on the crispness of the crust and how the crumb soaks up soup and olive oil. It has become our small celebration bread for casual gatherings.
Ingredients
- Active dry yeast: Use one standard packet containing 2 1/4 teaspoons. Look for fresh yeast from brands like Red Star or Fleischmann that produce a lively foam when proofed.
- Granulated sugar: A teaspoon helps kickstart fermentation. Any white sugar will work; organic cane is fine and imparts no detectable sweetness in the finished loaf.
- Warm water: Use 1 cup at about 110 degrees Fahrenheit. This temperature wakes yeast without stressing it. Use a thermometer or test with your wrist for gentle warmth.
- Bread flour or all-purpose flour: 2 and 1/2 cups provides structure. Bread flour gives a chewier crumb; all-purpose is perfectly acceptable for a softer interior.
- Olive oil: Two tablespoons add flavor and tenderize the crumb. Use a good everyday extra virgin such as Colavita or an Italian blend for an authentic aroma.
- Salt: One teaspoon rounds out flavor. Fine sea salt or kosher salt works; measure by weight if you prefer precision.
Instructions
Activate the yeast:In a large bowl or the bowl of a stand mixer, combine 2 and 1/4 teaspoons active dry yeast, 1 teaspoon granulated sugar, and 1 cup warm water at approximately 110 degrees Fahrenheit. Let stand 5 to 10 minutes until the surface is foamy and fragrant. This foam indicates live yeast and a healthy rise ahead.Mix the dough:Add 2 cups of the 2 and 1/2 cups flour, 2 tablespoons olive oil, and 1 teaspoon salt to the foamy yeast. Stir with a wooden spoon until a shaggy mass forms, or use a dough hook on low speed. The dough will be sticky; resist the urge to add all remaining flour at once.Knead to develop gluten:Turn dough onto a lightly floured surface and knead by hand for about 10 minutes, sprinkling just enough of the remaining 1/2 cup flour to keep it manageable. Alternatively, increase the dough hook to medium and knead in a stand mixer for about 5 minutes until the dough is smooth, soft, and elastic with a slight bounce back to the touch.First rise:Shape the dough into a ball and place in an oiled bowl, turning once to coat. Cover with plastic wrap and allow it to rise in a warm draft-free spot for about 1 hour, or until the dough has roughly doubled in volume. Look for a soft spring when you press gently.Shape and second rise:Preheat the oven to 400 degrees Fahrenheit. Line a baking sheet with parchment or a silicone mat. On a lightly floured surface, punch down the dough gently and shape into a batard about 12 inches long. Transfer to the prepared sheet, cover with a clean tea towel, and let rest 20 to 30 minutes until puffy but not overexpanded.Score and bake:Using a lame, razor blade, or serrated knife, make a few shallow slits about 1/4 inch deep across the top of the loaf to guide expansion. Bake in the preheated oven for 20 to 25 minutes until golden brown and the crust sounds hollow when tapped. Move to a cooling rack and allow to cool completely before slicing so the crumb sets.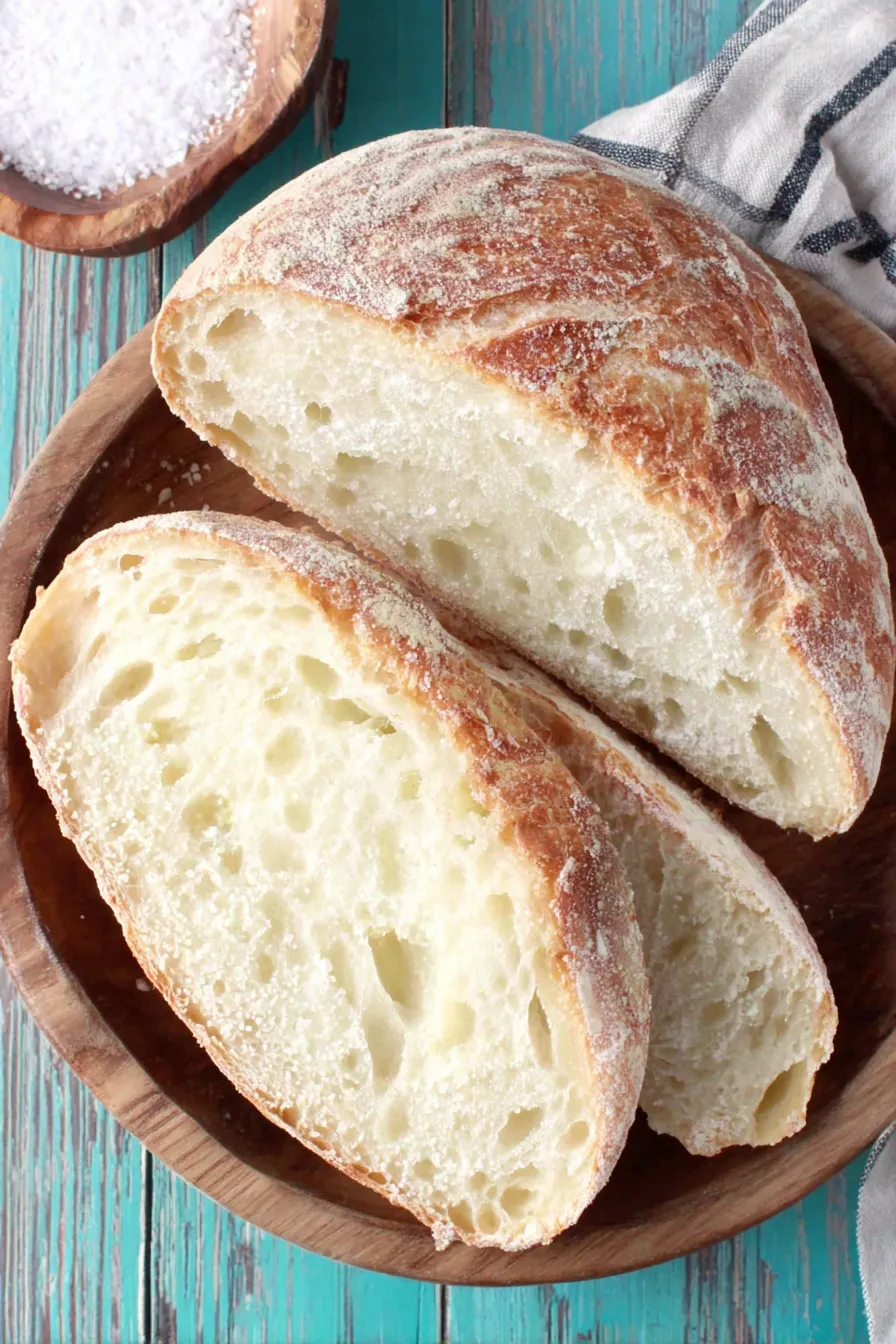
You Must Know
- Proof yeast at the correct temperature. Water that is too hot will kill yeast. Aim for about 110 degrees Fahrenheit for optimal activity.
- Do not over flour. Add small amounts of the remaining flour during kneading until the dough feels soft and slightly tacky. Over-flouring makes a dense crumb.
- Allow the loaf to cool fully before slicing. Cutting too soon will produce a gummy interior because steam continues to set the crumb as it cools.
- This loaf freezes well for up to three months. Slice before freezing and toast slices straight from the freezer for convenience.
My favorite part is the ritual of shaping and scoring. Scoring not only looks artisanal but controls how the loaf expands. Family members often judge my success by the crackle of the crust and how the slices soak up olive oil and vinegar. This bread has been present at casual dinners and small celebrations when a simple loaf felt like something special.
Storage Tips
Store the loaf at room temperature for up to two days wrapped in a clean cotton bag or a large paper bag to retain crust while preventing condensation. For longer storage, cool fully then slice and freeze in an airtight bag for up to three months. To refresh, reheat whole loaf in a 350 degree Fahrenheit oven for 10 minutes wrapped in foil or toast individual slices straight from frozen. Avoid refrigerating as it accelerates staling.
Ingredient Substitutions
If you prefer a softer crumb, use all-purpose flour instead of bread flour. For a heartier flavor, replace up to one cup of white flour with whole wheat flour, but expect a denser crumb and shorter rise. Substitute olive oil with melted unsalted butter for a richer flavor profile. For a no-sugar option, omit the teaspoon of sugar; the yeast will still activate more slowly, so allow a little extra time for proofing.

Serving Suggestions
Serve warm slices with extra virgin olive oil and flaky sea salt, or alongside a bowl of tomato soup for dipping. This loaf pairs beautifully with antipasti such as marinated olives, thinly sliced prosciutto, and roasted peppers. For breakfast, toast and top with ricotta, honey, and lemon zest. The batard shape makes even sandwiches feel artisanal.
Cultural Background
This style echoes the simple country breads of Italy where loaves were baked daily in communal ovens and served with local olive oil and cheese. Unlike enriched breads, rustic versions emphasize flour, water, salt, and time. Regional variations across Italy include different shaping and hydration levels, but the focus remains on texture and utility rather than ornate flavoring.
Seasonal Adaptations
In autumn, fold in a tablespoon of roasted garlic paste for a warming note. For summer, add chopped fresh rosemary to the dough before the second rise to pair with fresh tomatoes and basil. Around the holidays, swap half the oil for browned butter and sprinkle the top with coarse salt and a touch of cracked black pepper for a savory, festive loaf.
Meal Prep Tips
Prepare dough the night before and let it rise slowly in the refrigerator overnight for deeper flavor. In the morning, shape, allow a short bench rest for the second rise, then bake. Slice and portion into freezer bags for quick weekday breakfasts and lunches. Use a shallow container with vented lid for short term storage to preserve crust texture.
Fresh-baked bread invites sharing and small rituals. Whether you make this loaf once a month or every weekend, the simple steps produce a reliable, comforting result that elevates every meal. Enjoy the process as much as the tasting.
Pro Tips
Check water temperature with your wrist or a thermometer to keep it around 110 degrees Fahrenheit when proofing yeast.
Use a bench scraper to help shape the batard cleanly and prevent over-flouring the work surface.
Score the loaf with a sharp blade to control expansion and create an attractive crust pattern.
Allow the loaf to cool fully before slicing to ensure the crumb sets and texture is optimal.
This nourishing rustic italian crusty bread recipe is sure to be a staple in your kitchen. Enjoy every moist, high protein slice — it is perfect for breakfast or as a wholesome snack any time.
FAQs about Recipes
What if the yeast does not foam?
If the yeast does not foam, your water may be too hot or the yeast may be inactive. Try again with fresh yeast and cooler water around 110 degrees Fahrenheit.
Why is the crumb gummy when I slice it?
Cool the loaf completely on a rack before slicing. Cutting too early will make the crumb gummy as steam is still trapped inside.
Tags
Rustic Italian Crusty Bread
This Rustic Italian Crusty Bread recipe makes perfectly juicy, tender, and flavorful steak every time! Serve with potatoes and a side salad for an unforgettable dinner in under 30 minutes.
Ingredients
Dough
Instructions
Activate the yeast
In a large bowl or stand mixer bowl, combine 2 1/4 teaspoons active dry yeast, 1 teaspoon granulated sugar, and 1 cup warm water at 110 degrees Fahrenheit. Let sit 5 to 10 minutes until foamy.
Mix the dough
Add 2 cups of flour, 2 tablespoons olive oil, and 1 teaspoon salt to the foamy yeast. Stir to form a shaggy dough or mix on low with a dough hook.
Knead to develop gluten
Knead by hand on a lightly floured surface about 10 minutes, adding remaining flour as needed, or knead in a stand mixer 5 minutes on medium until smooth and elastic.
First rise
Shape into a ball, place in an oiled bowl and turn to coat. Cover and let rise about 1 hour until doubled in size.
Shape and second rise
Preheat oven to 400 degrees Fahrenheit. Punch down dough and shape into a 12 inch batard. Place on prepared baking sheet, cover, and let rise 20 to 30 minutes until puffy.
Score and bake
Make a few 1/4 inch slits in the surface with a lame or sharp knife. Bake 20 to 25 minutes until golden and hollow sounding. Cool completely on a rack before slicing.
Last Step: Please leave a rating and comment letting us know how you liked this recipe! This helps our business to thrive and continue providing free, high-quality recipes for you.
Nutrition
Did You Make This?
Leave a comment & rating below or tag
@whiskia on social media!
Categories:
You might also like...

Savory Baked Meatballs
Tender, herb-laced meatballs baked to juicy perfection with Parmesan and garlic. Perfect over spaghetti, tucked into subs, or served with favorite dips.

Classic Bacon Carbonara Pasta
Creamy, silky carbonara with smoky bacon, peppery bite, and perfectly coated spaghetti. Ready in 25 minutes for a comforting, crowd-pleasing dinner.

One Pot Creamy Garlic Pasta
A rich, silky garlic pasta made in one pan with milk and Parmesan for a fast, comforting dinner that is ready in about 20 minutes.
Did You Make This?
Leave a comment & rating below or tag @whiskia on social media!
Rate This Recipe
Share This Recipe
Enjoyed this recipe? Share it with friends and family, and don't forget to leave a review!
Comments (1)
This recipe looks amazing! Can't wait to try it.
Comments are stored locally in your browser. Server comments are displayed alongside your local comments.

Hi, I'm Victoria!
What's Popular

30-Minute Meals!
Join to receive our email series which contains a round-up of some of our quick and easy family favorite recipes.