
Strawberry Pop Tart Pie

A fun riff on the classic toaster pastry — a flaky double-crust pie filled with glossy strawberry filling, iced like a Pop-Tart and finished with rainbow sanding sugar.
This strawberry pop tart pie began as a joyful experiment on a rainy Saturday when I wanted to turn nostalgic toaster pastries into something shareable at the family table. I discovered the balance of a saucy, slightly tart strawberry filling tucked beneath a perfectly baked double crust made this more than a novelty: it became our new favorite dessert for gatherings. The filling is bright and jammy but still has visible tender strawberry pieces; the crust stays crisp thanks to a simple egg wash trick that seals and protects it. The glaze on top, a thick, creamy icing with a whisper of vanilla and a sprinkle of rainbow sanding sugar, delivers that unmistakable Pop-Tart nostalgia in every forkful.
I first made this for a birthday breakfast-for-dinner and watched everyone’s faces light up as I sliced through the crust to reveal that glossy interior. The texture is the showstopper — flaky golden pastry, a thick glossy strawberry interior that holds together when sliced, and a hardened glaze that gives the first satisfying crack. It’s approachable enough for an experienced home cook to make on a weeknight, yet special enough to bring to a potluck or holiday brunch.
Why You'll Love This Recipe
- It transforms pantry-friendly refrigerated pie crusts and fresh strawberries into a dessert that looks and tastes like a bakery staple but takes under an hour of active stove and oven time.
- The filling cooks on the stovetop so you control consistency — glossy and sliceable, never runny; cornstarch acts as a reliable thickener to mimic jammy texture.
- Egg wash on the bottom crust prevents sogginess and helps the top and bottom seal tightly, so you get a crisp crust after baking.
- Make-ahead friendly: you can prepare the filling a day ahead and glaze the pie right before serving for a fresh look.
- The glaze dries to a thin, crisp shell reminiscent of a toaster pastry, and sanding sugar adds playful color and crunch without overwhelming the fruit.
- Uses accessible ingredients — fresh strawberries in season, a box of refrigerated crusts, and basic pantry staples — making it excellent for last-minute celebrations.
I honestly love how reliably the filling sets when using the lemon-cornstarch slurry; the bright lemon highlights the strawberries without making the pie too tart. My family asks for this on long weekends, and I keep the sanding sugar on hand — it’s the little detail that makes it feel festive.
Ingredients
- Fresh strawberries (5 cups, hulled and diced): Look for firm, fragrant berries — early summer berries from local farmers’ markets give the best flavor. Ripe but still slightly firm berries hold their shape through cooking. Approximately 1 1/2 pounds.
- Granulated sugar (1 cup): Standard white sugar balances the fruit’s natural acidity; if your berries are exceptionally sweet, you can reduce to 3/4 cup.
- Cornstarch (4 tablespoons): Creates a glossy, stable filling. Dissolve in lemon juice first to avoid lumps and ensure even thickening.
- Lemon juice (4 tablespoons, fresh): Brightens the filling and activates the cornstarch slurry. Always use fresh lemon for the cleanest flavor.
- Vanilla extract (1 teaspoon): Adds depth and rounds the fruit flavor; use pure vanilla whenever possible for a subtle perfume.
- Refrigerated pie crusts (14.1 ounces): Two 9-inch crusts per box (Pillsbury recommended). Thaw according to package instructions so they remain pliable but cold.
- Large egg (1, room temperature): For egg wash to protect the bottom crust and glaze the top for color and shine.
- Powdered sugar (1 1/2 cups, sifted): For a smooth, lump-free glaze.
- Whole milk (2 to 2 1/2 tablespoons): Start with 2 tablespoons and add teaspoons until the glaze reaches a spreadable consistency.
- Rainbow sanding sugar (1/2 teaspoon): For the classic Pop-Tart look and crunchy sparkle.
Instructions
Cook the strawberries: In a 4-quart saucepan over medium heat, combine the diced strawberries and granulated sugar. Cook 10 to 12 minutes, stirring frequently, until juices are released and the mixture reaches a vigorous simmer. Watch carefully to prevent boiling over and stir often so sugars don’t burn along the pan edges. Make the cornstarch slurry: Whisk 4 tablespoons cornstarch into 4 tablespoons fresh lemon juice in a small bowl until smooth. This ensures the cornstarch is fully hydrated before it meets heat and prevents lumps from forming in the filling. Thicken the filling: Slowly stream the slurry into the boiling strawberries while whisking constantly. Continue to cook 1 to 2 minutes until the filling is glossy and thickened; you should see the sauce cling to a spoon. Remove from heat and stir in 1 teaspoon vanilla. Cool the filling: Transfer the filling to a shallow bowl and let it cool about 30 minutes until warm to the touch. It must be cool enough so it won’t melt the bottom crust yet warm enough to remain pliable when poured. Preheat and prepare baking pan: Adjust oven racks to the lower two-thirds and preheat to 375°F. Place a 9-inch pie dish on a rimmed baking sheet to catch any bubbling over; the sheet also eases handling. Line the pie dish: Unroll one thawed pie crust into the 9-inch dish, pressing into the bottom and up the sides. Whisk the egg and lightly brush the bottom and sides of the crust — this thin egg wash acts as a moisture barrier to keep the bottom crust crisp. Fill and top: Pour the slightly warm filling into the prepared crust. Place the second crust over the top, trim excess, and crimp edges with a fork to seal. Brush the entire top crust with the remaining egg wash. Vent and bake: Cut four 1-inch slits into the top crust to allow steam to escape. Bake on the rimmed sheet in the lower two-thirds of the oven 40 to 45 minutes until the crust is deeply golden. Remove from oven and allow the pie to cool completely at room temperature for a minimum of 5 to 6 hours before glazing; full cooling is key for clean slices. Glaze and finish: Once cool, whisk 1 1/2 cups sifted powdered sugar with 2 tablespoons whole milk and 1/2 teaspoon vanilla until smooth. Add milk 1 teaspoon at a time if needed until glaze is thick but spreadable. Spoon and spread the glaze over the center of the pie leaving the outer crimp untouched, then sprinkle with rainbow sanding sugar. Let glaze set at least 30 minutes before slicing.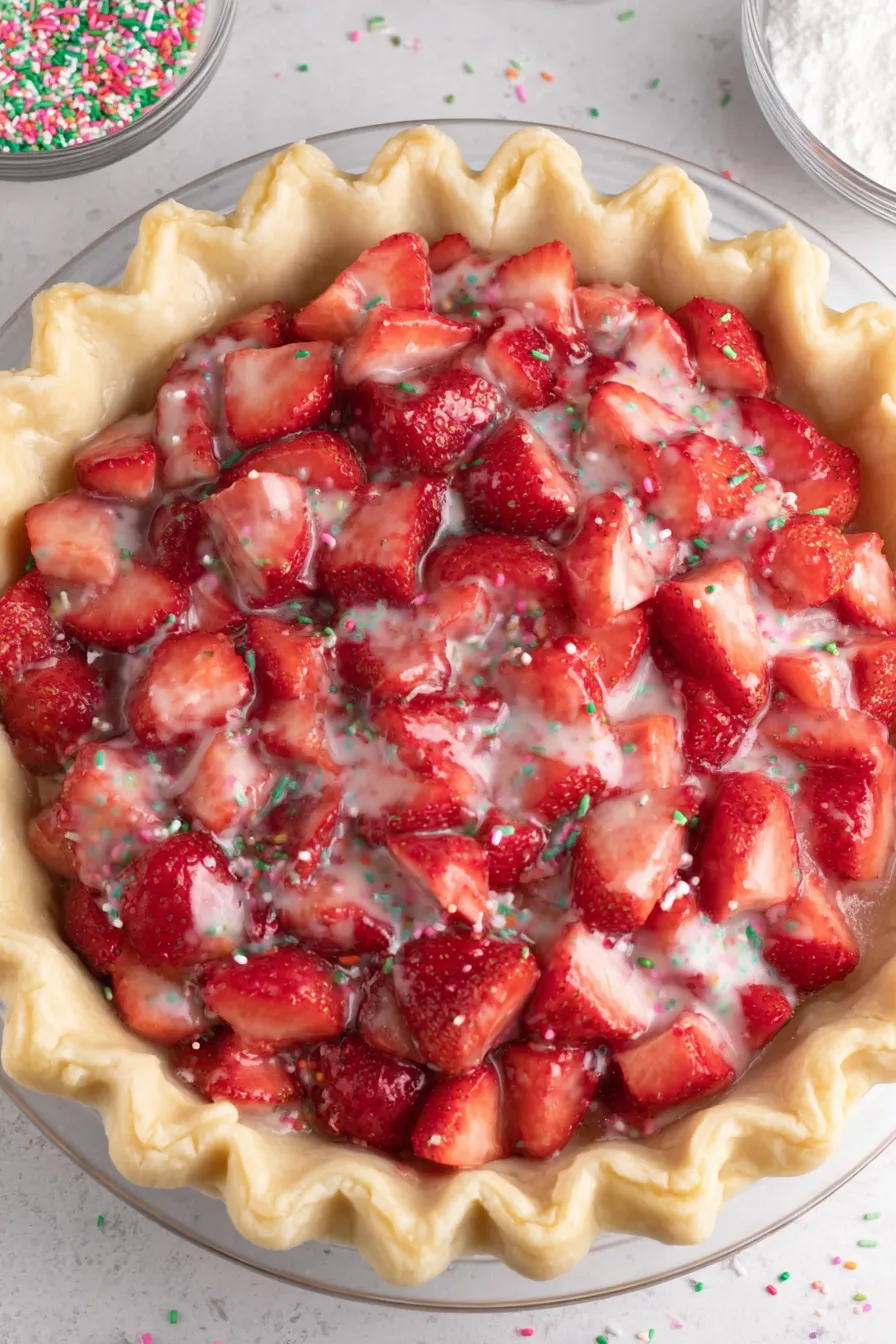
You Must Know
- The filling will steam as it bakes; cutting vents and using a rimmed sheet prevents sticky overflow and makes cleanup easy.
- Cooling completely before glazing is essential — a warm pie will cause the glaze to melt and run off instead of setting with a crisp finish.
- This is best served at room temperature after glazing; refrigeration will keep it fresh but can slightly soften the glaze.
- Freezes well: wrap tightly and freeze up to 3 months; thaw in refrigerator overnight and bring to room temperature before serving.
My favorite part of this dish is the contrast it creates: a crisp, bakery-style crust with a bright, scooped strawberry interior and a playful crunchy glaze. Every time I bring it to brunch, neighbors ask for the recipe, and I always tell them the secret is patience — let the filling set and the glaze harden.
Storage Tips
Store leftovers loosely covered at room temperature for up to one day to preserve the crispness of the glaze. For longer storage, cover tightly and refrigerate up to 3 days; note the glaze may soften in the fridge. To freeze, wrap whole pie or individual slices in plastic wrap followed by foil and freeze up to 3 months. Thaw overnight in the refrigerator and bring to room temperature before serving; refresh the glaze with a thin drizzle of powdered sugar mixed with a few drops of milk if needed.
Ingredient Substitutions
If strawberries are out of season, swap in raspberries or a mixed berry blend but reduce cooking time slightly as raspberries break down faster. For a gluten-free option, use a store-bought gluten-free pie crust and verify the brand’s stability in the oven — some may need a blind-bake cushion before filling. Swap whole milk in the glaze for half-and-half for a richer finish or use a non-dairy milk like almond milk for a dairy-free glaze, though texture will be slightly thinner.
Serving Suggestions
Serve slices with a dollop of whipped cream or a scoop of vanilla bean ice cream for contrast. For brunch, a wedge alongside a creamy yogurt and granola bowl makes an indulgent finish. Garnish with a few fresh sliced strawberries or a light dusting of powdered sugar. For a playful presentation, cut smaller squares to mimic toaster pastry sizes and plate as a handheld dessert at parties.
Cultural Background
This creation is an American-inspired hybrid that draws on the nostalgic flavor profile of Pop-Tarts — sweet glazed pastries introduced in the 1960s — and combines it with classic double-crust pie techniques. While Pop-Tarts are mass-produced toaster pastries, this version brings the same flavors into a communal pie format rooted in traditional home baking and local fruit seasons.
Seasonal Adaptations
In summer, use the sweetest garden strawberries and skip added sugar if they’re exceptionally ripe. In cooler months, incorporate frozen berries (thawed and drained) with an extra tablespoon of cornstarch to manage the extra moisture. For holiday variations, fold a teaspoon of ground cardamom or a pinch of cinnamon into the filling for warm spice notes, or top with crushed candied nuts for crunch.
Meal Prep Tips
Prepare the filling up to two days ahead and store in the refrigerator; bring to room temperature before assembling. You can also assemble the unbaked pie, wrap it tightly, and freeze — bake from frozen adding 10 to 15 minutes to the baking time. Keep the glaze separate until ready to serve for the freshest appearance and crispest finish.
There’s real joy in taking a childhood flavor and elevating it with home baking techniques — it makes every bite feel celebratory. Try this for a weekend gathering and watch it become one of those recipes people request time and again.
Pro Tips
Brush the bottom crust with a thin layer of egg wash to create a moisture barrier and prevent a soggy bottom.
Whisk the cornstarch into lemon juice first to form a smooth slurry and eliminate lumps in the filling.
Cool the filling in a shallow bowl to speed up cooling and keep the center of the pie from becoming soggy.
Use a rimmed baking sheet under the pie to catch any bubbling over and make oven handling safer.
This nourishing strawberry pop tart pie recipe is sure to be a staple in your kitchen. Enjoy every moist, high protein slice — it is perfect for breakfast or as a wholesome snack any time.
FAQs about Recipes
Can I glaze the pie while it is still warm?
Let the pie cool completely at room temperature for at least 5 to 6 hours before glazing; glazing too soon will cause the icing to run.
Can I freeze the pie?
Yes. Wrap tightly and freeze whole or in slices up to 3 months. Thaw overnight in the refrigerator and bring to room temperature before serving.
Tags
Strawberry Pop Tart Pie
This Strawberry Pop Tart Pie recipe makes perfectly juicy, tender, and flavorful steak every time! Serve with potatoes and a side salad for an unforgettable dinner in under 30 minutes.
Ingredients
Pie
Glaze
Instructions
Cook strawberries and release juices
In a 4-quart saucepan over medium heat, combine diced strawberries and granulated sugar. Cook, stirring frequently, 10 to 12 minutes until juices are released and the mixture reaches a rapid simmer. Monitor closely to prevent boiling over or burning.
Prepare cornstarch slurry
Whisk cornstarch into fresh lemon juice in a small bowl until completely smooth. This slurry prevents lumps and ensures even thickening when added to the hot fruit.
Thicken filling
Slowly add the slurry to the boiling strawberries while whisking constantly. Continue to cook 1 to 2 minutes until the mixture is thick and glossy, then remove from heat and stir in vanilla.
Cool filling
Transfer filling to a shallow bowl and cool about 30 minutes until warm to the touch. Filling should not be hot when added to the crust to avoid melting the bottom pastry.
Preheat oven and prepare pan
Preheat oven to 375°F and position racks in the lower two-thirds. Place a 9-inch pie dish on a rimmed baking sheet to catch any overflow and make handling easier.
Assemble crust and egg wash
Line pie dish with one thawed crust. Whisk the egg and brush a thin layer over the bottom and sides to keep the crust from becoming soggy. Reserve extra egg wash for the top crust.
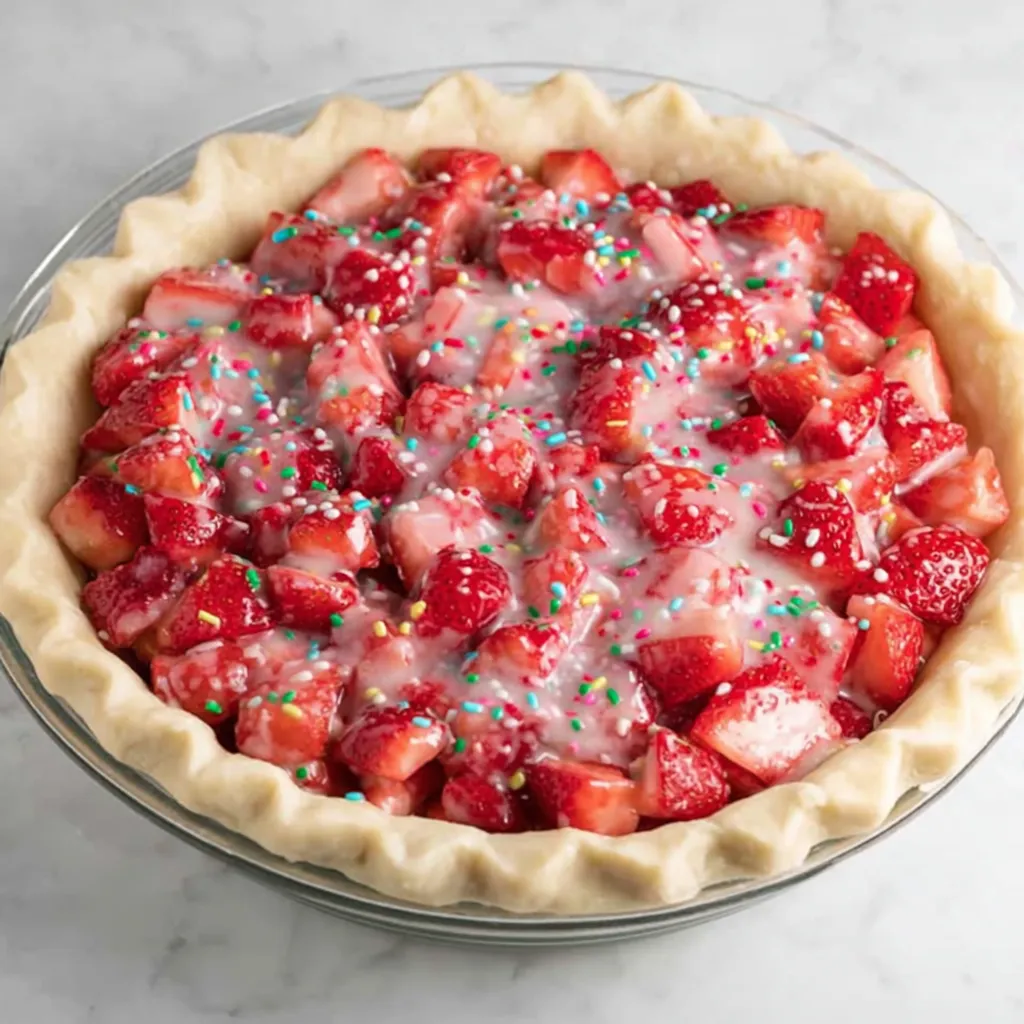
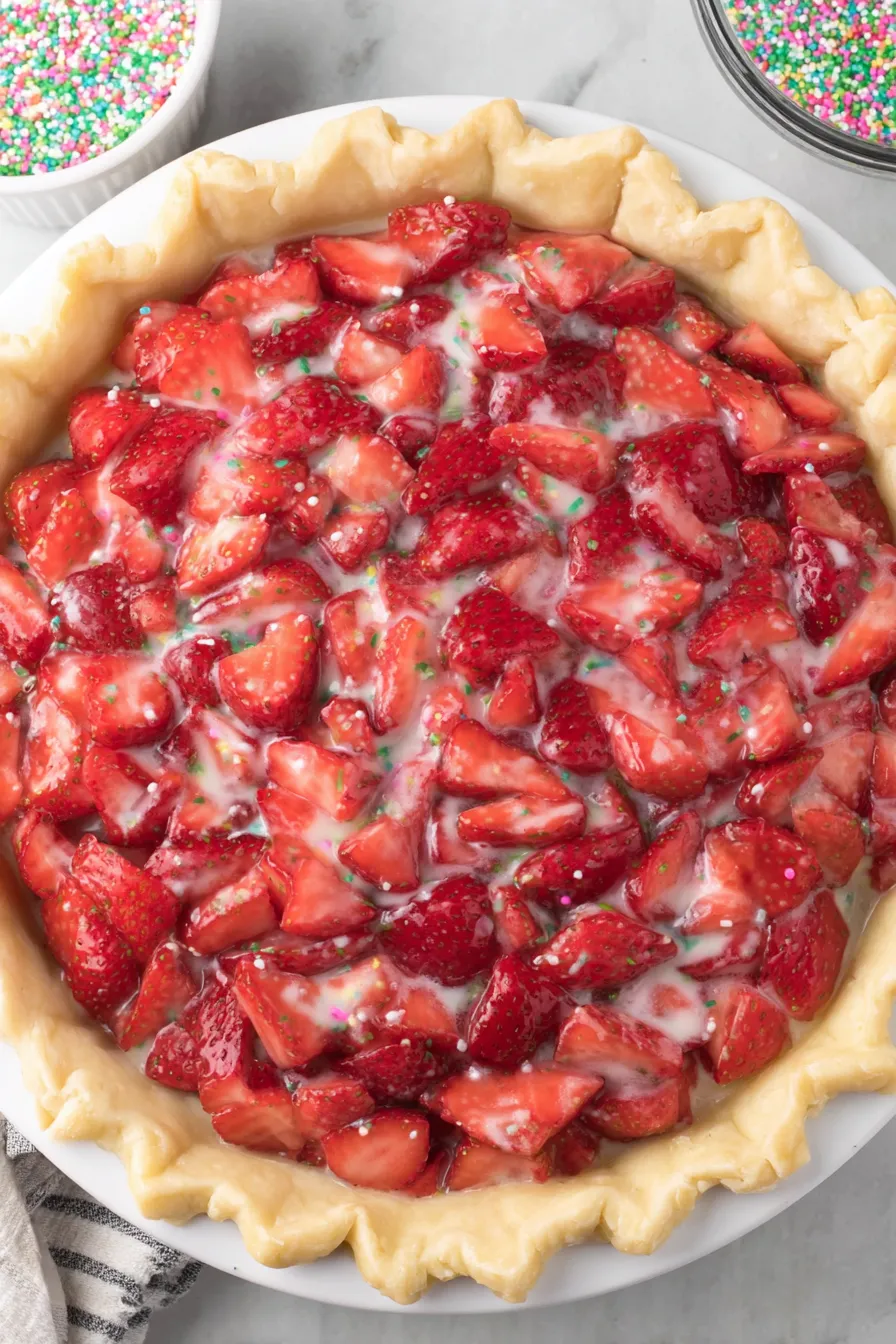
Fill and seal
Pour the slightly warm filling into the prepared crust. Top with the second crust, trim excess, and crimp edges with a fork to seal. Brush the top crust with egg wash.
Vent and bake
Cut four 1-inch slits in the top crust to vent steam. Bake on the rimmed sheet 40 to 45 minutes until golden brown. Remove and cool completely at room temperature for at least 5 to 6 hours.
Glaze and decorate
Whisk powdered sugar with 2 tablespoons whole milk and vanilla until thick and spreadable. Spread over the cooled pie, avoiding the crimped edge, and sprinkle with sanding sugar. Allow glaze to set at least 30 minutes before slicing.
Last Step: Please leave a rating and comment letting us know how you liked this recipe! This helps our business to thrive and continue providing free, high-quality recipes for you.
Nutrition
Did You Make This?
Leave a comment & rating below or tag
@whiskia on social media!
Categories:
You might also like...

Savory Baked Meatballs
Tender, herb-laced meatballs baked to juicy perfection with Parmesan and garlic. Perfect over spaghetti, tucked into subs, or served with favorite dips.

Classic Bacon Carbonara Pasta
Creamy, silky carbonara with smoky bacon, peppery bite, and perfectly coated spaghetti. Ready in 25 minutes for a comforting, crowd-pleasing dinner.

One Pot Creamy Garlic Pasta
A rich, silky garlic pasta made in one pan with milk and Parmesan for a fast, comforting dinner that is ready in about 20 minutes.
Did You Make This?
Leave a comment & rating below or tag @whiskia on social media!
Rate This Recipe
Share This Recipe
Enjoyed this recipe? Share it with friends and family, and don't forget to leave a review!
Comments (1)
This recipe looks amazing! Can't wait to try it.
Comments are stored locally in your browser. Server comments are displayed alongside your local comments.

Hi, I'm Victoria!
What's Popular

30-Minute Meals!
Join to receive our email series which contains a round-up of some of our quick and easy family favorite recipes.