
>>

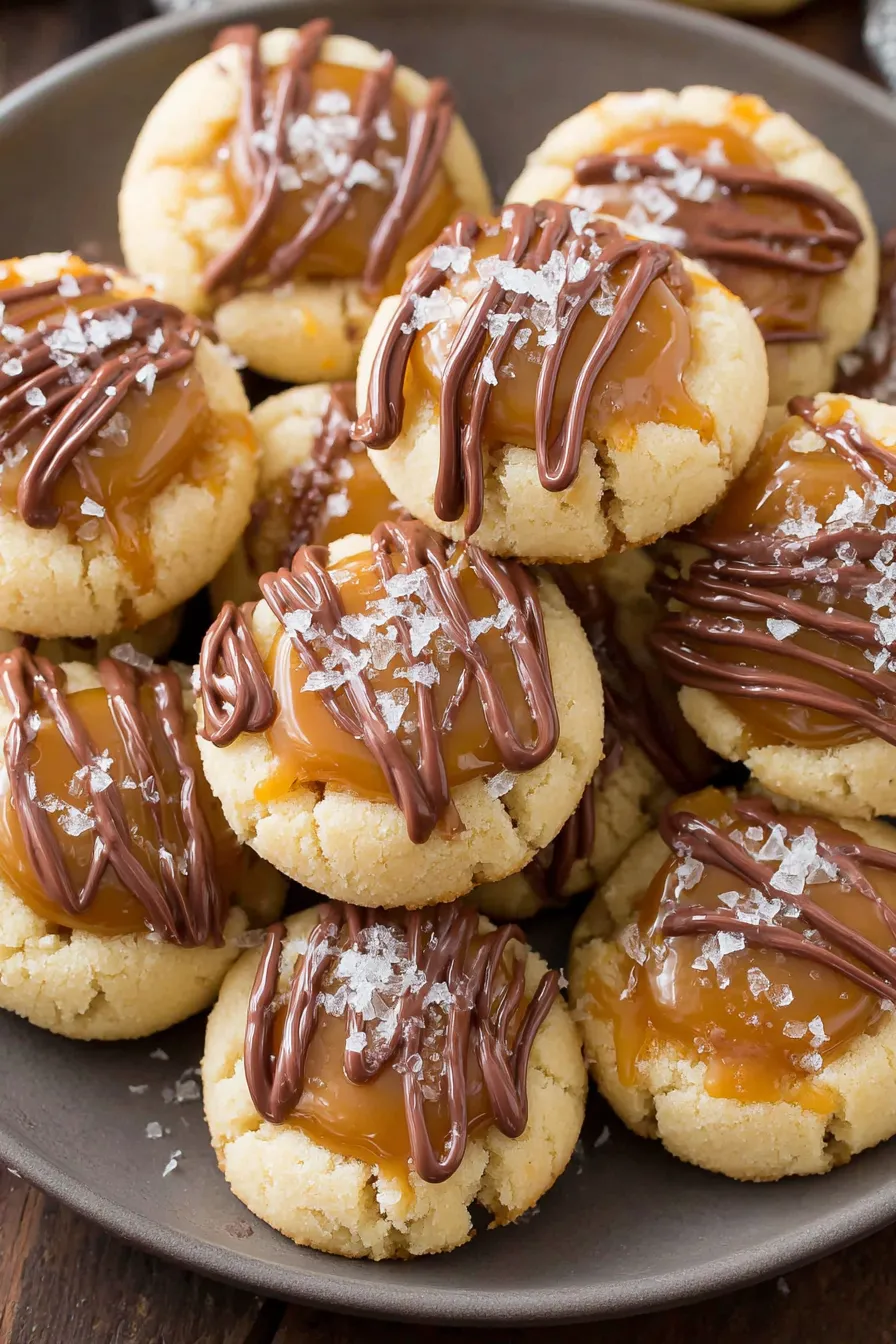
Buttery thumbprint cookies filled with soft caramel and drizzled with milk chocolate — a homemade Twix-inspired treat perfect for gifting or sharing.
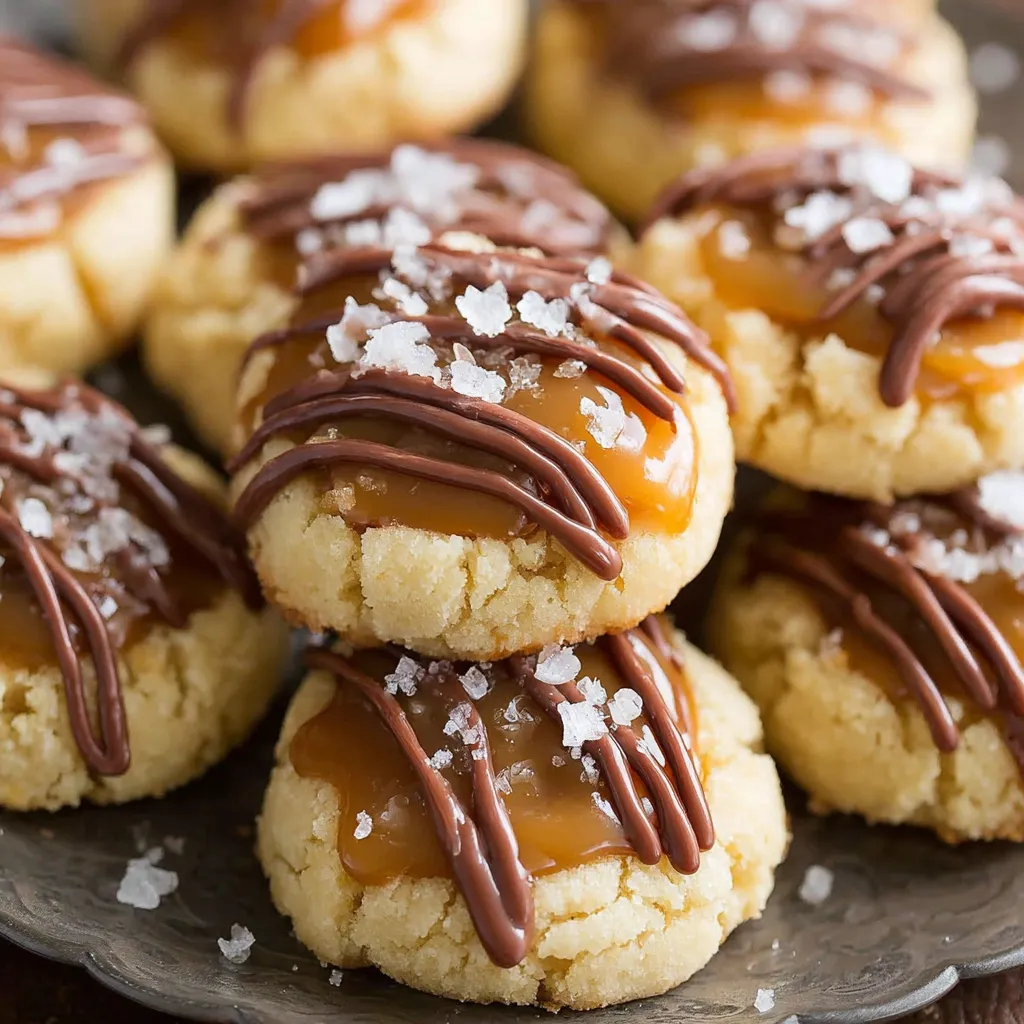
This Twix-inspired thumbprint cookie has been a holiday favorite in my kitchen ever since I first made a batch for a cookie swap five years ago. The concept is simple but remarkably satisfying: a tender, buttery cookie shell, a glossy caramel center that yields a little when you bite, and a silky milk chocolate drizzle finishing the contrast between sweet and slightly salty. I discovered this version while trying to recreate the satisfying texture of a Twix bar but in a small, elegant bite-sized form that disappears fast at parties.
I remember pulling the tray from the oven and pressing each cookie with my thumb, the warm dough accepting the impression and promising a caramel-filled well. My kids declared them the best cookies I'd ever made, and neighbors clamored for the recipe. What makes these special is the balance: the cookie is crisp at the edges, tender inside, and not overly sweet, which allows the buttery caramel and milk chocolate to sing. The few simple steps — chilling the dough, melting caramels with cream, and a gentle chocolate drizzle — result in a cookie that looks like it took a pastry chef's touch but is very much achievable at home.
On my first try I underestimated how quickly these would disappear; one neighbor returned the empty container simply to say thank you. Over the years I’ve learned small adjustments — like chilling longer for cleaner thumbprints and using a rounded teaspoon to deepen the well after baking — that made the difference between good and exceptional.
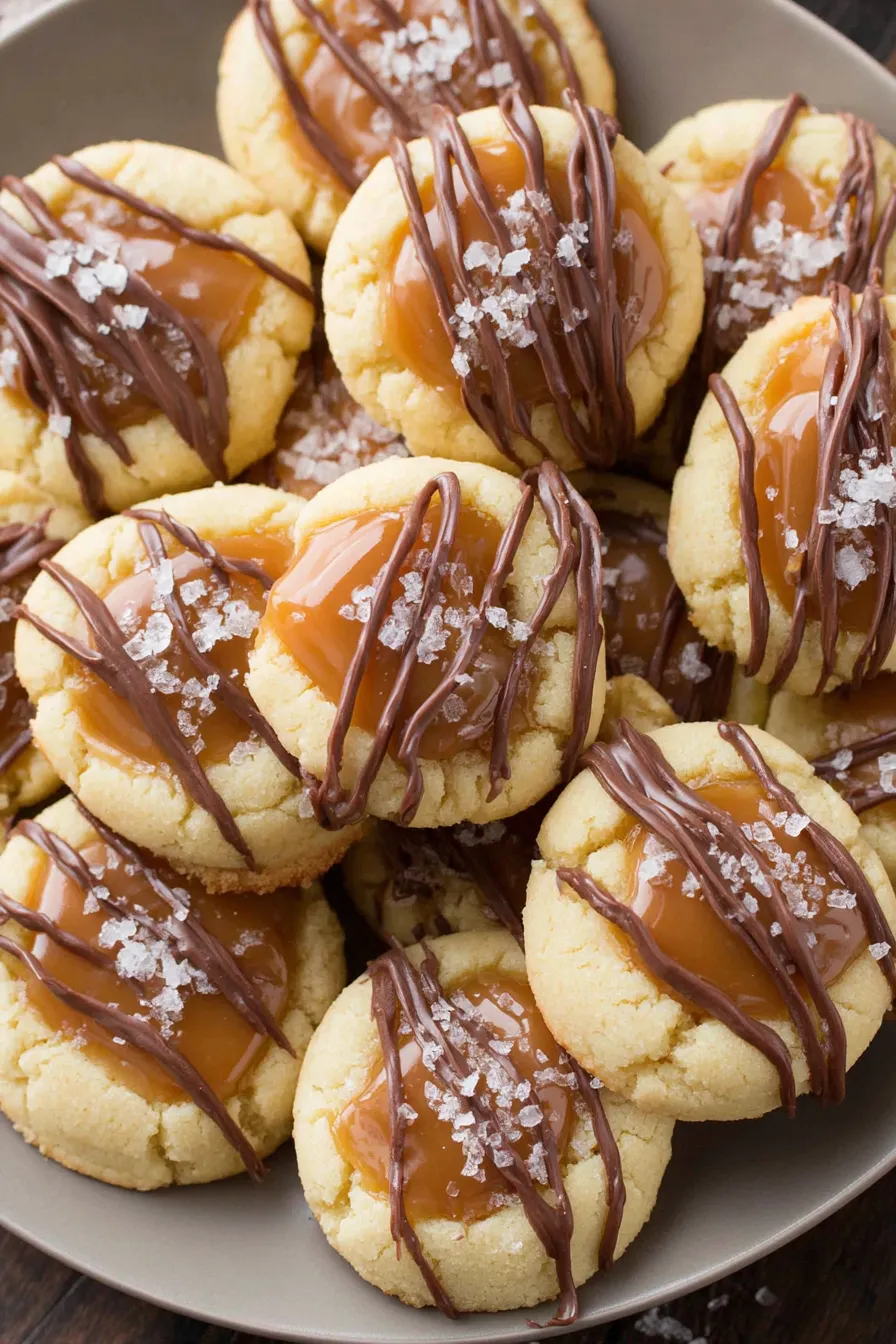
My favorite thing is the ritual of pressing the thumbprint and filling it: it feels homemade in the most literal way. At bake sales and holiday exchanges these always attract attention because they look polished but are so simple to make. The sea salt on top adds that final lift that keeps people coming back for one more.
Store finished cookies in a single layer in an airtight container at room temperature for up to 3 to 4 days. If stacking is necessary, separate layers with parchment to prevent sticking. For longer storage, freeze fully baked and cooled cookies without the caramel and chocolate, arranging them in a single layer on a sheet and then transferring to a freezer container; they keep up to 3 months. Thaw at room temperature, then pipe or spoon warm caramel and add chocolate. To refresh slightly stale cookies, warm briefly in a 300°F oven for 3 to 4 minutes to restore a touch of crispness.
If you need to adapt, you can swap milk chocolate for dark chocolate (60 to 70% cacao) for deeper flavor; use a 1:1 exchange. To make the caramel softer, add an extra teaspoon of heavy cream when melting. For a slightly lighter cookie, replace 2 tablespoons of butter with an equal weight of neutral oil, though the texture will be less tender. If you only have granulated caramels, they will work but may need a few extra seconds in the microwave to fully melt; stirring is key to avoid graininess.
Serve these on a dessert platter with powdered sugar-dusted shortbread and chocolate-dipped pretzels for contrast. They pair wonderfully with a strong coffee or a milky hot chocolate. For party presentation, arrange in paper baking cups and garnish with a tiny curl of chocolate or a single toasted pecan half on top of the caramel before the chocolate sets.
Thumbprint-style cookies are a classic across many baking traditions, often filled with jam, dulce de leche, or ganache. This variation pays homage to the Twix candy bar (a shortbread base, caramel layer, and chocolate top) but transforms it into a European-style butter cookie. It’s an example of how beloved candy bar flavors can be reinterpreted into small-batch, artisanal cookies that carry the same nostalgic notes.
For winter holidays, add a pinch of ground ginger or cinnamon to the cookie dough and swap milk chocolate for dark chocolate spiced with orange zest. In summer, replace the caramel with a salted dulce de leche and finish with chopped toasted almonds for a lighter variation. For Valentine’s Day, drizzle white chocolate and top with pink sanding sugar for a festive look.
Shape the dough into balls and freeze them on a tray until firm, then transfer to a resealable bag. When ready to bake, place frozen dough on a lined sheet, allow 10 to 15 minutes at room temperature to take the chill off, then make the thumbprints and bake — you may need an extra 1 to 2 minutes of baking time. Bake in batches and finish with caramel and chocolate just before serving for the freshest texture.
These Twix-inspired thumbprint cookies combine nostalgic candy-bar flavors with the charm of homemade baking. Whether you’re gifting a stack or sending them to school events, they reliably impress while staying easy enough for everyday baking. Make the recipe your own by experimenting with chocolate types and salt finishes — and most importantly, enjoy the smiles they bring.
Chill shaped dough thoroughly before baking to prevent spreading and ensure tidy thumbprints.
Use a rounded teaspoon to deepen the well immediately after baking if the indentation puffs up during oven time.
Melt caramels slowly at 50% microwave power in 30-second intervals and stir between bursts to avoid scorching.
If caramel thickens while filling, reheat briefly and stir until spoonable rather than microwaving at full power.
For neat chocolate drizzle use a small resealable bag with a very small cut; practice on parchment if needed.
This nourishing twix thumbprint cookies recipe is sure to be a staple in your kitchen. Enjoy every moist, high protein slice — it is perfect for breakfast or as a wholesome snack any time.
Yes. Shaped dough balls can be frozen in a single layer, then stored in a resealable bag for up to 3 months. Thaw slightly, press the thumbprint, and bake as directed—add 1 to 2 minutes to the baking time if still very cold.
Store in a single layer in an airtight container at room temperature for 3 to 4 days. For longer keeping, freeze baked cookies without caramel and chocolate up to 3 months.
This Twix Thumbprint Cookies recipe makes perfectly juicy, tender, and flavorful steak every time! Serve with potatoes and a side salad for an unforgettable dinner in under 30 minutes.
Whisk flour and salt. Cream butter and sugar until combined, add yolks and vanilla, then add flour mixture on low just until combined. Avoid overmixing.
Scoop 1 tablespoon portions and roll into balls. Make an initial thumb indentation on each ball, place on a plate, and chill 45 to 60 minutes so cookies hold their shape.
Preheat oven to 350°F. Bake chilled cookies 14 to 15 minutes until set. Immediately press a rounded teaspoon into the centers to deepen wells if needed, then cool on the sheet 5 minutes and transfer to a rack.
Combine caramels and heavy cream in a microwave-safe bowl. Heat at 50% power in 30-second intervals, stirring until smooth. Spoon about 1 heaping teaspoon into each cooled well.
Melt milk chocolate at 50% power in 30-second bursts, stirring until smooth. Pipe a thin drizzle over cookies, sprinkle with flaky salt if desired, and allow to set.
Store in a single layer in an airtight container at room temperature for up to 3 to 4 days. Freeze baked cookies without toppings for longer storage.
Last Step: Please leave a rating and comment letting us know how you liked this recipe! This helps our business to thrive and continue providing free, high-quality recipes for you.
Leave a comment & rating below or tag
@whiskia on social media!

Tender, herb-laced meatballs baked to juicy perfection with Parmesan and garlic. Perfect over spaghetti, tucked into subs, or served with favorite dips.

Creamy, silky carbonara with smoky bacon, peppery bite, and perfectly coated spaghetti. Ready in 25 minutes for a comforting, crowd-pleasing dinner.

A rich, silky garlic pasta made in one pan with milk and Parmesan for a fast, comforting dinner that is ready in about 20 minutes.
Leave a comment & rating below or tag @whiskia on social media!
Enjoyed this recipe? Share it with friends and family, and don't forget to leave a review!
This recipe looks amazing! Can't wait to try it.
Comments are stored locally in your browser. Server comments are displayed alongside your local comments.

Join to receive our email series which contains a round-up of some of our quick and easy family favorite recipes.
